
Sartorius muscle pain: Cause, symptoms, Treatment, Exercise
When you feel pain in the front of the hip joint while they flex & rotate the joint & during walking, it is indicated to be sartorius muscle pain. This pain is produced by many reasons like Sartorius muscle strain & Tear of the sartorius muscle. this pain is relieved by physiotherapy treatment.
Table of Contents
What is sartorius muscle pain?
- This muscle is also known as the tailor’s muscle because this muscle helps to flex joints & rotate the hip joint & flex the knee joint.
- If the patient sits with one leg crossed over the other leg, then the sartorius muscle is working.
- This pain occurs due to many reasons like strain in the muscle & tear of the muscle.
- The patient is also feeling weakness in the leg.
- This pain is reduced by the RICE principle at home & physiotherapy treatment.
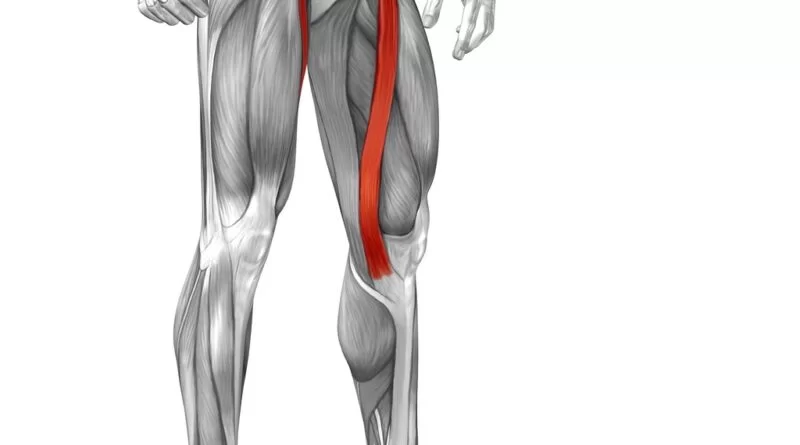
Anatomy of the sartorius muscle:
- This muscle is the longest in the human body.
- The sartorius muscle is a long muscle that is located in the front of the thigh.
- This muscle arises from the Anterior superior iliac spine (ASIS).
- The courses of this muscle are from the hip joint & cross the front of the thigh.
- Then this muscle is inserted near the inner part of the knee joint.
- The function of the sartorius muscle is to flex & rotate the hip joint & bend the knee.
- This sartorius muscle is innervated by the femoral nerve.
What is the cause of the sartorius muscle pain?
- Overuse of the Sartorius’s muscle
- Strain in the Sartorius’s muscle
- Occur to Tear in the sartorius muscle
- Tendinitis of Pes anserine
- Paresis & paralysis of the Sartorius’s muscle due to a pinched nerve injury in the lumbar spine.
- An injury of the sartorius muscle usually occurs with a conjunction injury to another thigh muscle such as the psoas & the quadriceps muscle because all the muscles work together & perform to movement.
What are symptoms of the sartorius pain?
- Symptoms of this muscle pain depend on the cause of the pain.
- Sartorius tendonitis:
- Sartorius muscle Tendonitis give to typically results in pain & limited mobility of the muscle.
- The patient is feeling pain in the front of the hip joint while flexing & rotating the joint during walking.
- Physiotherapy helps to decrease the inflammation of the muscle & improve mobility.
- Sartorius tear:
- When A tear occurs in the sartorius muscle pain & swelling are produced in the muscle.
- It involves a significant period of immobility & rest to allow for the muscle to heal. Once the healing has taken place, the physiotherapist works to improve scar tissue mobility, improve the flexibility of the sartorius muscle.
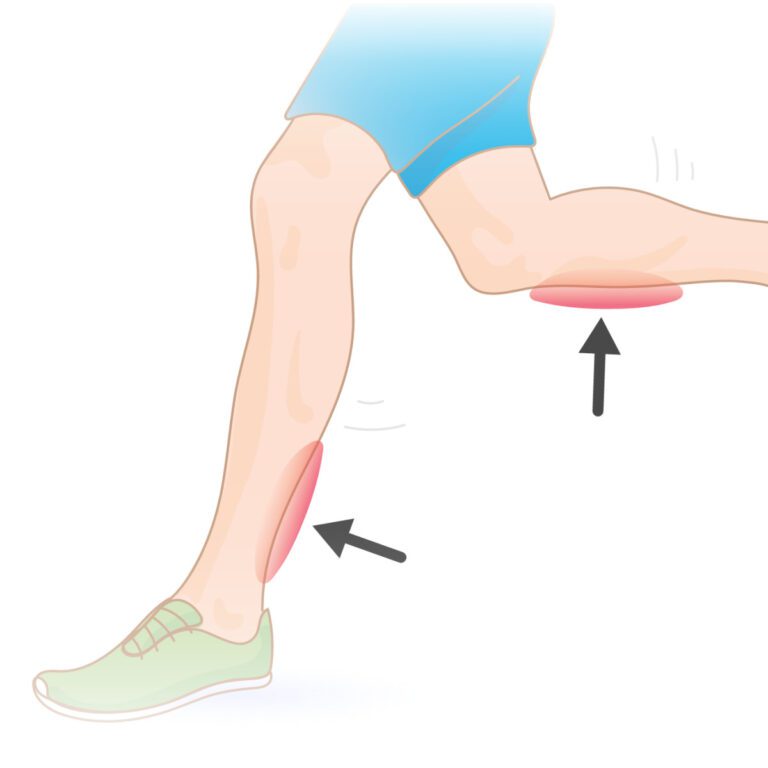
- Pes anserine tendonitis:
- In this condition, the patient feels pain in the medial & front aspect of the upper shin bone just below the knee joint.
- Physiotherapy helps decrease pain & inflammation & improve sartorius flexibility or strength.
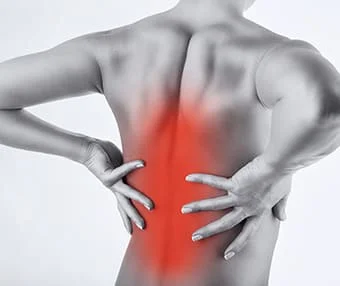
- Weakness due to nerve injury:
- Nerve compression in the lower back is due to herniated disc/spinal foraminal stenosis which is produced by pain & weakness in the front of the thigh by affecting the sartorius muscle.
- Treatment, including exercises to relieve the nerve compression & correct the posture.
Some movements are produced problems in this Sartorius’s muscles:
- A twisting fall.
- A sudden twisting of a planted foot.
- Hold the legs up while sitting & sleeping position
- Maintaining a contorted position.
- Some common sporting activities like swimming, skating, soccer, and hockey, are commonly used to force adduction of the hip joint. this is a setup for the trigger points in this muscle.
How to diagnose Sartorius muscle pain?
- When the patient suspects any of these problems, please visit the healthcare provider & get an accurate diagnosis so that start the proper treatment of the reason for pain.
- The healthcare provider follows the assessment for diagnosis of pain.
- First doctor & physiotherapist take to history & try to cause of the pain.
- In the observation, the part observes the swelling in the area of pain.
- Then do the palpation of the swellings & spasms.
- In the examination, the part checks the ROM of the hip joint & strength of the muscle.
What is the treatment of Sartorius pain?
RICE principle :
- The first stage of treatment after the muscle pain is the RICE principle.
- R – rest = When the patient feels muscle pain do the rest for some days.
- I – ice = Applied to ice on the area of pain for 20 minutes, you can also use to ice pack & frozen peas for pain relief & reduce the swellings.
- C – compression = Applied to compression bandage on the area of pain to release the pain & swellings.
- E – elevation = Elevated to the leg with the help of a pillow to reduce the swellings.
Foam Rolling:
- The patient is Supporting the weight on the elbows & knee joints.
- Place the foam roller under the belly & in between the thighs with the edge of the roller in contact with the inner hip.
- Using the elbow joint & straight leg, move the body slowly so that the foam roller is moved along the inner thigh.
- This is very tender but with each pass of the foam roller.
- So that Pressure is increased in the muscle.
- It is released to muscle spasms & swelling in the muscle which is applied like a massage.
- Repeat this foam rolling 3 times per day.
Trigger Point:
- A trigger point is always referred to as pain & sensation in another location when they press the point.
- First Find the place where the maximum tenderness point becomes to trigger point of the muscle.
- on the trigger point apply pressure on the point & maintain this pressure for no less than 1 minute & no longer than two minutes till you feel the tissue soften.
- Then Release this pressure gradually without moving the finger.
- Rest & repeat this multiple times per day.
What is Physiotherapy treatment for Sartorius muscle pain?
- The physiotherapy treatment includes stretching, strengthening exercises & yoga which are used to reduce the pain of muscles.
Stretching Exercise for the Sartorius pain:
- This stretching exercise helps to reduce the tightness & spasms of the muscle.
- Kneeling Stretch
- Standing Stretch
Kneeling Stretch:
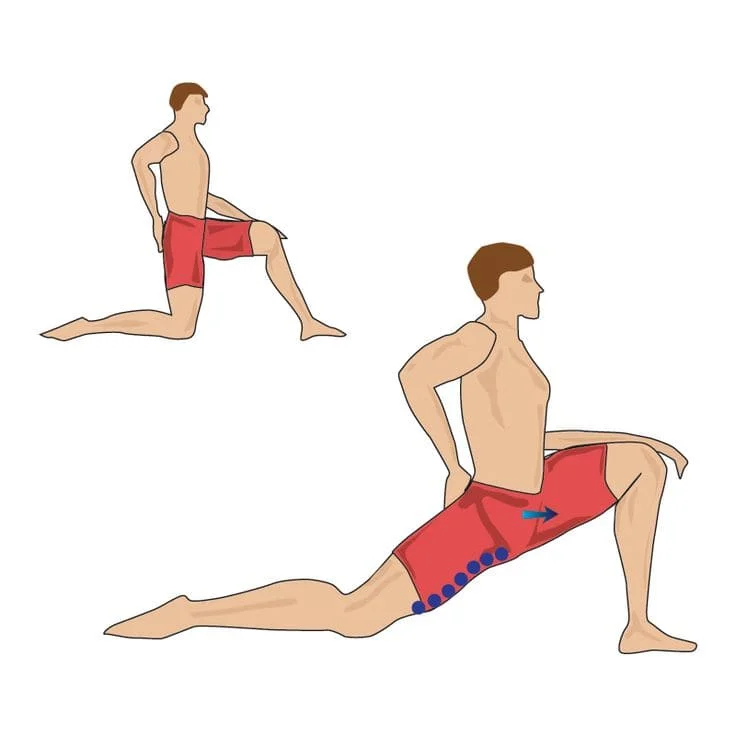
- The patient is in a kneeling position with one knee on the ground.
- The other knee is bent at a 90-degree angle in front of the body with the foot flat on the floor.
- Support the body against a wall & sturdy piece of furniture, for balance.
- Must be Keep the spine upright.
- Keep the pelvis in a neutral position.
- Lean forward with the spine still completely upright.
- Pushing the pelvis forward while still keeping it level.
- Then Clenching the buttock muscles & feel for the right motion.
- Hold the stretching position for 30 seconds, then slowly release & repeat this stretching on the other side.
- Repeat this stretching 3 times in 1 session & 3 sessions per day.
Standing Stretch:
- The patient is Standing on the right leg.
- For the Support hold a wall for the balance.
- Bring the left heel as close to the buttocks as possible.
- Then Grasp the left foot in both hands
- Pushing the hips forward without arching the back.
- The patient feels the stretch in the front of the hip joint & possibly down the inside of the thigh as well.
- Hold the stretching for 30 seconds, then slowly release & repeat this stretching on the other side.
- Repeat the stretch until you’ve held it for one full minute on each leg.
Strengthening exercise for Sartorius muscle pain:
- Plie Squats
- Clam Exercise
- Step-ups
Plie Squats:
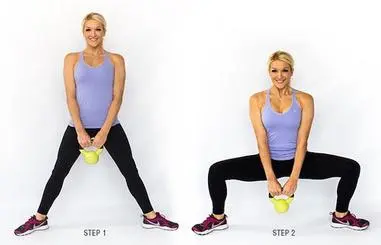
- For the Plie Squats first abduct the hip joint by creating a wide base of support, stepping the feet out laterally from the midline.
- Then rotate the hip joint outward, so that the thighs, knees & feet point toward the sides of the room.
- Bend the knee & hip joint lowering the glutes muscle straight down while keeping the hip joint externally rotated so that the knee joint remains aligned with the toes.
- When the knee joint forms a 90-degree angle, press the heels & return to the standing position.
- This exercise is performed with 10 repetitions in 1 session.
- This exercise is also done with dumbbells & a barbell to increase the resistance.
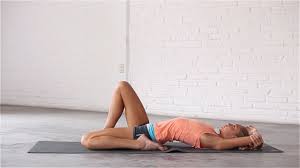
Clam Exercise:
- The patient is lying on the affected side & bottom the arm extended upward to support the head & neck.
- Flex the hip & knee joints so thatthe thighs are positioned at a 90-degree angle to the torso & knees are also bent at roughly 90 degrees.
- Make sure the shoulder joint, hip joint & knee joint are stacked, the body is perpendicular to the floor.
- Keep the big toes touching, tighten the core muscle & externally rotate the hip joint & knee joint is open, as though the clam opening up.
- Rotate as far as comfortably with good form, then reverse the movement of exercise means, internally rotating the hip joint back into the starting position.
- Perform this exercise in 10 repetitions before repeating on the opposite side.
- For the resistance used to a small looped resistance band in the exercise.
Step-ups:
- The starting position for the test is the standing position.
- Place one foot onto a platform, or step bench /to the lowest step onto the staircase.
- The patient is must be Kept straight onto the pelvis level.
- Bend to the knee joint then slowly lower to the opposite foot onto the floor.
- Lightly touch the toe onto the floor, then rise to back up the position.
- Repeat this Step-ups exercise 10 times in 1 session & 3 sessions per day.
- This Step-up exercise targets almost all the muscles of the lower body but mostly the sartorius muscle.

Lateral band walks:
- For this exercise, used one prop-looped resistance band.
- The patient places the band around the legs, above the ankle joint.
- Then Bend both the legs slightly & move the right leg laterally.
- Pull the band against the resistance & move the left leg closer.
- Then Take at least 10-12 steps in the right direction in the same way.
- Repeat this exercise with the other side.
What is the yoga pose for Sartorius’s pain?
- Reclining Hero Pose (Supta Virasana)
- Half Reclining Hero Pose (Ardha Supta Virasana)
- Bow Pose (Dhanurasana)
- Camel Pose (Ustrasana)
- Firefly Pose (Tittibhasana)
- High Lunge
- Low Lunge (Anjaneyasana)
- One-Legged King Pigeon Pose
- Tree pose
Reclining Hero Pose:
- The patient is first to Perform Virasana means Exhale & lower the back torso toward the floor.
- The patient is First to lean onto the hands, then the forearms & elbow joint.
- Once the hand is on the elbow joint, place the hands on the back of the pelvis & release the lower back & upper buttocks by spreading the flesh down toward the tailbone.
- Then Sink the heads of the thighbones deep into the back of the hip joint sockets.
- It is alright to lift the knee joint a little away from the floor to help soften the groins
- The patient is also raising the knee joint a few inches with the help of a thickly folded blanket.
- To begin position, stay in this pose for 30 seconds to 1 minute.
- Then Gradually extend the time & try to stay in the yoga pose for 5 minutes.
Half Reclining Hero Pose :
- The patient is in a kneeling position towards the front of the mat.
- Bring the right foot flat to the mat & drop down inside the left foot.
- Walk the right foot out to the right as far as the patient needs to so that both sitting bones are flat on the mat.
- Check the left foot & toes point straight back& that the right knee points straight ahead.
- Place the hands behind, palms down & fingertips facing forwards & lean back till you feel the stretch in the left quad.
- The patient comes down onto the elbows or lowers them down to the mat, brings the arms up overhead & holds onto the opposite elbow joint.
- To increase the intensity, the patient hugs the right knee into the chest.
- The patient holds this pose for 3-5 slow breaths.
- Then Release the arms, bring the hands to the mat & carefully press the back up for the other side.
Bow pose :
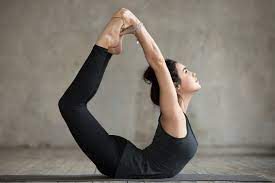
- The patient is lying on the belly on the mat, with a blanket under the pelvis.
- Press all of the toes into the floor & then bend the knee joint, must be keep the toes active.
- Grab the outer edges of the ankles with the hands & flex the feet strongly.
- During the inhalation, lift the rib cage & shoulders toward the ears.
- During the exhalation lengthen the tailbone & kick the legs back into the hands as they hold on firmly.
- Then lift the head & heart.
- Press down through the thighs to lift the chest.
- The patient stays in the pose for 30 seconds.
Camel Pose :
- The patient is in a Kneeling position on the mat with both knees shoulder-width apart.
- Then Reach to the back & place the hands on the bottoms of the feet.
- The patient becomes an Arch into a backbend
- So that the head is falling back & gazing at the wall behind the body.
- Hold this yoga pose for 30 seconds & repeat for several times.
Firefly Pose :
- Start with a Standing Forward Bend, with the toes pointing slightly out toes & knees are slightly bent.
- Take the right hand through the legs to clasp the right calf, placing the right shoulder behind the right knee.
- Then place the right hand on the floor behind the heel with fingers facing forward.
- Repeat this pose on the left side.
- Tilt the chest forward & carefully lower the legs onto the backs of the upper arms.
- Inhale, lift the feet off the mat & straighten the legs.
- Patient’s feet are pointed/flexed.
- Hold this yoga pose for 15 seconds & for a longer time, then release the feet to the floor with an exhale.
High Lunge :
- Start with this yoga pose Adho Mukha Svanasana = Downward-Facing Dog.
- Exhale & step the right foot forward between the hands, aligning the knee joint over the heel.
- Keep the left leg strong & firm.
- The patient is Inhale & raises the torso to upright.
- At the same time, sweep the arms wide to the sides & raise them overhead, palms facing
- Must Be careful not to overarch of the lower back.
- Lengthen the tailbone toward the floor & reach back through the left heel.
- Be sure not to press the front ribs forward.
- Draw them down & into the torso.
- Then Lift the arms from the lower back ribs, reaching through the little fingers.
- Hold this pose for 30 seconds to 1 minute.
Low Lunge:
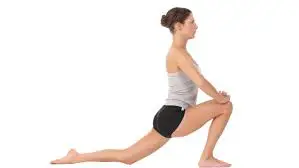
- Start with the Downward-Facing Dog then exhale & step the right foot forward between the hands, aligning the right knee joint over the heel.
- Then lower the left knee to the floor & keep the right knee fixed in place, slide the left-back till they feel a comfortable stretch in the left front thigh & groin.
- Turn the top of the left foot to the floor.
- Inhale & lift the torso to upright.
- Sweep the arms out to the sides & up, perpendicular to the floor.
- Draw the tailbone down toward the floor & lift the pubic bone toward the navel.
- Lift the chest from the firmness of the shoulder blades against the back torso.
- Take the head back & lookup, being too careful not to jam the back of the neck.
- Hold for a minute, exhale the torso back to the right thigh & hands to the floor,& turn to back toes under
One-Legged King Pigeon Pose :
- Starting on the hands & knees, slide the left knee forward, angling the left shin under the torso so that the left foot is at the front of the right knee & the outside of the left shin is resting on the floor.
- Slowly slide the right leg back, straightening the knee & resting the top of the thigh on the floor.
- Lower the outer left backside to the floor.
- Position the left heel just in front of the right hip joint.
- left knee is an angle slightly to the left, outside the line of the hip joint.
- Look back at the right leg. It extends the straight back from the hip joint.
- Lift the torso away from the thigh.
- Lengthen the lower back by pressing the tailbone down & forward.
- Draw the right front hip point slightly forward, toward the left heel.
- Stay in the pose for a few breaths, release the hands one by one & lower the torso over the left leg & down to the floor.
- The patient is held for a few breaths & repeats with the other side.
Tree pose:
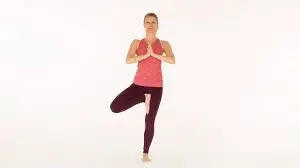
- This yoga pose is also known as the Vrksasana.
- The patient is standing in the Tadasana position means Spreading the toes, pressing the feet into the mat & firming the leg muscles.
- Then Raise the front hip points toward the lower ribs which are gently lifted in the lower belly.
- The patient inhales deeply, lifting the chest & exhales as they draw the shoulder blades down the back.
- The patient is looking straight ahead.
- Place the hands on the hip joint & raise the right foot high onto the left thigh or shin.
- Avoid making contact with the knee joint.
- Press the right foot & left leg with each other.
- Hold this yoga pose for several breaths, then step back into Mountain Pose & repeat this yoga pose on the other side.
How to prevent Sartorius muscle pain?
- Avoid painful activities & apply to gently stretch till regain full ROM & normal strength in the injured leg & when you walk without pain & limping.
- To avoid sartorius muscle pain, the patient is doing the warm-up & cool down during the exercise.
- Always use good body mechanics & do the right strength training & stretching exercises for the inner thigh which is an important component of the treatment plan.

pretty cool. i got this pain, and it also lead to MERALGIA PARESTHETICA.