Safe Core Exercises For Beginners With Back Pain
Table of Contents
Introduction:
Nearly 80% of individuals have had lower back pain at some point in their lives, so you’re not alone if you have it.
Pulling a low back muscle, overuse, bad posture, incorrect lifting technique, and prolonged sitting are some of the most frequent causes of low back pain.
Research has demonstrated that strengthening your core and lower (lumbar) back muscles is necessary if you want to lessen your low back pain.
It’s crucial to concentrate on developing both the outer (global) and smaller, deeper (local) muscles. Together, these muscles assist in securing your pelvis and spine, which helps lessen low back pain, stabilize your spine, and guard against injuries.
It’s crucial to remember that both glute and core weakness frequently lead to anterior pelvic tilt, a postural issue that can exacerbate low back pain.
The following are a few muscles that must be strengthened:
- Pelvic floor muscles
- Deep core muscles: transverse abdominis
- quadratus lumborum
- lumbar multifidus
- Both internal and external obliques
- Rectus abdominis
- Gluteus maximus
- Gluteus medius
Warm-up stretches
To prevent injury, it is essential to warm up before engaging in these exercises. Take your time and carefully follow the instructions for each of these stretches:
1. Seated trunk rotation:
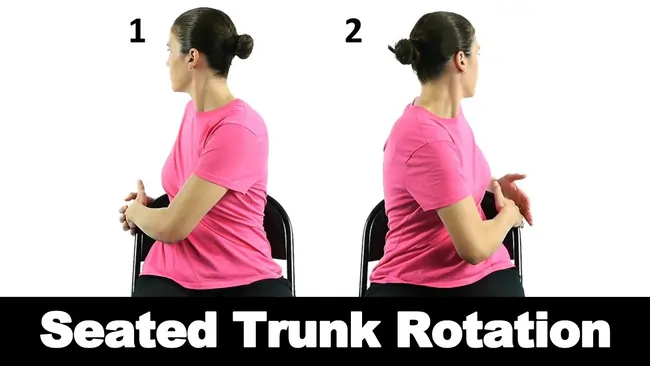
How to do it:
- Choose a chair that is durable, like a dining table chair.
- Sit slightly forward so that your back does not rest on the back of the chair, with your legs shoulder-width apart and bent at a 90-degree angle at the knee.
- Your arms should be folded over your chest.
- Keep your hips facing forward at all times.
- Rotate slowly to the right as far as is comfortable, then turn back to face the front.
- Rotate gently to the left as far as is comfortable, then turn back to face the front.
- Do the motion ten times on each side.
2. Standing trunk rotation:
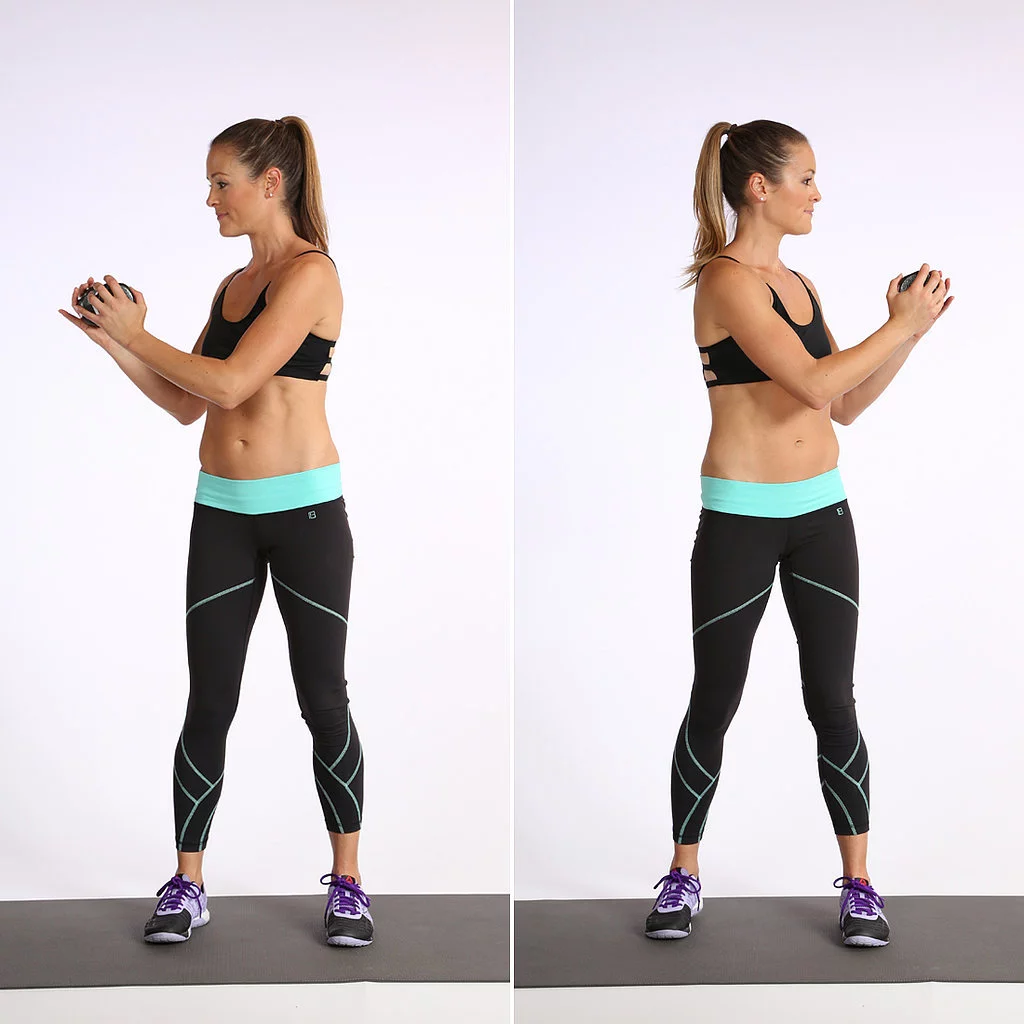
- Keep your knees slightly bent and your legs slightly apart while maintaining a straight posture.
- Your arms should be folded over your chest.
- Keep your hips facing forward at all times.
- Rotate slowly to the right as far as is comfortable, then turn back to face the front.
- Rotate gently to the left as far as is comfortable, then turn back to face the front. Do the motion ten times on each side.
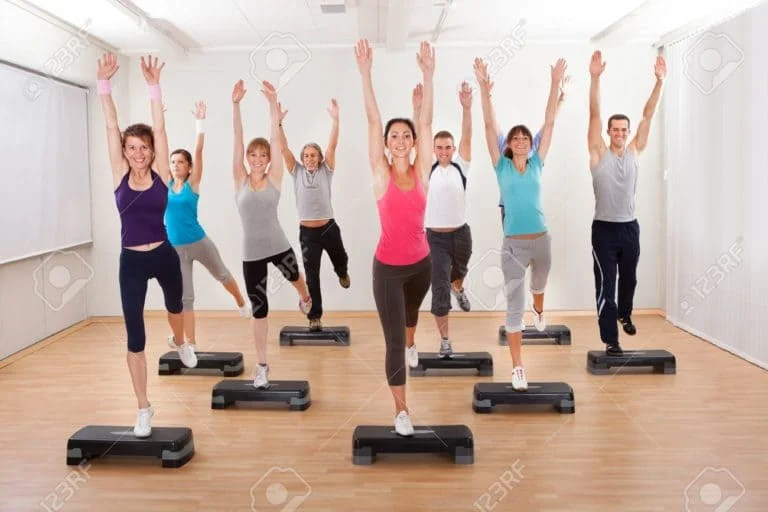
3. High knees:
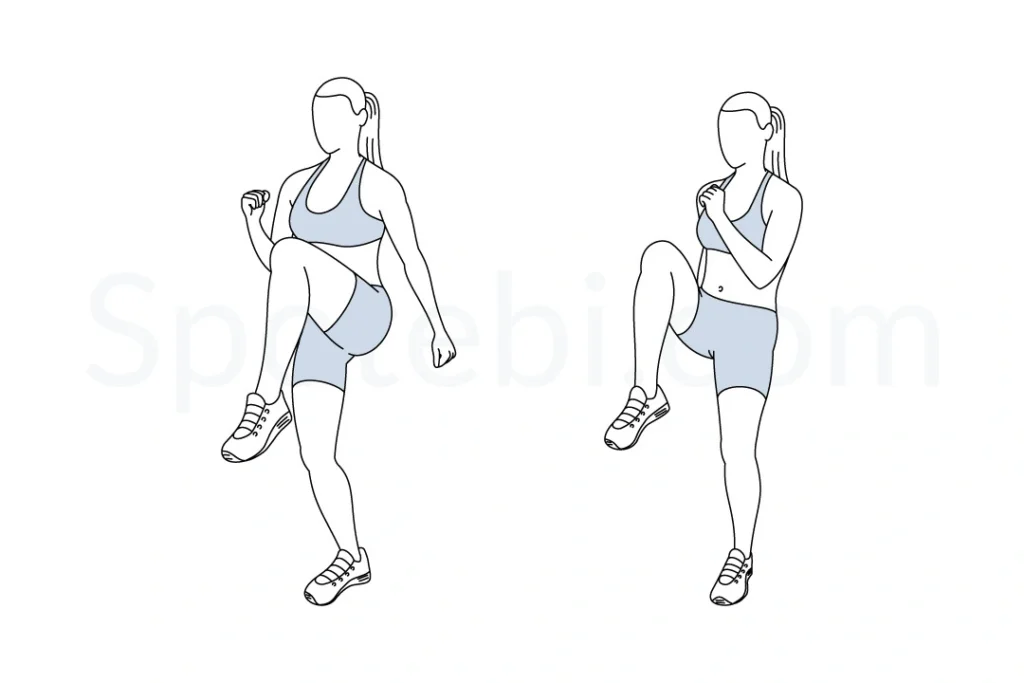
- Maintain a straight back and space your legs slightly apart.
- Gently lift your right knee as high as you can to a 90-degree angle, then lower it down to the ground.
- Gently lift your left knee as high as you can, to a 90-degree angle, and then lower it gradually to the ground.
- Repeat the action 10 times with each leg.
- Advice: Hold onto the back of a desk or chair if you are having problems maintaining your equilibrium. If you need more help, consider inviting a friend or family member to be nearby.
4. Standing side bends:
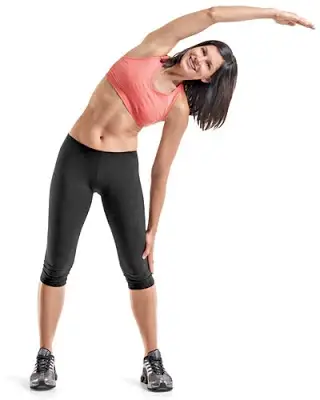
- Stand upright with your legs shoulder-width apart.
- You should have your arms by your sides.
- As you gradually drop your body to the right while keeping your posture straight, slide your hand down your leg to your knee.
- Go as far as you feel comfortable.
- Repeat on your left side after gently returning to a straight posture.
- Do the motion ten times on each side.
5. Standing back stretch:
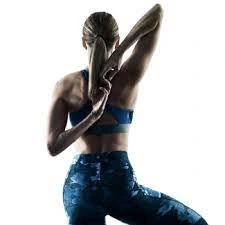
If you are worried about your balance, don’t do this.
- Set your legs shoulder-width apart and stand upright.
- Your arms should be by your sides.
- Slide your hand down the leg to your knee as you gently lower your body to the right while keeping a straight stance.
- Proceed as far as you feel comfortable.
- Gently return to a straight stance, and continue on your left side.
- Do the motion ten times on each side.
Exercises for Strengthening Core and Lower Back Strength
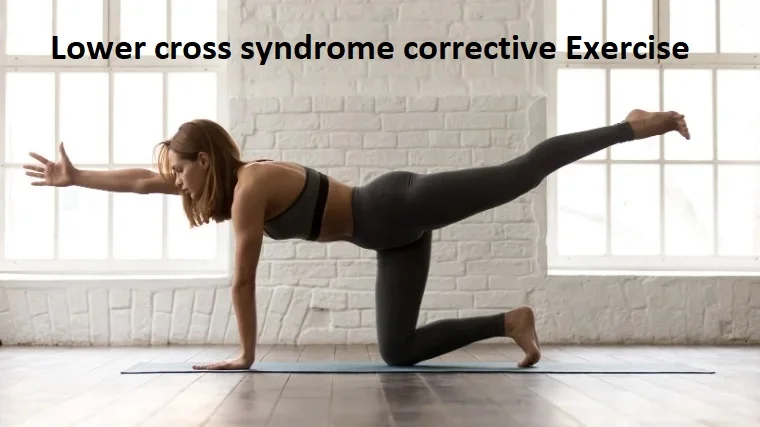
1. Bird dog:
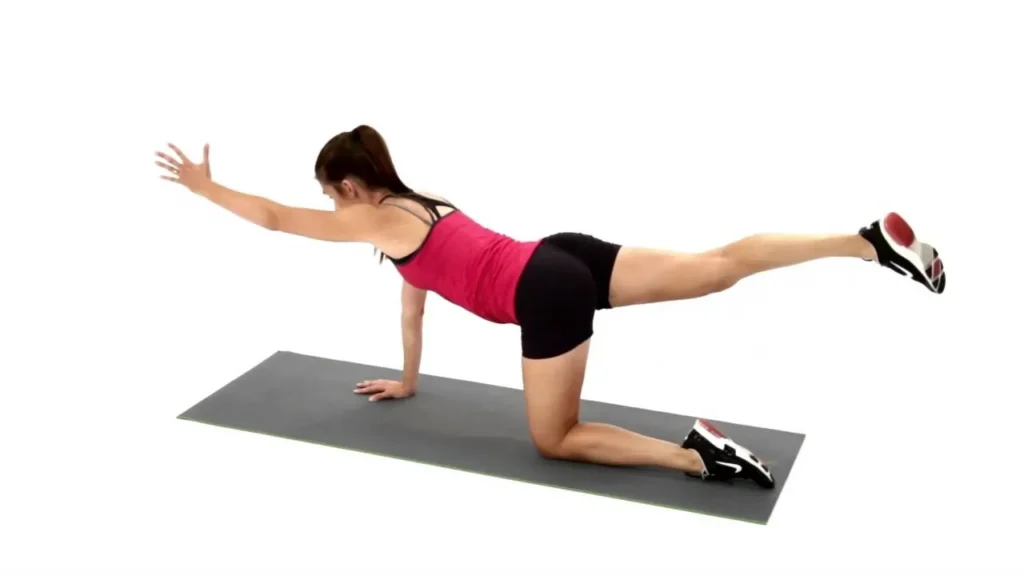
How to do it:
- Begin on your hands and knees, bringing your knees below your hips and your hands below your shoulders.
- Before initiating any movement, brace (contract) your core with as much force as you can.
- Raise your left arm and lengthen it forward until it is aligned with the surface of your body while bracing your core. At the same time, kick your right leg backward until it is level with your torso.
- While performing this, it’s crucial to prevent you from arching your lower back.
- Following maintaining that pose for two to three seconds, slowly move back to the beginning position.
- For 10 repetitions, switch sides.
- Don’t arch your lower back; only extend your arm and leg to a comfortable extent.
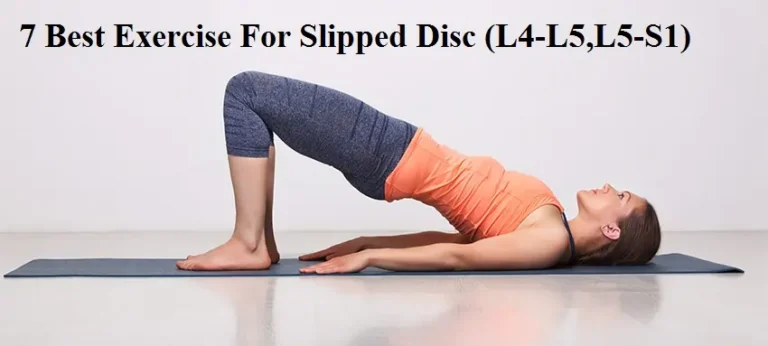
2. Glute Bridge:
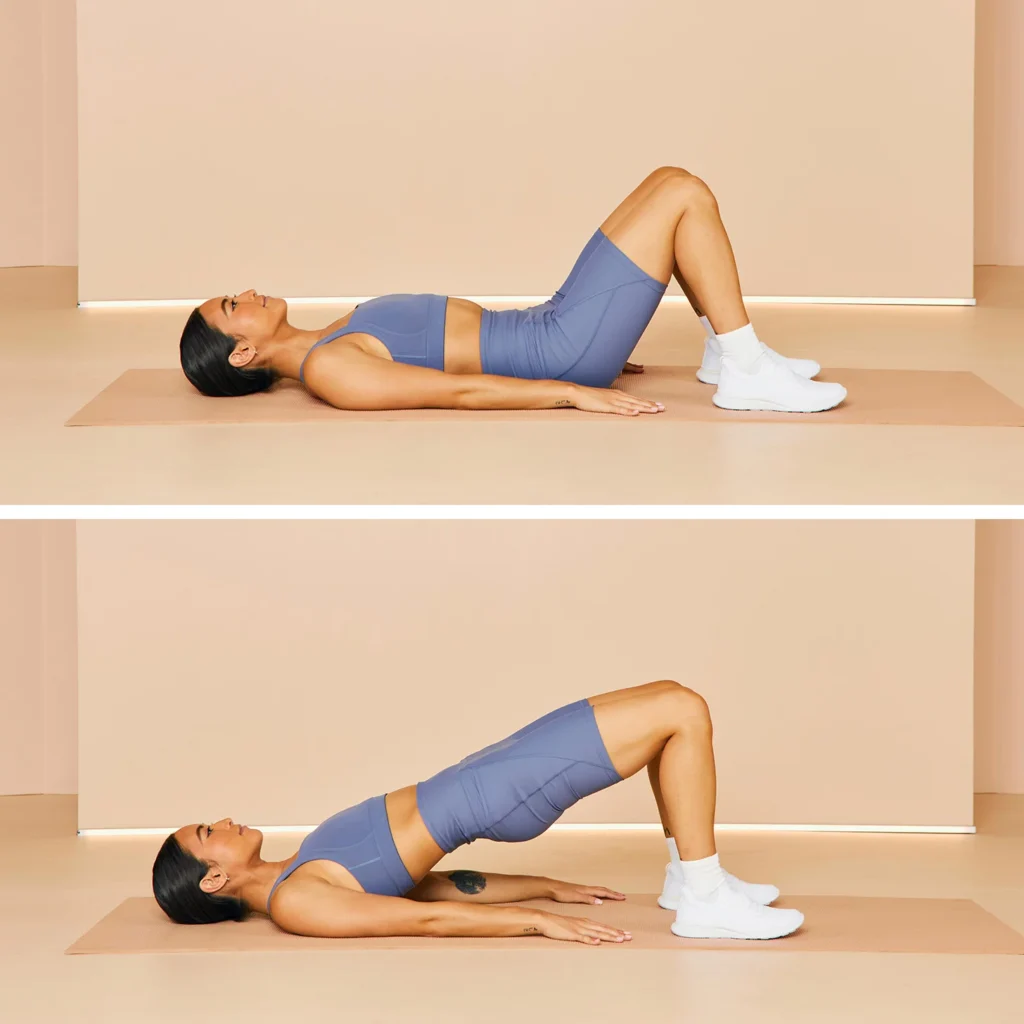
How to do it:
- Begin by lying on your back on the floor with your arms behind your torso, knees bent, and feet flat on the ground.
- Before you move, straighten your butt and brace your core.
- Lift your butt off the floor while squeezing it and bracing.
- Following 5 seconds of maintaining this position, slowly return to the starting position.
- Aim for 10 repetitions.
- You should feel your glutes firing during this type of activity; avoid overexerting yourself.
3. Squats
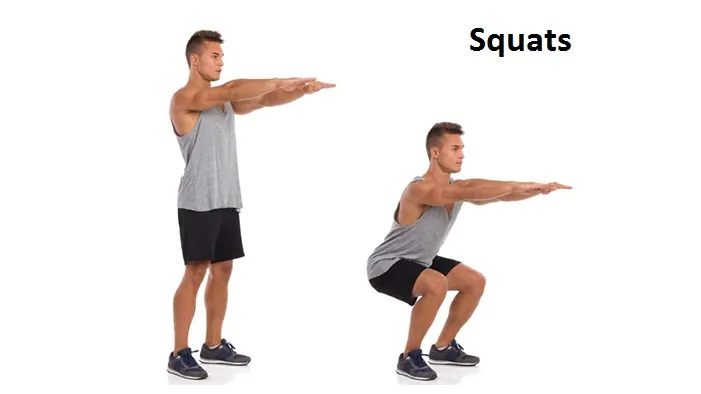
How to do it:
- Beginning from a standing position, put your feet shoulder-width apart.
- Strengthen your core and look straight ahead.
- Keep a tight abdominal position, then bend your knees to a 90-degree angle (as if you were sitting) and hinge at your hips.
- Use your legs first, then your glutes (squeeze your butt) to come up.
- Aim for 10 to 15 reps.
- It is not recommended to squat at an angle larger than ninety degrees. Your muscles will get stronger from a simple squat.
4. Plank
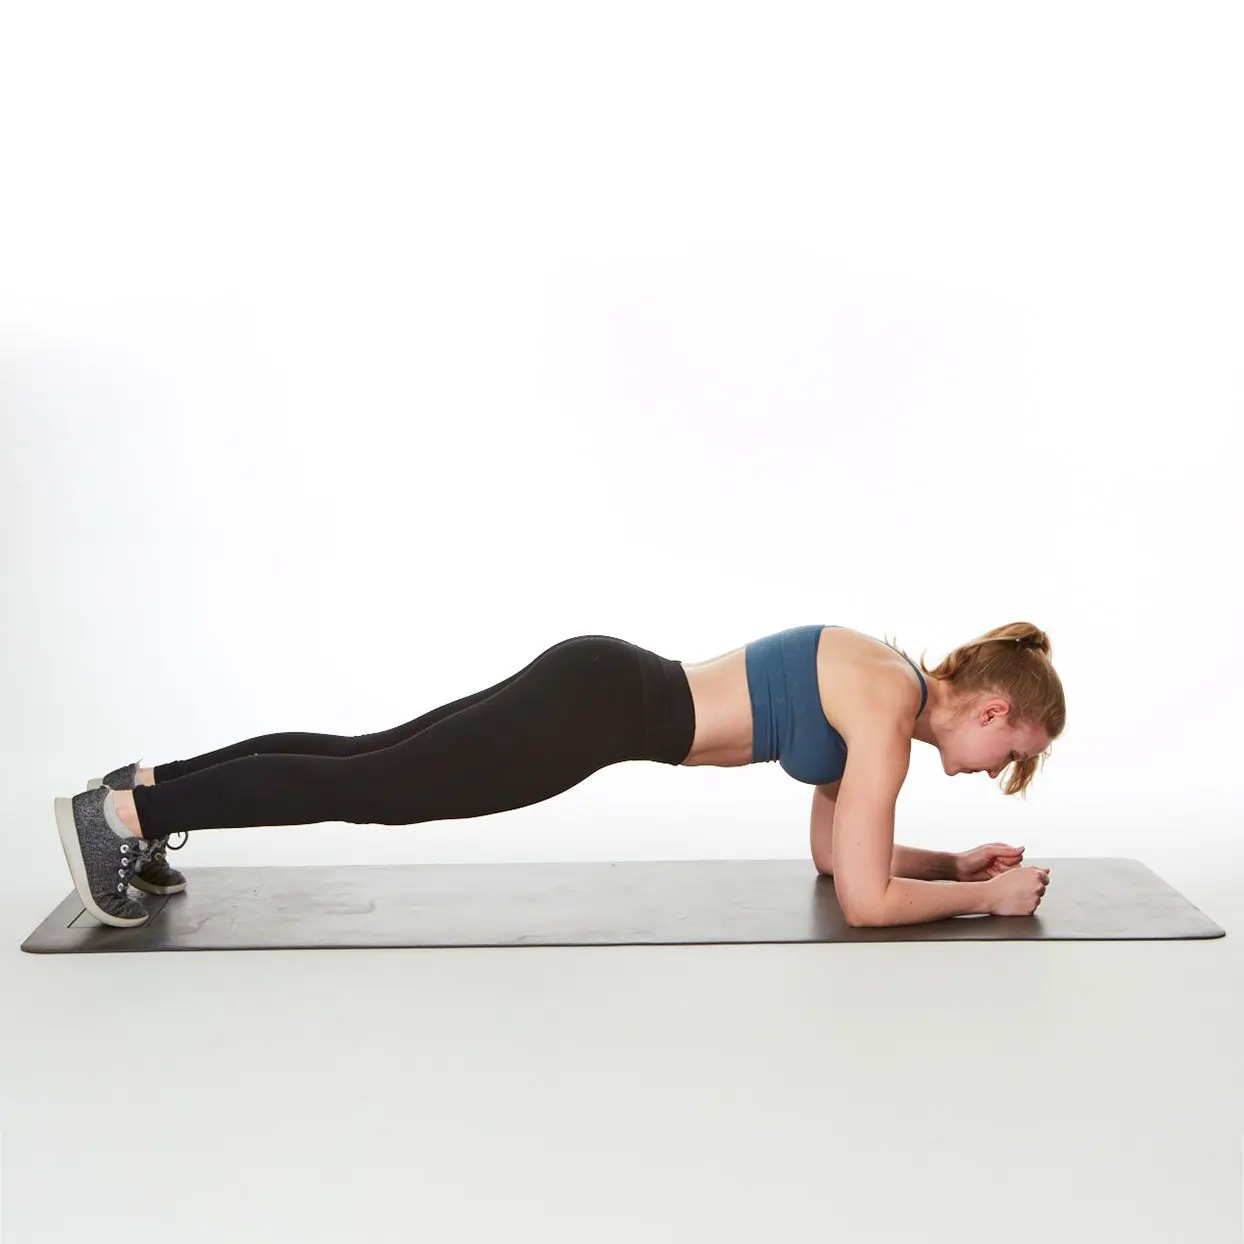
How to do it:
- Start by putting your forearms against the mat whilst lying on your stomach.
- Lift your body to the point where you are resting on your forearms and toes by using your core.
- Make sure your spine is in a neutral position, meaning that your butt is not raised in the air or your low back is sagging.
- While holding the plank position for twenty to thirty seconds, fall to the floor.
- Try to do this exercise two to five times.
- Throughout the entire exercise, make sure to keep a straight back.
5. Side Plank

How to do it:
- Move your body sideways as you proceed.
- Place your elbow at a 90-degree angle and stack your legs and feet together.
- Now brace your core and butt muscles and raise your hips off the floor.
- To support your weight, use your elbows and feet.
- Keep your entire body in top-to-bottom alignment.
- For 30 seconds, maintain the elevated position.
- Now do the side plank exercise on the other side.
- Do this three times on each side.
- Make sure your back is in an aligned position for the whole activity.
6. Dead Bug (Alternate both sides)
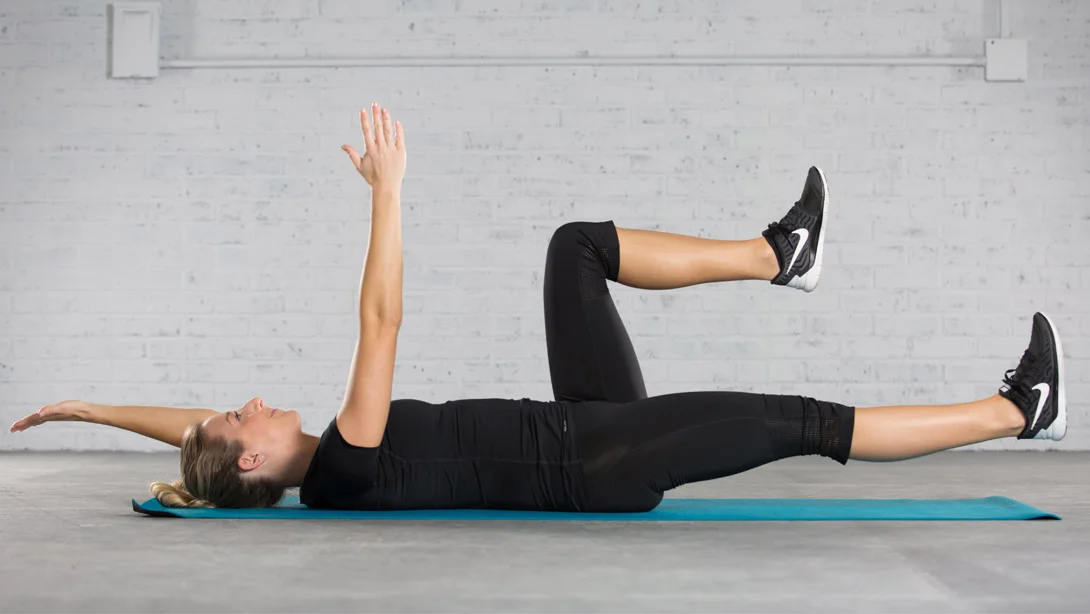
How to do it:
- Start by lying on your back and reaching both arms toward the ceiling.
- Extend your legs to a 90-degree angle off the ground.
- After exhaling to lower your ribs, try to flatten your back on the floor by rotating your pelvis upward and bracing your core muscles. For this workout, you must begin in this position and stay there the entire time.
- Start the exercise by extending your left leg, straightening at the knee and hip, and lowering the leg to just above the floor without arching your lower back. Lower your right arm back to just above the floor at the same moment.
- Keeping your gluteal and abdominal muscles tense, return your left leg and right arm to the starting position
7. Seated good mornings
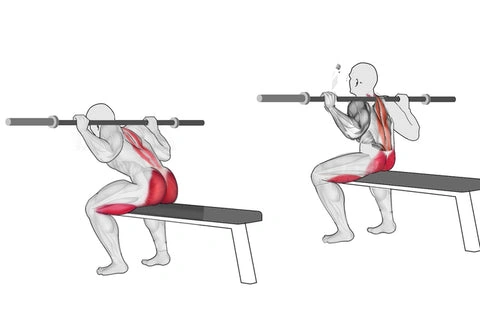
How to do it:
- Look for a sturdy chair, like a dining table chair, that has no arms.
- If it is not too painful, sit upright with your feet slightly wider than shoulder-width apart on the ground and your legs bent at a 90-degree angle.
- Place your arms between your legs.
- Maintaining a straight back and bending at the hips, slowly bring your hands down to the floor.
- Without experiencing any pain or bending your back, lower as far as you can.
- Maintain a straight back at all times as you slowly return to sitting upright.
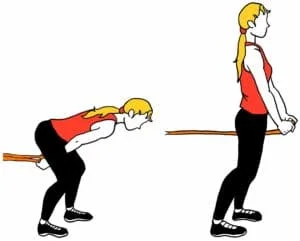
8. Good mornings
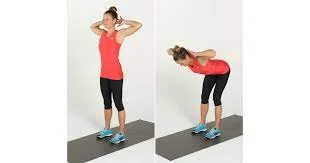
How to do it:
- Stand up upright with your feet shoulder-width apart.
- Stretch your elbows out and press your fingertips on your temples.
- Pull your belly button up and in toward your back to activate your core.
- Keeping your back straight, descend your upper body forward while hinging at the hips and slightly bending at the knees.
- Aim for horizontal (so that your body runs parallel to the floor) by lowering as far as you feel comfortable while maintaining a straight back.
- Maintaining a straight back, slowly raise yourself back up to standing.
- Inhale as you descend and exhale as you ascend back to your upright position.
9. Pelvic lift (also known as a hip thrust)
How to do it:
- With your arms by your sides and your legs bent, lie on your back.
- Inhale deeply.
- Squeeze your buttocks and activate your core by drawing your belly button up and in toward your back as you exhale.
- Raise your buttocks off the ground. From your shoulders to your knees, your body should make a straight line.
- Hold for one or two seconds.
- Inhale, then softly descend to the floor.
10. Standing trunk rotation with extended arms:
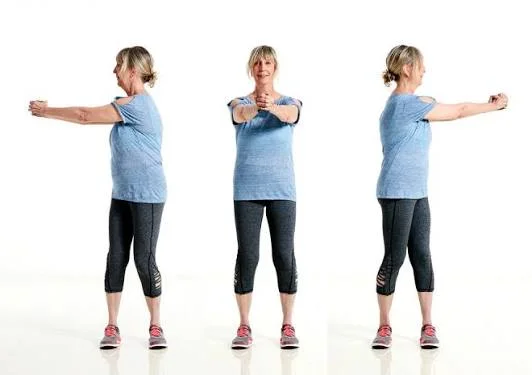
How to do It:
- Keep a straight position while keeping your legs slightly apart.
- Pull your belly button up and in toward your back to activate your core.
- Clasp your hands together and extend your arms in front of you at shoulder height or at a height that suits you.
- Always keep your hips looking forward.
- Return to facing the front after slowly rotating to the right as far as is comfortable.
- Return to facing the front after slowly rotating to the left as far as is comfortable.
- Breathe in when you’re back in the center and out when you’re twisting.
- You should feel a tiny tug on the muscles, so just twist as much as is comfortable.
11. Superman Exercise:
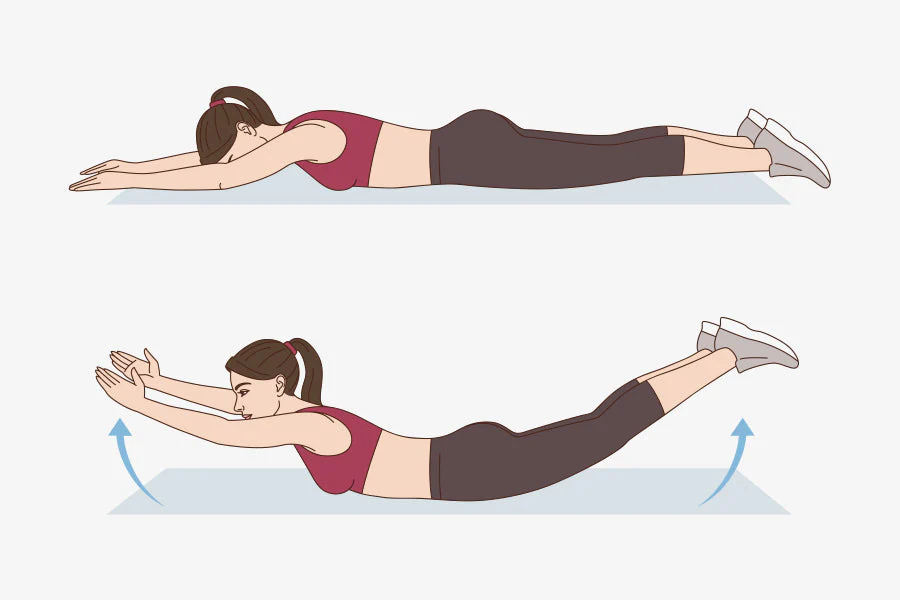
How to do it:
- With your arms out in front of you and your legs straight, lie face down.
- Squeeze your buttocks firmly as you gently raise your arms, shoulders, and legs off the ground after exhaling.
- Inhale deeply, then slowly return to the ground.
- Put your fingertips on your temples and extend your elbows if you have trouble with straight arms.
Stretches for lower back pain
1. Seated cat-cow:
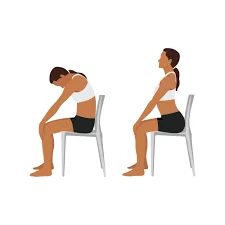
- Look for a sturdy chair, like a dining table chair, that has no arms.
- With your feet slightly apart on the floor, your hands on your thighs, and your legs bent at a 90-degree angle, sit up straight 10 to 15 cm (4 to 6 inches) from the back of the chair.
- Bend forward and slowly circle your back as you exhale. With your hands sliding forward and beyond your knees and your chin lowered to your chest, pull your stomach in.
- Hold the action for one to two seconds, then reverse it.
- Return to a straight sitting position while taking calm breaths. Then, arch your back, push your stomach out, and look up at the ceiling. Your hands should ascend your thighs in the direction of your body.
2. Cat-cow:
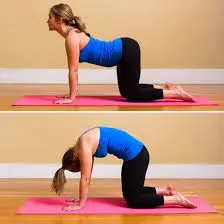
- Place your knees on the floor with your hands flat on the floor.
- With your knees just below your hips, place your arms straight behind your shoulders.
- Inhale as you arch your back, gaze up at the ceiling, and lower your stomach toward the floor.
- Hold the action for one to two seconds, then reverse it.
- Breathe out as you drop your head to the floor, curve your back, and pull your belly button toward your back.
3. Knee rolls:
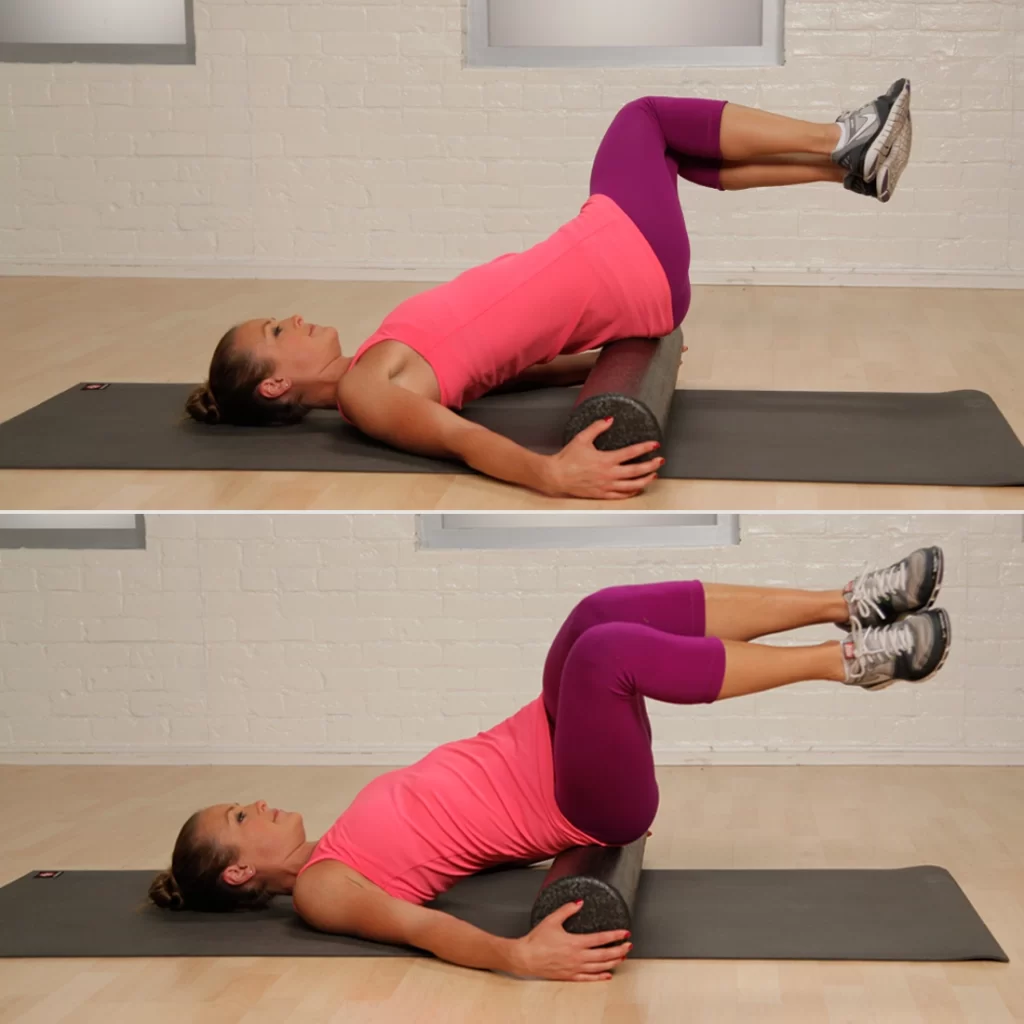
- With your feet flat on the surface and your knees bent, lie on your back
- At a 90-degree angle to your torso, extend your arms to the sides.
- With your legs and feet together, carefully roll both knees to the right after exhaling.
- Hold for 1 or 2 seconds.
- Take a breath, then lower yourself to the floor by bending your arms.
- On the left side, repeat.
4. Upward-facing dog:
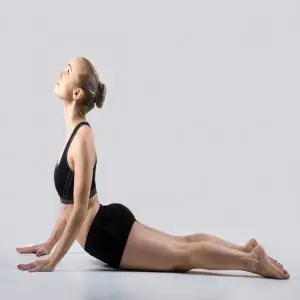
- Sit face down on your stomach with your legs straight out.
- Put your hands near your lower ribs on the floor beside your chest.
- Inhale deeply, then draw your belly button up and in toward your back to activate your core.
- Breathe out gently for three to five seconds while straightening your arms, pressing your hands into the floor, and raising your head, neck, and back.
- Attempt to keep your hips on the ground.
- Take a breath, then lower yourself to the floor by bending your arms.
5. Knee hugs:
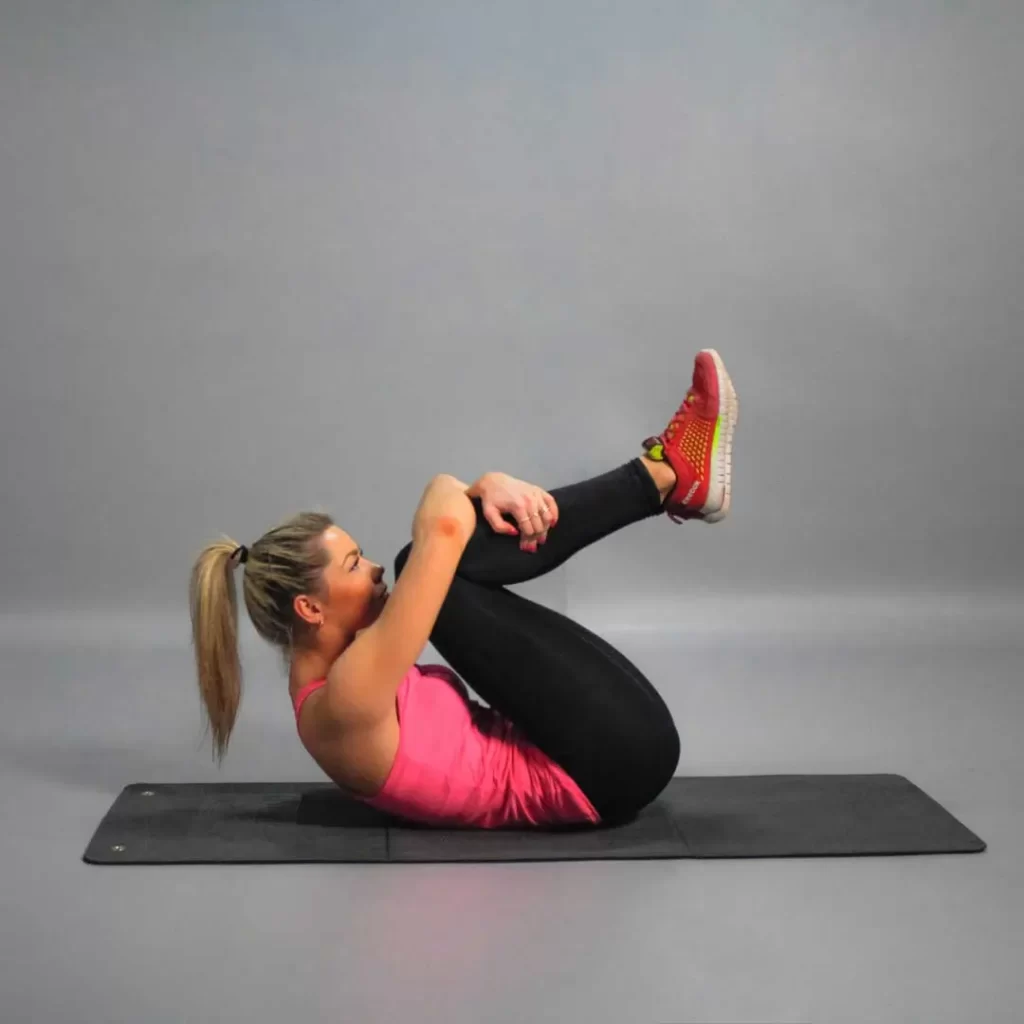
- Stretch your legs straight while lying on your back.
- Bring your knees up to your chest.
- Breathe out as you gently bring your knees into your chest (like an embrace) while holding them with both hands.
- Hold for five seconds.
- Let go of your hands, take a deep breath, and return your legs to the floor while keeping them straight.
FAQs
When should I do stretching exercises?
It’s advised to avoid stretching during a warm-up since it might raise the chance of injury.
To lower your chance of injury, stretch after your warm-up or after working out, when your muscles are at their most elastic.
Additionally, throughout your 10- to 15-minute pre-workout warm-up, be sure to mobilize every joint you will be stretching if you are performing flexibility exercises as part of a cardiovascular workout.
Additionally, perform stretching exercises at the conclusion of your cool-down if you’re performing them after a workout.
How should I feel when working out?
Increase the intensity of the exercise until you get a little tug in your muscles. Stop what you’re doing right away if you feel any discomfort. Sharp pain indicates that something is amiss or that you have gone too far.
It’s crucial to use your core during the workouts. You must draw your belly button up and in toward your spine to do this. You should be able to breathe properly and feel the muscles between your hips tighten.
You could notice that your muscles are getting tired during the activities. This indicates that they are getting good exercise. It’s normal to experience some discomfort in your muscles the following day. Before repeating the workouts, give yourself some time to heal. However, get in touch with your physician if the workouts are making your discomfort worse.
Advice: When performing the exercises, avoid holding your breath. While performing the exercises, it’s crucial to keep breathing.
Since many lower back exercises are floor exercises, they may not be appropriate for you if you have postural hypotension, lightheadedness, or dizziness when you stand up after lying, sitting, or bending.
How should I feel while stretching?
Move your body until you get some muscular tension throughout each stretch; this shouldn’t be uncomfortable.
You might need to extend your range of motion to experience that minor tightness as your body adjusts to this kind of exercise and you become more flexible.
References:
- Specialist, A. S. C. R. (2025, November 4). Exercises for lower back pain. British Heart Foundation. https://www.bhf.org.uk/informationsupport/heart-matters-magazine/activity/exercises-for-lower-back-pain
- Turetsky, L., & Turetsky, L. (2023, November 1). 6 Exercises to strengthen lower back and core muscles. Back Intelligence (Creators of PostureFlow App). https://backintelligence.com/exercises-to-strengthen-lower-back/