
Supraspinatus Muscle
Table of Contents
What is Supraspinatus Muscle?
- Supraspinatus is 1 of the rotator cuff muscles, along with infraspinatus, teres minor & subscapularis muscles. Supraspinatus is situated deeply to the trapezius muscle in the posterior scapular region, extending from the supraspinous fossa of the scapula to the proximal humerus.
- Together with the other rotator cuff muscles, supraspinatus work as a stabilization of the glenohumeral (shoulder) joint during the movements of the upper extremity. Additionally, it helps in the abduction of the arm.
Relations
- Supraspinatus locates deeply to the trapezius muscle & superior to the spine of the scapula & infraspinatus muscle. The tendon of the supraspinatus is detached from the coracoacromial ligament, the acromion & the deltoid muscle by the subacromial bursa.
Origin of Supraspinatus Muscle
- Supraspinatus is the most superior of the 4 rotator cuff muscles. It is a small triangular-shaped muscle, situated on the posterior aspect of the scapula. It origins from the medial aspect of the supraspinous fossa, a concave depression situated upper the spine of the scapula. The muscle fibers diverge onto a tendon that runs inferior to the acromion of the scapula.
Insertion
- After passing above the glenohumeral joint it inserts into the superficial facet on the greater tubercle of the humerus.
Nerve Supply
- Supraspinatus muscle is innervated by the suprascapular nerve, which is formed by the anterior rami of spinal nerves C5 & C6.
Blood supply
- Supraspinatus receives vascular supply from the suprascapular artery, a branch of the thyrocervical trunk of the subclavian artery. The suprascapular artery goes through the suprascapular notch, together with the suprascapular nerve to supply supraspinatus.
- Supraspinatus occasionally receives a collateral blood supply through the dorsal scapular artery. Venous drainage is transported by the same-named veins which go along with the arteries & drain into the subclavian vein.
Action
- Shoulder joint: the abduction of the arm.
- Work as a stabilizer of the humeral head in the glenoid cavity.
Function of Supraspinatus Muscle
- During motions of the glenohumeral joint, the supraspinatus muscle activates in the stabilization of the head of the humerus in the joint. It also helps the deltoid muscle in the abduction of the arm at the glenohumeral joint.
Clinical Significance of Supraspinatus Muscle
- Supraspinatus tendinitis is a common & disabling condition that becomes more seen after middle age & is a common cause of pain in the shoulder joint. The primary cause is resistive overuse.
- The muscle tendon of the rotator cuff is involved & affects the tendons of the musculoskeletal system & becomes degenerative, most often as a result of repetitive stresses & overloading during sports or occupational activities.
- The tendon of the Muscle generally impinges below the acromion as it passes between the acromion & the humeral head. This mechanism is multi-factorial.
- The Empty Can Test, along with the Full Can Test is a primarily used orthopedic examination testing for supraspinatus impingement or integrity of the supraspinatus muscle & tendon. The test is usually liable in sitting or standing positions. On the side to be tested 1 hand of the examiner’s hands stabilizes the shoulder girdle. The arm to be tested is moving into 90 degrees of abduction in the plane of the scapula (approximately 30 degrees of forwarding flexion), full internal rotation with the thumb pointing downwards as if emptying a beverage can. The examiner’s other hand gave downward pressure on the superior aspect of the distal forearm & the patient resists. The Empty Can Test is considered positive if there is significant pain &/or weakness in the supraspinatus muscle.
- 4 muscles surround the scapula-to-shoulder region joint to make Rotator Cuff Muscle. The 4 muscles are Supraspinatus, Infraspinatus, Teres minor & Subscapularis.
- According to the first name of each muscle, they are also called as SITS.
- They strengthen or stabilize the shoulder joint. Injury to this muscle group might cause Rotator Cuff Injury.
Subacromial Impingement :
- Subacromial Pain Syndrome is all non-traumatic, usually unilateral, shoulder harm that causes pain, localized surrounding the acromion, and might worsen during or subsequent to pulling the arm. It is basically a general term that encompasses pain situated with any lesion within a structure or the structures within the Subacromial Space. As such the SAPS incorporates all conditions related to subacromial structures as they are subacromial bursitis, tendinosis Calcarea, rotator cuff tendinopathy, rotator cuff tears, biceps tendinopathy, or tendon cuff degeneration.
Supraspinatus Tear:
- A supraspinatus tear is a tear and rupture of the tendon of the supraspinatus muscle. The supraspinatus is the portion of the rotator cuff of the shoulder. Most of the time it is work with another rotator cuff muscle tear. This will occur due to trauma or repeated micro-trauma & present as a partial or full thickness tear. Many of the time the tear occurs commonly in the tendon or as an avulsion from the greater tuberosity.
Winging of Scapula :
- The term ‘winged scapula’ (also scapula alata) is preferred when the muscles of the scapula are too weak or paralyzed, resulting in a limited ability to stabilize the scapula. In conclusion of this, the medial side border of the scapula protruding, like wings. The primary reasons for this condition are musculoskeletal & neurological-related.
Stretching Exercise for Supraspinatus Muscle
Single-Side Stretch
- How to do– Sitting on a yoga ball or chair, or stand. Either way, make sure the spine is straight.
- Relax the shoulders & let your arms hang down by the sides.
- Raise the right arm directly overhead, so that the elbow is right next to the head.
- Bend at the elbow so that you can reach the right hand down the back.
- Bring the left hand behind the back & grab the right hand or wrist.
- If the hands do not reach each other, roll up a small towel or hold a resistance band you can grasp between both hands.
- If you want to raise the intensity of the stretch, let the head drop to the left side.
- Hold it for 30 secs & repeat 4 times before switching to the alternate sides.
Posterior Shoulder Stretches
- How to do– You can do this stretch sitting down/standing up position. The main thing is you keep the posture straight & upright, to target the supraspinatus effectively.
- Raise one arm in front of you to shoulder level, so that it was parallel to the ground.
- Cross the extended arm over the chest & use the other arm to hold it in place.
- Felt the stretch in the posterior deltoid & supraspinatus, at the back of the shoulder joint.
- Hold for 30 secs.
- Flex the elbow of the arm that’s stretched across the body, so that you feel a more isolated stretch in the supraspinatus.
- The more you pull the arm inwards toward the body, the deeper you will feel the stretch.
- Repeat the stretches on the other shoulder.
- Hold it for 30 secs & repeat 4 times before switching to the alternate sides.
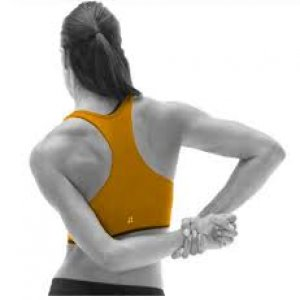
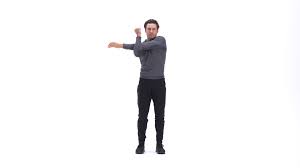
Double Shoulder Stretch
- How to do – Standing with an upright spine, stretch the left & right shoulders at the same time by placing the hands on the hips.
- The palms facing away from the body & the fingers pointing backward.
- Press the backs of the hands against the hips & gently move the elbows forward until you felt a stretch behind the shoulders.
- Hold it 30 secs before returning the elbows to the starting position & relaxing. Switch to the other side.
- Repeat 4 to 5 times.
Wall Lat Stretch
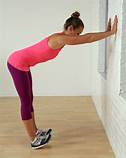
- Stand while seeing the wall & then place the hands on the wall at the waist & level at shoulder width.
- Step behind while folding the hips until the torso & arms are in a straight line. The back should remain flat.
- Stabilize the arching of the lower back by using abdominal muscles. Alternatively, flex the elbows downward while the forearms rest vertically on the wall. You can also do the stretch with a table in place of the wall.
- And the torso is angled toward the bar at the lower position. Use both arms to do the bar stretch & hold all bar stretches for 30 secs.
Seated Stretch
- How to do – Took a sitting position on a stable chair with a soft surface.
- Bend the left elbow at a 90-degree angle, and position the arm in front of you with the underlying across the lower ribcage.
- Send the right upper arm below the left upper arm & reach up with the right hand to grasp the left thumb.
- Relax the left arm & shoulder, lightly pulling the right thumb toward the left, while rotating the left arm out.
- Maintain that stretch position for up to 30 secs & relax.
- Repeat up to two to four times before switching to the alternate side.
- Hold this stretch for 30 secs to 1 min.
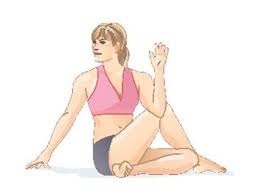
Seated spinal twist stretch
- How to do– Sitting on the floor with both legs extended out in front.
- Bend the left knee & place the foot to the outside of the right thigh.
- Place the right arm on the outside of the left thigh.
- Place the left hand behind you for support.
- Starting at the base of the spine, twist to the left side.
- Hold this pose for up to 1 minute.
- Repeat on the other side.

Pendulum Stretch
- How to do – Take a standing position beside a table so that it is at the side.
- With a straight back, flex forward at the waist.
- Let the right elbow & forearm support you on the table.
- Let the left arm hang straight downwards from the shoulder joint, loosely & limply.
- Slowly move the left arm forward & back, so that it swings like the pendulum TO and FRO of a grandfather clock.
- Then, change the motion from side to side.
- Next, go around three times or more, & switch directions.
- Repeat on the right side.
- Do 15 to 20 times smoothly motions in a particular smoothly pattern.

Crossover arm stretch
- How to do – You can perform this stretch sitting or standing position. The main thing is you keep the posture upright & straight, to target the supraspinatus successfully.
- Raise the right arm in front of you to shoulder level, so that it is parallel to the floor.
- Cross the extended arm over the chest & use the left arm to hold it in place.
- You can feel a stretch in the posterior deltoid & supraspinatus, at the back of the shoulder joint.
- Hold it up to 30 secs.
- Bend the elbow of the right arm that’s stretched across the body, so that you feel an isolated stretch in the supraspinatus.
- The further you pull the arm in toward the body, the deeper you will feel a stretch.
- Repeat the stretches on the left and right shoulder.
Seated Table Slides Stretch
- How to do – Took a sitting position in a chair at a table with a towel placed in front of you.
- Put the hands on a towel, with the palms facing the table. You can do exercise with one arm at a time or both arms at the same time.
- Flex forward at the waist & press the towel as far as on the table, allow it to slide along the table as you flex into a deep stretch.
- Once you felt a perfect stretch in the shoulders, hold it for 20 – 30 secs before sliding back up to the initial position.
- Repeat for 4 more reps.
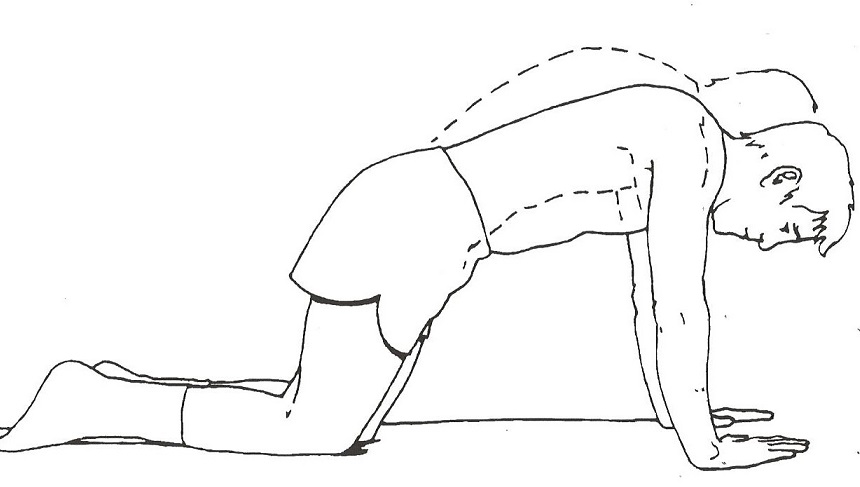
Extended Child’s Pose on Fingertips Stretch
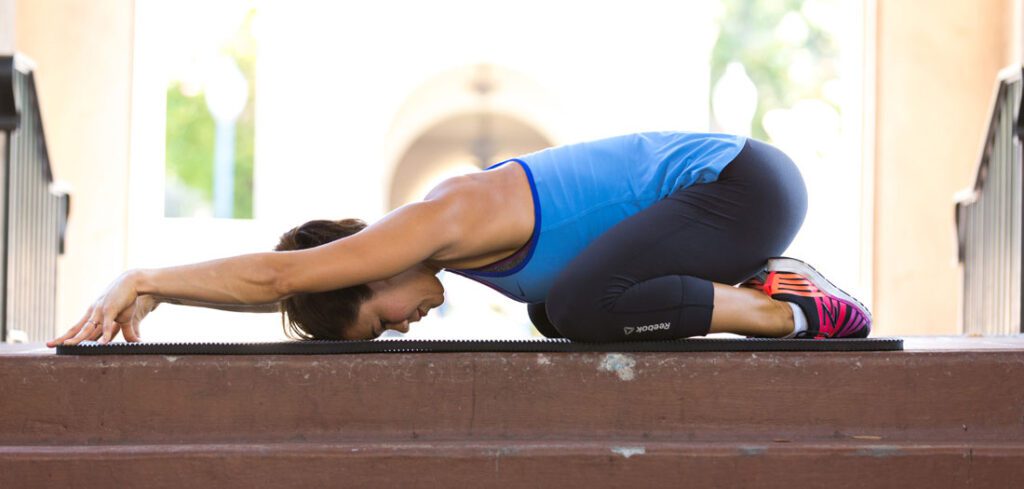
- How to do– The patient is Kneeling on the floor.
- Try to Touch the big toes together & the patient is sitting on the heels.
- Next, separate the knee joint about as wide as the hip joint.
- Then Bend the forward from the hip joint & walk the hands out as far in front of them as possible.
- With the arms extended palms are facing down then come up onto the fingertips as if the ball underneath the palms & melts the chest toward the floor.
Cross-body shoulder stretch
- How to do– The patient is in a standing position on a tall with the feet at hip-width apart & the muscle of the core is contracting.
- For good posture: stack the ears over the shoulders, hips, knees, & ankles joints.
- Bring the right arm across the body at shoulder height, reaching past the left shoulder.
- Use the left hand to grab the right forearm.
- Gently pull the right arm closer to the body till the patient feel a stretch toward the middle of the right shoulder.
- Hold the stretch position & breathe deep, for 30 secs.
- After that Rest, then perform this exercise 2 more times before switching sides.
Strengthening Exercise for Supraspinatus Muscle
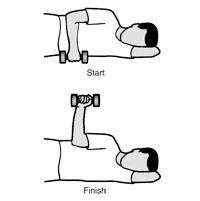
Prone External Rotation Exercise
- To perform this exercise you have to lie down on the tummy with the right upper arm hanging halfway off the side of a bed or bench at shoulder level.
- Hold a 1- to 2-pound weight in the left hand, and rotate the forearm & hand upward until the forearm is parallel with the floor.
- Hold this position for 2 to 4 secs, then back to the starting position.
- After completing 10 reps, perform the same exercise with the right arm.
- This exercise made both muscles stronger the infraspinatus & supraspinatus muscles & helps to improve shoulder posture.
Resisted External Rotation Exercise
- To perform this exercise you have to stand with the left side facing a door.
- With one end of a resistance band secured in the door handle, hold the other end in the right hand.
- Keep the right elbow flexed up to a 90-degree angle & resting firmly against the side.
- Rotate the right forearm away from the door as much as you can without turning the torso.
- As you do this, contract the shoulder blade down & back.
- Do not let the elbow leave the side.
- After a 2 to 4-sec hold, release the shoulder blade as you rotate the forearm back to the starting position. Do 10 reps before changing to the other side.
Prone Elevation Exercise
- To perform this exercise you have to lie down on the tummy with the right arm hanging off the edge of a bed. Hold a 1 to 2-pound weight in the left hand.
- With the left thumb facing the sky, raise the arm slightly above ear level until it is even with the bed. Do not shrug the shoulder or lift the shoulder off the bed as you perform.
- Hold the left arm in this position for 2 to 4 secs & then lower it back down.
- After completing this 10 times, repeat with the right arm.
Side-Lying External Rotation Exercise
- To perform this exercise you have to lie down on the right side with the left elbow flexed at a 90-degree angle & the palm resting against the abdomen. Hold a two pound weight in the left hand.
- Set the left shoulder blade down & back. Then, rotate the left palm & forearm away from the tummy until the forearm is straight up & down.
- Maintain this position for 2 to 4 secs & then slowly rotate the arm back to the belly.
- After 10 reps, repeat with the right arm.
Full Can Exercise
- To do this exercise you have to stand on 1 end of a resistance band & hold the other end in your right hand.
- You can also use a one to a two-pound dumbbell in place of a resistance band.
- With an extended elbow & the thumb positioned up, elevate the arm at a 45-degree angle with the body.
- Once you have lifted the arm slightly above ear level, hold this position for 2 to 4 secs & then slowly lower back to the right side.
- Do not shrug the shoulder as you perform.
- After 10 reps, repeat the exercise on the left side.
Prone Full Can Raise Exercise
- To do this exercise you have to lie down flat on your tummy on a bench or bed.
- Begin with the arms facing down toward the floor, slightly in front of the shoulders, as opposed to directly below the shoulders, with the palms facing forward.
- Raise the arms directly to the side until they reach about the shoulder level, then slowly lower.
- The prone full can or shoulder T also known as horizontal abduction in external rotation is structured to provide dynamic stability, optimal muscle length, & tension, & proper positioning of the scapula & shoulder girdle.
T-Band Rows Exercise
- To do this exercise you have to Wrap a band surround a pole or any stable object at belly button level.
- Grab on to both ends of the band so that there is the same length on both sides, while also maintaining tension in the band at the starting position.
- Begin with the elbows extended with a straight trunk (maintained throughout), & then take the elbows straight back, keeping them tucked in.
- Pinch the shoulders while pulling the band beside. Imagine trying to contract a pencil between the shoulder blades.
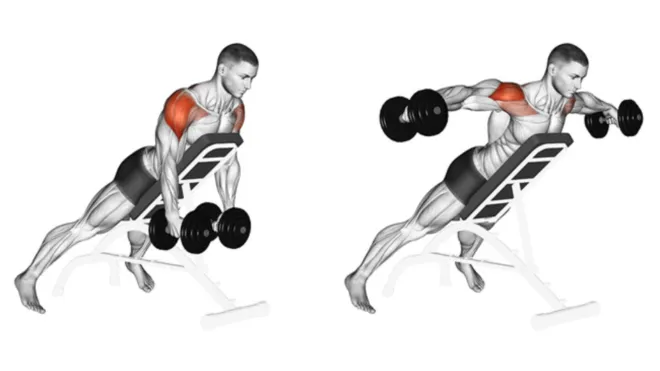
Incline Reverse Lateral Dumbbell Raise Exercise
- To do this exercise you have to Lie face downwards on an inclined bench.
- Hold a dumbbell in both hands below the chest with the arms fully straight.
- Elevate the arms to shoulder level, arcing the weights away from each other.
- Return to the starting position.
Band Pull-Aparts Exercise
- Holding an exercise band in the hands, elevate the arms to shoulder level.
- Slightly bend the elbows & keep the shoulders relaxed during the entire exercise regime.
- Stretch the band across the chest keeping the arms parallel to the chest.
- Repeat this exercise more times.
- Gradually upgrade the exercise level by using tougher bands.
Bent-Over Lateral Raise [Reverse Fly] Exercise
- The patient is in a standing position with the feet hip-width apart.
- The patient is holding a dumbbell in each hand at the side.
- Hinge at the hip joint, keeping the back flat & allowing the arms to hang straight down with the palms facing each other.
- With the elbow joint slightly bent, raise the arms out to the sides till they parallel with the back.
- Slowly lower the weights & repeat this exercise.
High-to-low rows Exercise
- To do a high-to-low row attach a resistance/elastic band to some stable object at or above shoulder level. Be sure it is safe so it does not come to loss when you pull on it.
- Get down on a single knee so the opposite of the injured arm is elevated. The body & lowered knee should be aligned. Rest the other hand on the raised knee.
- Grab the band securely with the arm outstretched, & move the elbow toward the body. The back should be straight & squeeze the shoulder blades together & down as you pull.
- The body should be steady as compared with the arm.
- Return to start & repeat 2 sets of 15 reps.
Push-Up Plus Exercise
- Hold/Maintain self in a push-up position: here, the body is horizontal, facing downwards, arms extended with the shoulders wide apart. Keep the head in a straight line with the spine.
- Extend the shoulders to the front & squeeze the shoulder blades to bring self up. Keeping the arms extended, let gravity bring you back to the starting position. Repeat the exercise 10-20 times per day.
Pull-Ups Exercise

- If you are a beginner at pull-up exercises, there are ways to modify to movement & slowly build the strength to lift the entire body.
- Start by putting a chair or step stool beneath the pull-up bar. put the hands wider than the shoulders, prop one foot (or both feet if needed) on the chair & use that leverage to pull the body up.
- Lower & repeat for 10 or more res.
- Over time, you can try using less from the lower limb & more from the upper limb.
- Try this modification, Use a table or a chair to pull own self up into position & then slowly lower your own self down without the chair.
- These are known as negatives, which are a nice way to build upper limb strength.
Shoulder abduction isometric exercise
- This exercise mostly targets your rotator cuff muscles.
- To perform shoulder abduction you stand six inches away from the wall.
- Then turn your body perpendicular to the wall & close to the wall at the side which is affected by the shoulder joint side.
- Make a fist on that side & press the towel into it.
- You are also using a folded towel for extra support.
- You are only gently pressed into the wall & try to lift your arm outside.
- Hold this pressure for 10 seconds & slowly release pressure from the wall.
- Do the 10 to 15 repetitions.
Rowing Barbell exercise
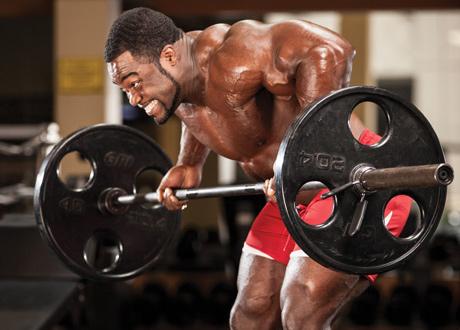
- While dumbbells allow you to work both sides separately, a barbell allows you to lift a healthier weight than you would with different weights.
- For this exercise, you have to grab the barbell with the palms facing the body & tip from the hips until the trunk is at near a 45-50 degree angle.
- You do not want to lower the trunk too far because that can strain the back, especially if the weight is heavy.
- The knees should be flexed to protect the back, take the barbell straight out & then squeeze the back to pull the barbell in towards the umbilicus.
- Repeat for 10 to 20 reps. You can also perform this movement with the palms outwards, as in a biceps curl.
High Cable Reverse Crossover Fly Exercise
- Begin with both handles at head height on the cable machine
- Stand seeing in the center of the two-pulley machine
- Reach up & across the body with both hands grabbing the handles with an overhand grip (or grab the cables)
- Pull the elbows down, out & back as far as possible until the arms are in line with the back
- Slowly return to the initial position
- Complete the 5 to 10 repetitions.
- Repeat 3 sets at a time.
Cable Supine Reverse Fly Exercise
- Begin with a bench in the center of 2 pulleys
- Reach up across the body grabbing both handles(cable) with an overhand grip
- Lie down on the bench with the arms crossed above the chest with the elbows slightly bent
- Pull the arms down to the sides until the elbow is level with the shoulders, keeping the arms perpendicular to the torso
- Slowly return to the initial position
- Complete the 5 to 10 repetitions.
- Repeat 3 sets at a time.
Underhand Yates Row Exercise
- Hold a barbell with both hands using an underhand grip at shoulder width
- Bend & the knees & hinge forward at the hips at 45 degrees
- The arms should be almost fully extended with the bar over the thighs
- Pull the bar up to the waist
- Now stop at the top then slowly return to the initial position
- Complete the 5 to 10 repetitions.
- Repeat 3 sets at a time.
Scapular Retraction/Protraction movement
- You are lying on your stomach means in a prone position on a table & bed with your injured arm hanging over the side.
- Must keep your elbow joint straight & lift the weight slowly.
- Try to squeeze your shoulder blade toward the opposite side as you can possible.
- Then return slowly to the starting position & repeat this exercise.
- Do this exercise 2–3 times per day.


5 Comments