
Sciatica Pain Physical Therapy Treatment & Exercise, Yoga Position:
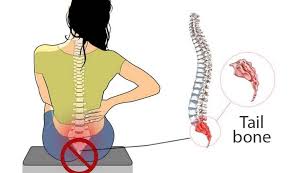
Sciatica pain is caused by the irritation or compression of the sciatic nerve, the largest nerve in the body. The sciatic nerve is formed by the joining of the nerves from the spinal cord that run through the lower back, hips and buttock area to the legs. The sciatic nerve is responsible for transmitting signals from the spinal cord to the lower body to give us sensation, such as feeling heat, cold and pressure. The sciatic nerve is a single nerve that runs down the buttocks and extends down the backs of the legs to the feet.
if you have sciatica pain, Physical therapy treatment and exercise is the best option for you if you want to relieve pain non-surgically, Physical therapy is a natural way recover from pain and irritation.
Table of Contents
Goals of the Physiotherapy treatment into the treating Sciatica :
- It is help to the strengthen & mobilize to the tissues into the lower back,buttocks,pelvis, thighs & abdomen .
- Goals of to the physiotherapy :
- Restore to the pain-free functional movement of the patterns .
- Relieve to the buttock ,lower back, thigh & leg pain .
- Restore to the function of to the lumbar spine & the sacroiliac joint .
- Improve to the mobility of to the lower body .
- Foster to a better healing environment in to the lower back .
- Promote to the neurological adaptations to the reduce the perception of pain .
- Prevent form to the future pain flareups .
- Reduce to the fear associated with the movement .
For the pain relief use the :
- In the Strengthening exercises = include to the body weight & resistance exercises for to the strengthen the muscles of the low back, abdomen,legs & hips.
- In the Isometric exercises = involve to the contracting of the muscles without to moving to the joints.
- Examples of the isometric exercises are bridge hold or a plank .
- This exercises is help to the strengthen of to the muscles when the symptoms are to more acute.
- In the Isotonic exercises = involve to the contraction of the muscle to the resist to a constant load
- Use to the resistance bands & weight training which is to the help increase form the muscle strength through to constant resistance of to the specific motions.
- In the Functional retraining = involve to reintroducing movements.
- Like as to the lifting,bending ,squatting & carrying.
- Use to the proper technique & healthy movement patterns for to incorporated of to the reduce pain & prevent to re-injury.
- In the Nerve glides = nerve mobilization involves to the active or passive techniques onto the symptomatic nerve when to the its placed into & out of the tension to the facilitate movement for to the reduce symptoms.
- Into the Joint mobilization = it is a manual therapy technique into the which to the therapist applies to the pressure on to the a joint for to the mobilize & produce to the therapeutic effect.


- In to the Joint manipulation = it is to a manual technique in to the therapist is applies to the a quick & thrust force onto the end range of the motion for to the joint which is promote to the pain relief & restore of to the normal movement.
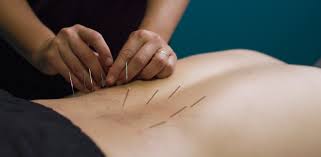
- Dry needling = it is a technique in which to the certified for to the healthcare provider us to the a small needle for to the target a trigger point in to the muscle.
- The technique is performed for to release the hyper-irritable & hyper-contracted muscle tissue for to the reduce the pain.
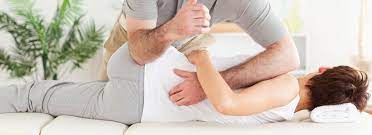
- Muscle energy technique = it is a form of to the manual therapy.
- In this technique involves to the patient which is performing by to the gentle muscle contractions into the conjunction with the therapist move to the painful joints through to a specific ROM .
- This technique is help to the reduce pain & restore the function.

- Myofascial release & soft tissue mobilization = in this technique include to the therapist which is used to the hands & instrument to the mobilize of the tissues in to the lower back,legs or hips .
- Treat to the facial restrictions & decrease to the muscle tension & spasm.
- Gait training = in this training involve analysis of the walking technique & retraining for the correct the gait patterns.
- In This technique also include the video analysis.
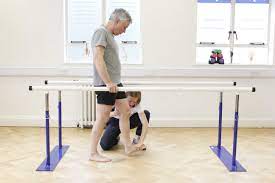
- Active assisted range of motion = in this motion involves the therapist is perform the assisted ROM movement of the parts of the lower body like as to the hip & legs.
- This technique is helps to facilitate the movement of the specific joints & muscles.
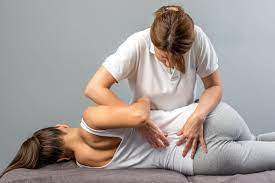
- Deep tissue massage = it is targets to the specific spinal muscles & fascia of the muscular connective tissue into the lumbar spine hips &buttocks which is to the compressing of the the sciatic nerve .
- The therapist apply to the direct pressure & friction for to release the tension into the soft tissues
- Apply to the deep tissue massage around to the gluteal area of the buttock .
- It is also involve the application of direct pressure for a release of the tension of the muscle group.
Physical therapy Modalities to relieve Sciatica Pain :
Hot & cold therapy :
- Heat pack = Use to the heat therapy for to the seeks to the get to the more blood for to the target area.
- Then more bloods are flow to brings to the more oxygen & nutrients for to the area.
- Like as to heat pack is placed onto the piriformis muscle.
- It is help to reduce the muscle spasms .
- Cold therapy = it is slows for circulation .
- Help into the reduce inflammation .
- Muscle spasms.
- Pain.
- Physiotherapist is apply to alternate between hot & cold.
TENS (trans cutaneous electrical nerve stimulation) :
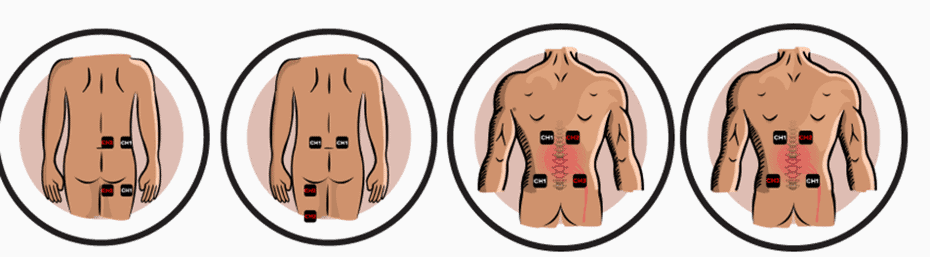
- This machine is that stimulates to the muscles group through to the variable intensities of the electrical current.
- This machine is help to reduce muscle spasms .
- It is increase to the body’s production of the endorphins then it is become to the body’s natural painkillers.
- Patient is also use this machine in to the at to the home if to at the necessary.
Ultrasound Therapy :

- This therapy machine is generates to the sound waves which is travel into the deep muscle tissues .
- Then this machine is creates to a gentle heat which is enhances to the circulation & helps into the speed healing.
- This circulation is also helps into the reduce the cramping , muscle spasms,stiffness , swelling, pain.
Hydrotherapy :
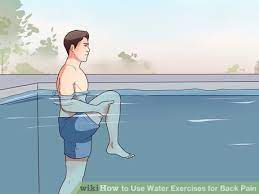
- It is is a type of the gentle exercise .
- It is uses to the gentle resistance of to the water for to the build & tone for the muscle .
- Many people do the weight-bearing exercise onto the land painful and great to success with the form of the activity.
- Types of hydrotherapy is Water aerobics & swimming
Stretching of to the Sciatica Pain physical Therapy :
- Standing Hamstring Stretch
- Lying Deep Gluteal muscle Stretch
- Knee to the opposite shoulder
- Sitting spinal stretch
- Basic seated stretch
- Standing piriformis muscle stretch
- Groin and long adductor muscle stretch
- Scissor hamstring stretch
- Sitting trunk stretch
Standing Hamstring Stretch :

- Starting position is standing
- Stand to straight up & put one to the foot on a slightly higher to the surface, like a to stair step.
- Straighten to the the leg on to the step & point to the toes up.
- Lean to the slightly forward to the while the keeping the back is straight.
- Hold for to the 20 to 30 seconds.
- Then Repeat with the other leg.
- Try to the 2 to 3 repetitions with to the each leg.
Lying Deep Gluteal Stretch :

- Starting position is supine
- Lie on to the back with legs are to bent.
- Raise to the right ankle & rest it on the left knee.
- Using to the both hands then lace the fingers behind the left thigh & gently pull it the toward the patient ,
- Then keeping to the head & back on to the floor.
- Hold for to the 20 to 30 seconds.
- Repeat this exercise with the other leg.
Knee to the opposite shoulder :

- Starting position is supine
- Lie onto the back with to the legs are extended & then feet flexed to the upward.
- Bend to the right leg & clasp to the hands are around to the knee.
- Gently pull the to the leg across to the body toward to the left shoulder.
- Hold this position for to the 30 seconds.
- Push to the knee so that the leg returns for its to the starting position.
- Repeat for to the total of 3 reps .
- Repeat this exercise with to the other leg.
Sitting spinal stretch :

- Starting position is sitting
- Sit on to the ground with to the legs are extended to the straight out with to the feet flexed to upward.
- Bend to the right knee& place to the foot flat on to the floor on to the outside of the opposite knee.
- Place to the left elbow on to the outside of the right knee for to the help the gently turn onto the body toward to the right.
- Hold for the 30 seconds& repeat to the three times.
- Repeat this exercise with the other leg.
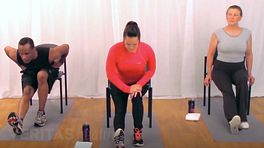
Basic seated stretch :

- Starting position is sitting .
- In to the starting position of this stretch for to the sitting down on to the chair & crossing to the painful leg over to the knee of to the other leg.
- Bend forward with to the chest & try to the hold the spine straight when it is not painful
- then try to the bend over a bit more.
- Stop to the if the patient feel to the any pain.
- Keep to this position for to the 30 seconds .
- Repeat this exercise with to the other leg.
Standing piriformis stretch :

- Starting position is standing .
- Put to the painful leg over to the knee of the other leg while the standing.
- Bend to the standing leg & try to the make to the number 4 with to the hips lowered of to the ground at to a 45-degree angle.
- Bend the waist down & swing the arms down while to the holding the back is a straight.
- Stay into the position for the 30 to 60 seconds.
- Then Switch to the legs & repeat to the exercise .
Groin and long adductor muscle stretch :

- Starting position is sitting .
- Sitting down on to the floor with to the legs are spread out to the as far as the patient is the straight in front of body .
- Place to the hands on to the floor in front of the body on to the floor & angle to the torso toward to the floor.
- Lean to the forward, leaving the elbows on to the floor.
- Hold to the position for to the 10 to 20 seconds.
- Stop this stretch if the feel to the any pain.
Scissor hamstring stretch :
- Place to the right foot about to the 3 feet behind to the left foot.
- Pull to the hips forward & push to the shoulders back, but when to the right hip is not be farther forward than to the left hip.
- A mirror is help for to the judgment for this stretch.
- Put to the hands onto the hips.
- Patient is use to the chair for to the balance
- Push to the torso a bit over to the in front of the leg by bending to the waist while keeping to the back straight.
- Keep to the weight on to the front of the leg.
- Keep the position for to the 5 to 10 seconds,
- Then repeat this stretch with to the opposite leg.
- Do this stretch for to the each leg for to the 3 to 5 times.
Sitting trunk stretch :

- Starting position is sitting
- Sit on the ground & extend the legs are straight to the out then flexing to the toes upward.
- Bend to the right knee or lift to the foot & place to the outside of to the left leg by to the knee.
- Put the left elbow on to the outside of the right knee & push into the gently
- Twisting to the toward of the right side of the body.
- Hold for to the 20–30 seconds & then to the release & switch to the sides.
- Repeat the stretch 2–3 times on the each side.
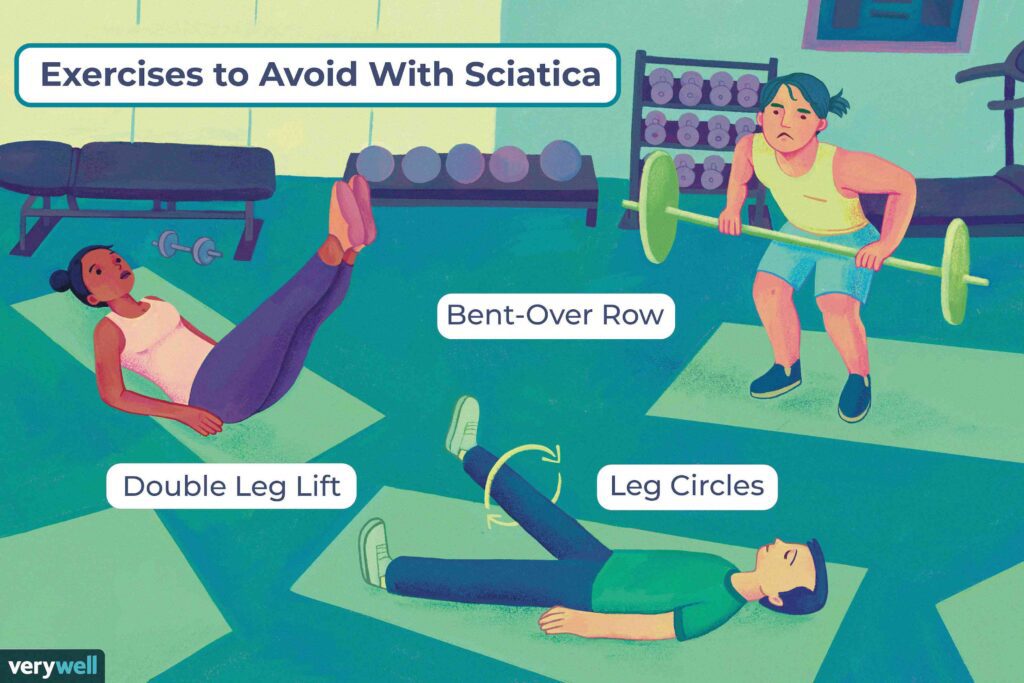
Exercise for the Sciatica Pain :
- Pelvic Tilt
- Knee to Chest
- hook lying position
- Glute Bridges
- superman position
- Curl-ups
- Pelvic Tilt
- back extension exercise
- Buttocks
- Plank
Pelvic tilt :

- Starting position is supine .
- Lie onto the back.
- Exhale & tighten to the abdominal muscles while to the push the belly button toward to the floor & flatten to the lower back.
- Hold to this position for to the 5 seconds.
- Repeat this exercise for the 10 times per one session & 3 session per day.
Knee to Chest :

- Starting position is supine .
- Lie onto the back.
- Starting with the left or right knee .
- Use the hands for to the gently pull the bent knee toward the chest.
- Hold for to the 10 seconds.
- Repeat this exercise with the opposite knee.
- Repeat this exercise for the 10 times per one session & 3 session per day.

- For the progression
- Use to the both the hands for to the gently pull of the both knees toward the chest.
- Hold for to the 10 seconds.
- Repeat this exercise for the 10 times per one session & 3 session per day .
Lower Trunk Rotations :

- Starting position is supine
- Lie on to the back with to the both knees are bent to upright & both feet flat on to the floor .
- While holding to the both the knees together
- Then rotate to the knees for to the one side & hold for the 3 to 5 seconds.
- Patient feel to the gentle stretching sensation in to the opposite side of the lower back & hip area.
- After that the contract to the abdominal muscles & rotate to the both knees of to the opposite side
- Then hold for to the 3 to 5 seconds.
- Repeat this exercise for the 10 times per one session & 3 session per day
Hook lying position :

- This position is Begin with the by positioning patient their self onto the all fours.
- Contract for to the abdominal muscle& then to help the keep the back flat & straight.
- Raise to the one leg upward behind & then straighten in to the outward.
- Hold for to the 3 to 5 seconds.
- Repeat this movement on to the opposite side.
- If the patient perform the exercise for to the 10 times with to the tolerable pain,then to the add to the arm movement with to the each leg extension then to the :
- Extend to the arm for to the opposite side from to the leg which is upward & outward into the front of to the body.
- Hold for to the 3 to 5 seconds.
- Repeat this exercise for the opposite side.
- Perform the exercise up to the 10 times.
Glute Bridges :

- Starting position is supine .
- Lie on the back onto the floor with the knees are bent.
- Then the Feet is put to the shoulder-width form apart.
- Then Relax to the arms at to the sides.
- Pushing to the through of the heels, lift to the hips until to the body forms a straight line to the knees to the shoulders.
- Hold the position for to the few seconds.
- Slowly lower to the hips of to the floor.
- Then repeat to the exercise .
- Try to the 2 or 3 sets of the 8 to 10 repetitions.
Superman position :
- Starting position is prone .
- Lie on the stomach with to the arms & legs stretched to the out.
- Raise to the one arm & opposite leg is to the together .
- Holding to this position for to the few seconds.
- Then lower to the ground
- Repeat this exercise of to the opposite side.
Curl-ups :
- Starting position is supine.
- Lie onto the back with to the knees are bent.
- Arms are to the folded on to the chest or to the held at to the back of to the head .
- Providing for to the support for to the neck.
- Then Curl up means lifting to the head & shoulders from to the ground
- This position is hold for to the 3 seconds.
Back extension :
- Starting position is prone
- Lie on to the mat on to the stomach & straighten to the legs are behind to the .
- Place to the elbows on to the ground & slide to the shoulders down.
- Lift to the upper back
- Then pressing to the hips into the mat.
- Keep to the head & neck neutral.
- Hold for to the 30 seconds.
- Then return to the starting position.
- Do the Complete 3 times in one sessions
- Do the 3 sessions per day
Buttocks Stretch:

- Starting position is supine .
- Lay on the back & bring to the right leg up to the right angle .
- Then grasping the with the both hands behind the thigh .
- Then locking to the fingers.
- Do the take left leg & place to the ankle against to the knee.
- Repeat to the opposite sides.
- Do the same procedure with the other leg.
Plank :

- Starting position is prone .
- Facing the ground .
- clasp to the hands in front of the face .
- then placing the forearms on to the ground like as the form of to the “V.”
- Walk to the feet back into the plank position.
- then keeping to the shoulders directly over to the hands, with the pelvis is tucked then core is engaged& into the body aligned.
- Hold & breathe for the at least 10 long breaths.
- then pulling into the stomach & tucking to the pelvis more with to the every exhale.
Yoga for the Sciatica Pain :
- Reclining to the pigeon pose
- Sitting pigeon pose
- Forward pigeon pose
- Child’s Pose (Balasana)
- Downward-Facing Dog
- Half Moon Pose (Ardha Chandrasana)
- Cobra Pose (Bhujangasana)
- Locust Pose (Salabhasana)
- Wind-Relieving Pose (Pawanmuktasana)
- Half Lord of the Fishes Pose (Ardha Matsyendrasana)
- Legs-Up-the-Wall pose (Viparita Karani)
- Cat-cow pose
Reclining to the pigeon pose :

- While on to the back, bring to the right leg up to a right angle.
- Clasp to the both to the hands & to the thigh, which is locking to the fingers.
- Lift to the left leg & place the right ankle onto the top of to the left knee.
- Hold this position for the moment.
- Repeat this exercise with the other leg.
Sitting pigeon pose :

- Starting position is sitting
- Sit on the floor with the legs are stretched out of the straight in front of you.
- Bend to the right leg & putting to the right ankle onto the top of the left knee.
- Lean the forward & allow the upper body for to the reach toward the thigh.
- Hold for the 15 to 30 seconds.
- Repeat the exercise with the other leg.
Forward pigeon pose :

- Starting position is kneeling
- Kneel with the on to the floor of the all fours.
- Pick up to the right leg & move it to the forward on to the ground in front of the body.
- then to the lower leg should be on to the ground for to the horizontal of to the body. right foot is place in to the front of the left knee while to the right knee stays on to the right.
- Stretch to the left leg out of the all to the way which is behind to the on to the floor .
- & with to the top of to the foot on to the ground then the toes pointing of the back.
- Shift to the body weight gradually from to the arms & to the legs so that the legs are to the supporting by the weight.
- Sit up to the straight with the hands on to the either side of to the legs.
- Repeat this exercise with to the other leg.
Child’s Pose (Balasana) :

- Starting position is sitting .
- Start onto the hands & knees.
- Bring to the knees are together & sink to the hips back onto the heels.
- Extend to the arms in front of the body or allow them to the rest along side of the body.
- Allow to the torso for to the relax completely as to the fall heavy into the thighs.
- Focus onto the deepening of to the breath for to the relax any areas of to the tightness / sensation.
- Hold for to the pose for up to the 5 minutes.
Downward-Facing Dog :

- Start on to the hands & knees.
- Press into the hands as for to the lift of the hips toward to the ceiling.
- Drop to the head down for to the bring the ears into the line with the upper arms or to the chin all to the way into the toward to the chest.
- Bend to the knees for to the tilt the pelvis slightly to the forward.
- Intuitively move to the body through to the any variations of to the feel for to the appropriate.
- Hold to the pose for up to the 1 minute.
Half Moon Pose (Ardha Chandrasana) :

- Starting position is standing
- Bend to the right knee for a bit deeper & yield to the weight into the right foot.
- Bring to the left hand to your hip.
- Slide to the left foot forward in to a few inches for to the reach of to the right hand for to the floor
- Lift to the left leg so it is parallel to the floor which is pressing out through to the left heel.
- Rotate to the torso & hip to the forward.
- Go to the deeper then lift to the left the hand up toward to the ceiling & turn to the gaze upward.
- Hold the pose for to up to the 1 minute.
- Repeat to the pose on to the opposite side
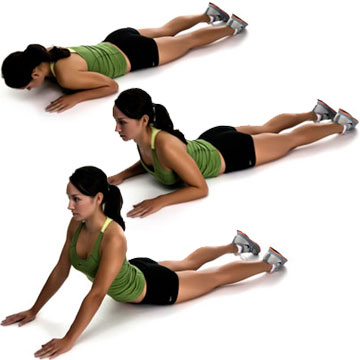
Cobra Pose (Bhujangasana) :

- Starting position is prone .
- Lie on to the stomach with to the hands under to the shoulders.
- Squeeze to the elbows into the body.
- Inhale to the lift the head, chest & shoulders.
- Maintain to the a slight bend in to the elbows & keep to the chest open.
- Engage to the thighs, lower back & abdominal.
- Hold for to the up to the 30 seconds.
- Release to the pose & rest .
- Then repeat to the 1–3 times.
Locust Pose (Salabhasana) :
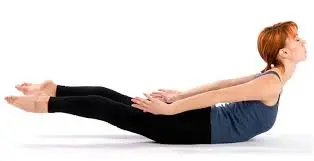
- Starting position is prone
- Lie onto the stomach with to the fingers interlaced at the base of the spine.
- Slowly lift the chest, head & arms up as to possible .
- Bring the arms up &away from the body.
- go to the deeper then raise the both of the legs
- Engage with to the glutes, lower back & abdominals.
- Hold for up to the 30 seconds.
- Release to the pose& return to the starting position.
- then Rest & relax of the body for a few breaths while to the gently moving to the hips from to the side to side.
- Repeat to this pose 1–2 times.
Wind-Relieving Pose (Pawanmuktasana) :
- Starting position is supine .
- Lie on to the back & draw to the tees together as to the reach of the hands around to the backs of the thighs or around to the shins.
- If to the hands are reach then & to the fingers or take to the of the opposite elbows.
- for To the deepen the stretch, lift to the head & tuck the chin into the chest.
- Hold the pose for up to the 1 minute.
Half Lord of the Fishes Pose (Ardha Matsyendrasana) :
- Start into the sitting position.
- Bring the right foot of to the outside of the left hip with the knee pointed forward to the side.
- Move to the left foot of to the outside of the right thigh.
- Bring to the left hand for to the floor behind then staying supported onto the fingertips.
- Wrap to the right arm around to thee left thigh & bring it to the outside of the left thigh.
- With during to the inhale then lift & lengthen to the spine.
- With during to the exhale then to the twist a bit more to the move more deeply into the pose.
- Turn to the head for to the gaze into the any direction.
- Hold for up to the 1 minute.
- Repeat this pose for the opposite side.
Legs-Up-the-Wall pose (Viparita Karani) :

- Starting position is sitting
- Sit with the right side against to the wall.
- Lie to the back & swing to the legs up along to the wall,
- bringing to the hips close to the wall for to the comfortable.
- Place on the pillow or on the folded blanket under the head.
- Bring the arms into the any comfortable position.
- Allow the body for to the fall heavy
- Remain in this pose for up to the 20 minutes.
Cat-camel pose :

- Get down to the all fours with the knees & hands on the floor.
- Then back & neck is in to the neutral & straight to the position.
- Inhale & slowly to the tighten to the lower abdomen
- rounding to the back towards to the ceiling.
- Hold the position for the 5 seconds.
- Exhale & release then returning to in the neutral position.
- Inhale & arch to the lower back the slightly, pointing to the tailbone out.
- Hold the position for the 5 seconds.
- Exhale & release .
- after that the returning of to the neutral position
- Repeat the process for to the 5 to 10 times.
The website is very effective for Physiotherapy guidance and quality knowledge required at the workplace. I really benefitted from the content, and looking forward to working with you. Thank you!