Thoracic Examination
Table of Contents
Introduction
Thoracic Examination is an important part of diagnosing thoracic spine-related conditions such as Kyphosis, scoliosis, and others. Examination of the thoracic spine helps to rule out other related conditions and make a treatment plan more specific for a speedy recovery.
In the Thoracic examination, the Physiotherapist checks the medical and family history of the patient, subjective and objective examination by performing various tests for the exact diagnosis of the conditions, and also prescribed imaging tests (x-ray, MRI) if needed.
- The role that the thoracic spine plays in the body is complicated and frequently neglected. It is an essential region for rotational movement within the body and load transfer between the upper and lower bodies.
- Should be evaluated and treated as a whole, including the rib cage and the spine.
- Muscle and connective tissue attachments from the head, neck, shoulder blade, clavicle, lumbar spine, and pelvis, as well as connections to organs in the rib cage and abdomen, take place in the thoracic region.
- It helps you breathe, protects your vital organs, and is connected to your emotions and the nerves that control your “fight or flight” response.
Initial Diagnosis
- When observing and evaluating a patient, be aware of the most common causes of thoracic spine pain so that you can screen for them and begin the process of elimination toward diagnosis.
- A tear or strain; a sprain of the disc or the zygapophyseal (facet) joint in the spine; a strained rib joint; muscle soreness
- Reduced thoracic mobility could be brought on by; zygapophyseal joint capsules, ligamentum flavum, and the dimensions of the vertebral bodies are all components of the rib cage.
Scheuermann’s Kyphosis
- Definition
- Scheuermann kyphosis, also known as Scheuermann disease, juvenile kyphosis, or juvenile discogenic disease, is a condition of hyperkyphosis characterized by anterior wedging of greater than or equal to 5 degrees in three or more vertebral bodies that are adjacent to one another.
- Most of the time, the thoracic spine is affected, but the thoracolumbar/lumbar region can also be affected.
- Adolescents between the ages of 12 and 17 who present with a postural deformity or “hunchbacked” appearance typically receive a diagnosis.
The most common cause of kyphotic deformity in adolescents is Scheuermann’s disease, which is characterized by pain in the affected hyperkyphotic region. - Scheuermann’s kyphosis has two main types.
- Most commonly, the thoracic form has an apex between T7 and T9.
Second, the thoracolumbar form is more likely to last into adulthood and can occur with an apex between T10 and T12. - Relevant to Clinical Practice
- The adult spine naturally has an S-curve. Lordosis affects the cervical and lumbar regions, while kyphosis affects the thoracic and sacral regions. The thoracic spine has a kyphosis of 20 to 40 degrees, according to the Scoliosis Research Society. When the curve is greater (or smaller) by the aforementioned degrees, it is considered a spinal deformity.
- A structural deformity of the spine and vertebral bodies is Scheuermann’s disease. The thoracic kyphosis will be between 45 and 75 degrees. Additionally, there will be more than five degrees of wedging between three or more adjacent vertebrae. The rigid hyperkyphosis that we see in Scheuermann’s disease is characterized by bodies that are wedge-shaped. Lumbar and cervical hyperlordosis can alleviate hyperkyphosis.
- Clinical Presentation
According to Sorenson, the following characteristics characterize Scheuermann’s kyphosis: - There may be no evidence of congenital, infectious, or even traumatic disorders of the spine. Three or more adjacent vertebrae must be wedged at least 5 degrees.
- Postural deformity and possibly subacute thoracic pain will typically accompany the adolescent’s presentation, with no discernible trigger. The pain gets worse when you work, but it gets better when you rest.
- The deformity is typically noticed by the child, parents, or on a school screening exam in the early to mid-teen years.
- The examination reveals a rigid hyperkyphotic curve that is accentuated by forward bending.
- The “rigid” nature of hyperkyphosis is further supported by the fact that it does not improve when lying prone or supine or in an extension position.
Scoliosis, cervical or lumbar hyperlordosis, and tight hamstrings might also be found on an exam. A comprehensive neurologic examination is required, despite the fact that neurological deficits are uncommon.
stiffness and exhaustion of the muscles, particularly at the end of the day. - The torso’s flexibility is reduced.
Heart and lung function can be compromised in severe cases, as can severe neurological symptoms. Extremely uncommon are these symptoms. - Due to pain or the presence of a deformity that affects their cosmetic appearance, Scheuermann’s disease patients may also complain that they are unable to engage in physical activity, work, or daily activities.
- Due to skin friction on chair backs, it is possible to observe cutaneous skin pigmentation in the region of greatest curvature.
There are conflicting reports regarding the severity of pain and physical disability associated with Scheuermann’s kyphosis, which has no clear natural history. - Diagnostic Procedures
The essential components for evaluating Scheuermann kyphosis include a history, physical, and AP/lateral radiographs. For diagnosis, lateral radiographs are required, and the following diagnostic criteria are used: - Rigid hyperkyphosis greater than 40 degrees Anterior wedging greater than or equal to 5 degrees in three or more adjacent vertebral bodies Other Associated Findings Noted on AP/Lateral Radiographs Irregular vertebral endplates Schmorl nodes Loss of disc space height Scoliosis
- Spondylolysis/spondylolisthesis Disc herniation Although MRI is typically not required, it can be useful for further evaluation Typically, CT imaging is not required. The diagnosis of Scheuermann kyphosis does not also require specific histologic or laboratory findings.
- Examination
Thoracic kyphosis is the most important characteristic of Scheuermann’s disease patients. - Often, kyphosis is accompanied by hyperlordosis in the lumbar or cervical region.
- A head protrusion can cause cervical lordosis to worsen. The majority of the shoulders are positioned anteriorly.
Mild to moderate scoliosis may accompany these abnormalities.
When compared to those with postural kyphosis, Scheuermann’s disease patients have more muscle mass. - The questions on the exam are:
- Assessment of posture: an examination of the posture from all angles, including the front, back, and sides Neurological screening: Rarely, at the apex of the curvature, the spinal cord can be stretched over the posterior aspect of the vertebral bodies, causing neurological signs of imminent paraplegia with clonus and hyperreflexia.
- Adam’s test of forward bend: Scoliosis can accompany Scheuermann’s kyphosis.
- Tests of muscle length: Tightness in the M. pectoralis, M. hamstrings, M. suboccipital, and hip flexors can be signs of the disease, as can contractures in the anterior shoulder and hip.
- Length of movement: Abilities and changes over time can be tracked with the spine and extremity flexibility.
Tests of muscle strength: It is necessary to assess the strength of the gluteal, abdominal, core, and trunk extensor muscles.
Posture
- Proper posture is more than just standing up straight to look your best.
- It plays a crucial role in your long-term health.
Whether you’re moving or sitting still, you can avoid pain, injuries, and other health issues by holding your body correctly. - What is posture?
A composite of the positions of the various body joints at that point is posture, which is the relative disposition of the body at any given moment. The positions of the other joints are influenced by the positions of each joint: - Proper posture: The position in which each joint experiences the least amount of stress Any static position that puts more strain on the joints. There are generally two kinds of posture:
- Supine position: The body and its parts are kept in certain positions and aligned. Standing, sitting, lying, and kneeling are all examples.
Adjustable posture: Walking, running, jumping, throwing, and lifting are all forms of body movement. - Assessment of Posture The spine’s position is crucial to good posture. There are three natural curves in the spine: the neck, the middle/upper back, and the lower back. These curves should be maintained, not increased, by good posture. The top of your shoulder should be above your hips and your head should be above your shoulders.
- The line of gravity ought to pass through particular parts of the body in the ideal posture. Using a plumb line to measure the body’s midline, can easily be observed or evaluated.
- The earlobe, the shoulder joint, the hip joint, the greater trochanter of the femur, a little anterior to the midline of the knee joint, and then anterior to the lateral malleolus should all be along this line.
- The body should theoretically be divided into two equal halves by the vertical line passing through its center of gravity when viewed from either the front or the back, with the body weight evenly distributed between the two feet.
In the anterior, lateral, and posterior views, posture should be evaluated for symmetry and rotations or tilts. Assess: - Alignment of the head, cervical, thoracic, and lumbar curvature, shoulder level and pelvic symmetry, hip, knee, and ankle joints, and
The ears ought to be in line with the shoulders and the shoulders ought to be in line with the hips. The shoulders ought to be relaxed, and the elbows ought to be close to the sides of the body. The angle between the elbows, the hips, and the knees ought to be about 90 degrees. - The feet ought to be flat on the floor, the forearms ought to be parallel to the floor and the wrists ought to be straight. The feet ought to rest comfortably on a surface.
Less frequent reasons: Thoracic outlet syndrome, rib or compression fractures, and T4 syndrome
- Ribs
Introduction to the Ribs The thoracic cavity’s bony framework is the ribs. - The thoracic organs are protected by the ribs, which are the main structure of the thoracic cage. However, their primary function is to facilitate respiration.
Twelve pairs of ribs are present. - Through the costovertebral joint, each rib articulates posteriorly with two thoracic vertebrae. The first rib only articulates with the first thoracic vertebra, which is an exception to this rule.
- The ribs are divided into three groups based on how they attach to the sternum: floating, false, and true ribs
- The ribs that straightly articulate with a sternum with the costal cartilages are the true ribs—ribs 1 through 7. The sternocostal joints allow them to articulate with the sternum. That doesn’t apply to the first rib; It is a synarthrosis, and the costoclavicular joint allows the first rib to directly articulate with the clavicle.
- The false ribs (8, 9, and 10) are the ribs that indirectly articulate with the sternum because their costal cartilages connect with the seventh costal cartilage.
The sternum and the floating ribs (11, 12) are completely unarticulated (distal two ribs).
Osteoporotic Vertebral Fractures
- Definition
According to the National Institute for Health and Care Excellence (NICE) clinical guidelines, osteoporotic (fragility) fractures are fractures caused by mechanical forces that would not normally cause a fracture. - Spinal column vertebral compression fractures (VCFs):
- Occur as a result of a biomechanical failure of the bone as a result of an axial/compressive (and, to a lesser extent, flexion) load, resulting in a fracture.
compromise the anterior column of the spine, compromising the anterior half of the VB and the anterior longitudinal ligament (ALL).
Avoid involving the posterior osseous ligamentous complex or the VB’s posterior half. A burst fracture and a compression fracture are distinguished by the former.
Most of the time, they are regarded as stable and do not require surgical instruments. - Clinical Signs and Symptoms
Vertebral fractures are characterized by pain and limited mobility. - Back pain is a common symptom of a vertebral fracture in elderly patients. Reduce while lying on your back.
- Up to 70% of vertebral fractures may not cause notably severe symptoms, and three-quarters of patients do not seek medical attention.
acute pain and height loss. The osteoporotic fractured vertebra’s height loss can be moderate (25-40%), severe (>40%), or mild (20-25%). Although any vertebra can be affected, the thoracolumbar region is typically affected. - Acute fracture pain typically lasts from four to six weeks and is characterized by severe pain at the fracture site.
The pain goes away in six to twelve weeks. - Patients with multiple compression fractures decreased height, and low bone density (also caused by structural changes or osteoarthritis) may also experience chronic pain.
- It’s possible that radiographic VCF doesn’t show any symptoms. The likelihood of suffering pain and becoming disabled is higher the more severe the deformity.
- Patients feel pain as they lose height because the rib cage presses down on their pelvis.
Patients may experience early satiety and weight loss as a result of their exaggerated thoracic kyphosis and/or lumbar lordosis which may also reduce their exercise tolerance. - Sleep problems, low self-esteem, and depression are all possible outcomes.
Self-care may become challenging. - Linked to an increase in both mortality and morbidity.
Thoracic Outlet Syndrome (TOS)
- Definition
- Definition of Thoracic Outlet Syndrome (TOS) Compression of the neurovascular structures as they exit the thoracic outlet (cervicothoracobrachial region) is referred to as “thoracic outlet syndrome.” The first rib is inferior, the middle scalene muscle is anterior, and the anterior scalene muscle is anterior.
- One of the most contentious issues in musculoskeletal medicine and rehabilitation is this condition. The definition, incidence, pathoanatomical contributions, diagnosis, and treatment of the disease are all topics of contention in this debate.
- The compressed structure is not specified in the term “TOS.” The two main types of TOS identified by the researchers are the neurological form, which occurs in more than 95-99% of all cases of TOS, and the vascular form (arterial or venous), which raises few diagnostic issues. Therefore, the term “arteriovenous TOS,” “venous TOS,” or “neurogenic” should be used to distinguish the syndrome.
- Anatomy of Clinical Relevance
The Interscalene Triangle is the most proximal and first narrowing area: The anterior scalene muscle extends anteriorly, the middle scalene muscle extends posteriorly, and the medial surface of the first rib extends inferiorly around this triangle. Both the anterior and middle scalene muscles’ insertions in the first rib, can result in overlap, and the presence of the scalene minimus muscle can result in a narrow space and, consequently, compression. This space is shared by the subclavian artery and the brachial plexus. - The costoclavicular triangle, also known as the second passageway, is bounded anteriorly by the middle third of the clavicle, posteromedially by the first rib, and posterolaterally by the upper scapula border.
- This costoclavicular region is traversed by the subclavian vein, artery, and plexus brachialis before further entering the subcoracoid space. Distal to the internal scalene triangle only. Congenital defects, injuries to the first rib or clavicle, and structural changes in the subclavian muscle or the costocoracoid ligament all have the potential to compress these structures.
- The subcoracoid or sub-pectoralis minor space is the final passageway: Under the coracoid process, just below the pectoralis minor tendon, is this final passageway.
- The coracoid process to the superior, the pec minor to the anterior, and the ribs 2-4 to the posterior form the boundaries of the thoraco-coraco-pectoral space. During hyperabduction, neurovascular structures may be compressed due to a narrowing of this final space caused by a shortening of the Pectoralis Major.
- The thoracic outlet can also be compromised by certain anatomical abnormalities. Congenital soft tissue abnormalities, clavicular hypomobility, and functionally acquired anatomical changes are among these. The neurovascular structures located within the thoracic outlet may be compressed or strained by abnormal soft tissue (such as hypertrophy, a broader middle scalene attachment on the first rib, or fibrous bands that increase stiffness, for example).
- Clinical Presentation
Due to the location of the nerve or vessel involvement, the clinical presentation of thoracic outlet syndrome varies from patient to patient. In severe cases, complications can be life-threatening to the limbs and range from mild pain and sensory changes. - Pain between the neck, face, and occipital region, or into the chest, shoulder, and upper extremity, as well as paresthesia in the upper extremity, are common symptoms of thoracic outlet syndrome. Additionally, the patient may express a sense of heaviness in the arm and hand, weakness, or absence of sensation. Additionally, the skin may be discolored or blotchy. Additionally, a distinct temperature can be observed.
- When the arm is abducted overhead, externally rotated, and the head is rotated to the same side or the opposite side, symptoms are typically worse. Consequently, activities like overhead throwing, tennis ball serving, painting the ceiling, driving, and typing may make symptoms worse.
- The side of the neck experiences pain when the upper plexus (C5,6,7) is affected, and this pain may spread to the ear and face. The pain frequently extends anteriorly over the clavicle and pectoralis and posteriorly to the rhomboids from the ear. The radial nerve may be affected by the pain moving laterally. When the upper plexus is affected, headaches are common.
- Typically, patients with involvement of the lower plexus (C8, T1) experience symptoms that begin in the anterior and posterior regions of the shoulder and extend down the ulnar side of the forearm into the hand, including the ring and small fingers.
- There are four distinct types of thoracic outlet syndrome, each with its own set of symptoms. Unless there is nerve root involvement, which will be crucial in determining your PT diagnosis and planning your treatment, TOS typically does not follow a dermatomal or myotomal pattern.
T4 Syndrome
- Introduction
Introduction to T4 Syndrome When all other diagnoses do not fit the clinical pattern, T4 syndrome is a diagnosis of exclusion. Upper limb paraesthesia, weakness with reduced thoracic movement, and tenderness on palpation of the T4 vertebra are uncommon symptoms. - At first, it was thought that sympathetic nerve fibers converged at T4 to cause these symptoms. It is believed that sympathetic outflow from T1 to T4 reaches the head and neck. T2 to T5 are thought to supply the upper trunk and limbs. The symptoms in the neck, head, and upper extremities may be due to this.
- Relevant to Clinical Practice Anatomy
A typical thoracic vertebra has six joints with adjacent vertebrae: four symphyses and four synovial joints - In the thoracic region, the joints are oriented vertically and limit flexion and extension while facilitating rotation. There are two main types of joints between the vertebrae: symphyses between the vertebral bodies and synovial joints between articular processes.
- The respiratory, visceral, and lower back areas are primarily innervated by the thoracic spinal nerves; however, T1 and 2 also supply some of the upper limbs.
- Conditions of the heart or lungs (pneumothorax, pulmonary embolism), peptic ulcers, tumors, and mesothelioma following asbestos exposure are red flags.
- Thoracic Back Pain Red Flags
Introduction
Red Flags for Thoracic Back Pain Introduction Unlike neck or low back pain, thoracic back pain is more likely to be brought on by a serious underlying condition. - Poor posture or injuries sustained during overuse are two common causes of thoracic spine pain.
These conditions typically resolve on their own, but a small number of patients present with thoracic spine pain as the first sign of more serious pathological conditions. A differential diagnosis should be made to rule out other causes of pain and, most importantly, situations that could be life-threatening. - Due to the shared afferent innervation of the ANS sympathetic, which originates from T1-L2 afferents from the spinal cord, thoracic spine pain and visceral pain can mimic one another.
Coughing, sneezing, deep breathing, trunk movement, palpation, and compression can all result in pseudo-anginal pain in segments T4–T7. - What Are Warning Signs?
Commonly referred to as “red flags,” red flags are clinical indicators that should raise the concern that there may be a more serious underlying medical issue presenting as common, non-serious musculoskeletal conditions. - The following are indicators of serious spinal pathology:
- Recent violent trauma (like an accident in a vehicle or a fall from a height).
Osteoporosis patients may experience mild trauma or even strenuous lifting.
Age at onset is between 20 and 50 (new back pain).
cancer, drug abuse, HIV, immunosuppression, or prolonged corticosteroid use in the past - Constitutional symptoms like fever, chills, an undiagnosed loss of weight
recent infection with bacteria. - That’s the pain: Permanent, severe, and advancing; non-mechanical, requiring neither bed rest nor a change in posture; despite treatment for two to four weeks, unchanged; accompanied by severe morning stiffness (ankylosing spondylitis and rheumatoid arthritis).
- Deformity in the structure.
the neurological impairment that is severe or progressing in the lower extremities.
Functional Anatomy
- The thoracic spine and ribcage serve the following roles:
- ventilation of the lungs, protection of the heart, lungs, and viscera, and a stable foundation for the attachment of the upper limb, head and neck, vertebral column, and pelvic muscles. despite the loss of mobility).
- The spine of the chest:
- Lies in the space between the inferior lumbar spine and the superior cervical spine. It has 12 vertebrae, and the bodies of the thoracic vertebrae are medium in size and have the shape of a heart. They usually get bigger from the top to the bottom to support more weight.
- Possess sides with articular facets for articulation with the rib heads.
- There are twelve pairs of ribs in the rib cage:
- 1st through 7th ribs: true) attach directly to the eighth and tenth ribs of the sternum: articulate with the sternum by using the costal cartilages that are located above the 11th and 12th ribs: floating ribs due to their lack of sternal attachment.
Subjective Assessment
- Symptoms (Recorded on a Body Chart) Area Distribution May run horizontally across the chest or along the course of a rib.
- Thoracic spine, scapula, or sternum Upper limbs (upper cervical spine) Lower limbs (lower cervical spine) Clear all other relevant areas and mark with ticks
- Type Quality Intensity VAS Pain diary may be helpful for chronic pain patients Depth Abnormal sensation Paraesthesia Numbness Constant/Intermittent If, constant, check whether there is variation in the intensity of symptoms Constant unremitting pain may be indicative of neoplastic disease Behaviour Ag The condition is deemed non-severe if the patient is able to maintain a position that reproduces the symptoms.
- Irritability
- If the patient is unable to maintain their position, the condition is deemed severe, and no overpressures should be applied. The condition is considered non-irritable and all movements can be tested if symptoms subside immediately upon provocation.
- If symptoms subside within a few minutes, the patient is irritable, and only a few movements should be attempted to avoid aggravated symptoms for 24 hours: Symptoms at night, in the morning, and at night (stiffness and pain in the morning for a few minutes suggest spondylosis, and stiffness and pain for a few hours suggests inflammatory processes like A.S.)
- Do symptoms of pillows affect sleep? Mattress: how firm or soft?
improving, remaining the same, or deteriorating. - Red Flags
- Due to the shared afferent innervation of the ANS sympathetic, which originates from T1-L2 afferents from the spinal cord, thoracic spine pain and visceral pain can mimic one another.
- Coughing, sneezing, deep breathing, trunk movement, palpation, and compression can all result in pseudo-anginal pain in segments T4–T7.
- The Fear-Avoidance Beliefs Questionnaire (FABQ), which can be used to screen for behaviors that may necessitate a consultation or an extension of treatment, can be found in Thoracic Back Pain Red Flags and Yellow Flags.
- It has been discovered that the physical gains made in therapy have reduced changes in quality of life and raised rates of disability in patients who are involved in ongoing litigation.
Investigation
- Standard thoracic spine radiographs should be taken for patients who present with acute thoracic spine pain and have risk factors for osteoporotic compression fractures. Investigations looking for serious pathology Diagnostic imaging considerations
- Acute compression fractures can be detected with precision on radiographs; However, if the patient’s initial radiographs were interpreted as normal but they continue to experience extreme pain or symptoms, you should think about getting them referred for more advanced imaging, such as a CT or MRI.
- To rule out cancer, patients with suspicious symptoms should be referred for imaging.
- Typically, patients with a suspicion of Ankylosing Spondylitis are referred for sacroiliac joint radiographs and laboratory tests, such as testing for HLA-B27.
Objective Examination
Observation
- When sitting or standing, this should be observed objectively from the front, behind, and sides.
- The examiners look at the patient’s thoracic spine and look for deviations from normal, such as frontal and sagittal thoracic spine curvatures.
According to a study, the overall impression of inter-rater reliability for kyphosis postural observation and labeling as excessive, normal, or decrease ranges from moderate to substantial. - Focusing on some of the following: symmetry, Cx/Tx/Lx curvatures, spine deviations, shoulder levels, shoulder girdle, GH joint position, level of the pelvis, limb position, muscle bulk, and tone (compare sides, hand dominance), soft tissues (skin color and quality, swelling, scars), gait (Trendelenburg gait, short leg gait), and attitudes and feelings.
Movement Patterns
- Patterns of Movement The examiner may request that the patient perform the following movements to check for any symptoms of change: Observing the sky, moving from a seated to a standing position, raising one or both arms above one’s head, and any other actions that either aggravate or alleviate symptoms Observe for any side-to-side deviations, compensations, or discrepancies while the patient performs these movements.
- After a trial intervention, any of these movement patterns can be used as an asterisk or other similar sign for reevaluation.
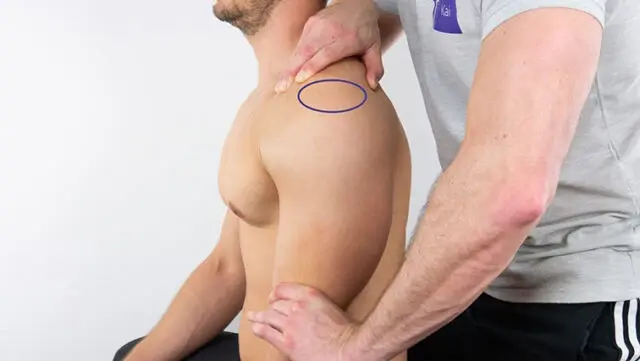
Palpation
- To begin, begin by palpating the thorax’s superficial structures before moving on to the more complex ones. Pay attention to any temperature, texture, or moisture changes, as well as swelling in the lymph nodes and soft tissues. Observation can also be used to check for symmetry between bony landmarks like rib angles and attachments.
- Evaluation of the temperature of the skin, soft tissues, muscle tone, tenderness, elevated or decreased bone prominence, and the supine position of the vertebrae and ribs: Joints in the sternum, ribs, clavicle, and sternocostal and costochondral regions Spinous process, costotransverse, and costovertebral Thoracic facet and costotransverse joints may indicate localized pain or pain one level up or down Testing the anterior and posterior motions of the first rib
- Thoracic spine AROM, PROM, and overpressure Flexion Extension Side-bending Rotation Combined Movements (rotation with extension) Prior to testing check for baseline symptoms, including their intensity and location. Observe changes in the intensity and location of symptoms as well as where they fall within the range during the test.
- By ensuring that the patient is not compensating with lumbar and pelvic movement, ensure that the motion is solely thoracic.
To check for a preference for one direction or centralization of symptoms, the repeated motion may be used.
At this time, repeated motion testing has primarily been studied for the cervical and lumbar spines.
The typical final feel for each of the listed actions is firm. - A double inclinometer method can be used to measure flexion, extension, and side-bending, but no normative values have been found, and the measurements’ reliability has not been studied. Observation alone was used to measure rotation and combined movements.
Accessing Passive Intervertebral Motion Place pressure on the thoracic spine from the posterior to the anterior side, either centrally directly on the spinous process (central) or unilaterally located just lateral to the spinous process, in order to access accessory intervertebral motion. - There are two ways to access rib motion: by applying pressure from the posterior to the anterior at the costosternal joints and pressure from the anterior to the posterior at the rib angles.
- Each joint’s mobility and the provocation of pain are evaluated by the examiner, who then determines whether the joint is hypermobile, hypermobile, or normal. Additionally, take into consideration the provocation of pain.
Assessment of the central PA of the thoracic spine’s passive accessory. - When the strict agreement of spinal levels was used, intra-rater and inter-rater reliability in the thoracic spine was acceptable for determining mobility dysfunction. When the expanded agreement increased to include one segment above or below, the intra-raterer and inter-raterer reliability became good to moderate.
According to Cleland’s findings, mobility testing of the thoracic spine revealed varying degrees of agreement between each individual segment of the spine.
Postural observation, active and passive range of motion, palpation, and PAs were rated as having poor to moderate intra-rater reliability for testing for thoracic joint dysfunction in the Potter study.
Rib Cage With strict agreement, the intra-rater reliability was found to be fair, and with more agreement, it was found to be good.
Reliability of Central Thoracic PAs’ Pain Provocation: Intra-rater reliability was fair to good, and inter-rater reliability was fair. Inter-rater reliability improved to good and intra-rater reliability improved to very good as the agreement grew.
Muscle Testing
- The thoracic spine’s pain provocation varied similarly, with no agreement to substantial agreement.
- Rib Cage has a Strict agreement, with no agreement for inter-rater reliability and moderate agreement for intra-rater reliability. Both intra-rater and inter-rater reliability increased to a complete agreement and good, respectively, when the agreement was increased.
Muscle Length Testing
- Muscle Testing To determine each muscle’s functional limitations and compensations, it is essential to test both its length and strength. The therapist is able to properly target impairment with interventions thanks to the measurement, which serves as a baseline for tracking progress.
Muscle Strength
- Test of Muscle Length for the Latissimus Dorsi: Pectoralis Major: moderate to substantial inter-rater reliability Pectoralis Minor: moderate to high inter-rater reliability moderate to significant inter-rater reliability’ Middle Trapezius Muscle Strength: Lower Trapezius: There is no inter-rater reliability. Seratus Anterior: There is no inter-rater reliability. Rhomboids: moderate to high inter-rater reliability and moderate reliability among tests.
Neurological assessment of Thoracic Examination
- Questions for the neurological assessment to aid in determining the direction of the neurological screen.
- Do you experience symptoms in your legs or low back when you move your neck?
- If so, conduct a thorough neurological exam. Have you ever experienced bilateral upper-extremity symptoms, as well as occasional balance or coordination problems in the lower extremities?
- Upper Motor Neuron Reflexes (Hoffman, Babinski, Clonus) Sensory Testing: If yes, conduct a thorough neurological examination. T1 Nerve Root Level:
- Dermatome (medial forearm) first dorsal interossei Lower thoracic Neural Tissue Provocation Tests Lower thoracic neurologic screening in the upper quarter
Special Tests for Thoracic Examination
Passive Neck Flexion Test
- Test of Passive Neck Flexibility to determine how neural tension affects the patient’s symptoms.
- Position of Test: Supine.
- How to Pass the Test: The patient makes an active upper cervical nod. The lower cervical spine is passively flexed by the examiner. A positive test is one in which the thoracic spine reproduces pain or other neural symptoms. A feeling of stretching is normal.
- Accuracy of the diagnosis: Unknown.
- Relevance of the Test: Nerves can become stuck to some structures as they travel through our body’s various tissues. By putting the spinal cord under tension through cervical flexion, the purpose of this test is to replicate these symptoms.
Upper limb Pressure Tests (ULTTs)
- Presentation
- The Brachial Plexus Pressure or Elvey Test, otherwise called Upper Appendage Strain Test, is intended to put weight on neurological designs of the upper appendage by stretching them. Elvey was the first to describe these tests, which are also known as the Elvey test but are more commonly referred to as the ULTT. The straight leg raise for the lumbar spine is equivalent to the ULTTs.
- Purpose
The purpose of ULTT is to evaluate the compression and mobility of peripheral nerves or as part of a neurodynamic evaluation. To confirm a nerve involvement diagnosis, a series of these tests are carried out. They can be used for both diagnosis and treatment. The tests to free the entrapped nerve are carried out following the diagnosis. - Technique
ULTTs aim to elicit the symptoms of the patient. This is accomplished by maintaining specific positions for the shoulder, elbow, forearm, wrist, and fingers to place stress on a particular nerve (nerve bias). Alterations to the position of each joint can also be used as a “sensitizer” to the particular nerves. - A few general points to keep in mind while taking the test.
- In layman’s terms, the therapist should briefly explain the procedure to the patient. The patient experiences less anticipation as a result, and they become more at ease. Inform the patient that it may or may not cause symptoms, and encourage verbal communication whenever the patient experiences discomfort.
- It is important to exercise caution so as not to make the symptoms worse.
On the normal/asymptomatic side, each test is performed first. - Performance with an appropriate stabilizing hand and a slow, steady mobilizing hand is credited with the test’s precision.
Ten seconds should not be held in the final movement. - Keep an eye out for erroneous movements that could affect the outcome. Traditionally, the upper limb’s shoulder, forearm, wrist, and fingers are positioned first, followed by the elbow. Until the pain or symptoms return, each joint positioning component is added. Side flexion of the cervical spine can be added to the upper limb tests to make them more sensitive. There is no need to add any more sensitizers if the initial position causes pain.
- Positive Test: A positive test is one that finds one or more of the following
Upper Limb Tension Test 1 (ULTT1, Median nerve bias, Magee-ULTT1)
- Indications
- Radiating pain in the upper limb Tingling sensations in the first three fingers Movements performed Shoulder depression Shoulder abduction 1100 Shoulder external rotation with an elbow at 900 Forearm supination Wrist and finger extension Elbow extension Structural differentiation Symptoms reproduced Side to side difference in elbow extension greater than 10 degrees Contralateral cervical side bending increases symptoms.

Upper Limb Tension Test 2A (ULTT2A, for Median nerve compression test)
- Indications
Radiating pain in an upper limb.
Recent shoulder arthroplasty surgery.
Recent Dislocation of the shoulder as well as Instability. - Movements performed
Shoulder girdle depression,
Shoulder abduction 100 degrees,
External rotation with the elbow at 90 degrees,
Forearm supination,
Wrist and finger extension,
Elbow extension. - Structural differentiation
Proximal symptoms- Relieve wrist as well as a finger extension
Distal symptoms (provocation)- Contralateral of the neck flexion.
Upper Limb Tension Test 2B (ULTT2B, For Radial nerve compression test)
- Indications:
Radiating pain in an upper limb
Supinator tunnel syndrome.
De Quervain`s disease.
Cervical Radiculopathy. - Movements performed
Shoulder girdle depression,
Shoulder abduction 20-30 degrees,
Shoulder internal rotation,
Forearm pronation,
Wrist, finger, and thumb flexion,
Elbow extension. - Structural differentiation
Proximal symptoms: Relieve wrist as well as finger flexion
Distal symptoms (provocation): Contralateral neck flexion.
Upper Limb Tension Test 3 (ULTT3, For Ulnar nerve compression)
- Indications
Pain radiating to 4th and 5th digits,
Thoracic outlet syndrome,
Carpal tunnel syndrome. - Movements performed
Shoulder girdle depression
Shoulder abduction 110 degrees,
Shoulder external rotation,
Forearm pronation,
Wrist and Finger extension,
Elbow flexion. - Structural Differentiation
Proximal symptoms: Relieve wrist & finger extension.
Distal symptoms (provocation): Contralateral neck flexion movement.
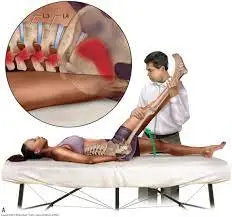
Straight Leg Raise Test
- Background
Background of the Straight Leg Raise Test Because it mechanically stresses the lumbosacral nerve roots, the Straight Leg Raise (SLR) test is frequently used to identify disc pathology or nerve root irritation. Additionally, it plays a crucial role in the detection of neural compression and disc herniation. Because it is able to identify excessive nerve root compression or tension, it is also referred to as a neurodynamic evaluation test. The name “Laseaguestest” refers to this test, which was developed by Dr. Charles Laseague. However, it is thought that Dr. Lazar Lazarevic developed this test first. - Tensile stresses are applied to the sciatic nerve and traction is applied to the lumbosacral nerve roots, particularly those from L4 to S2. These nerve roots are pushed anteriorly and inferiorly during the SLR, pulling the dura mater anteriorly, laterally, and caudally. As it pulls the sciatic foramen, the sacrum, the nerves that cross the pedicles, and the intervertebral foramen, the sciatic nerve experiences sequential tension. The greater sciatic notch is frequently the location of localized pain or tenderness.
- Clinical Application
Application in the Clinical Practice The majority of the clinical practice guidelines recommend using the straight leg raise test to determine whether radicular pain or even radiculopathy exists. However, the SLR test’s ability to detect radiculopathy is only marginally supported. - Because of its higher sensitivity than specificity, the SLR test is useful for excluding lumbosacral radiculopathy. In clinical practice, structural differentiation—such as neck flexion, ankle dorsiflexion, and hip adduction—improves the SLR test’s reliability to at least a moderate level.
- Technique
The traditional straight leg raise is done passively. The unaffected leg is tested first, followed by each leg individually. The clinician stands on the side being tested, putting their distal hand around the patient’s heel and their proximal hand on the patient’s distal thigh (anterior) to maintain knee extension while the patient is lying down. - While keeping the patient’s knee fully extended, the physician raises the patient’s leg by the posterior ankle. The doctor keeps lifting the patient’s leg slowly by flexing at the hip until the patient has the same symptoms or tightness in their back or posterior thigh.
- The examiner stops hip flexion when pain occurs and records ROM and pain location. As the outcome measure, the range of motion of the affected leg can be compared to that of the unaffected leg. However, the low inter-rater reliability for this should be noted.
- Reasoning and Interpretation
- A true positive SLR test should include:
- Radicular leg pain (below-the-knee symptoms).
Hip flexion at 30 degrees, 60 degrees, or even 70 degrees from the horizontal plane causes pain. Neurological pain that occurs in the leg and lower back between 30 and 70 degrees of hip flexion is an indication of lumbar disc herniation at the L4-S1 nerve roots. Pain that occurs at more than 70 degrees of hip flexion could be caused by tightness in the hamstrings, gluteus maximus, or hip capsule, or it could be a problem with the hip or sacroiliac joints. - If back pain is the primary symptom, the pressure placed on the anterior theca of the spinal cord is most likely caused by a disc herniation or a more central pathology. Back torment as it were” patients who have a plate prolapse have more modest, more focal prolapses.
- If the pain is commonly seen in the leg, a pathology that is placing pressure on a neurological tissue or even tissues is more likely to be lateral.
It is more likely that disc herniations or pathology which places pressure between the 2 extremes may cause pain in both areas. - The SLR test can also be positive for nerve root irritation like facet joint cysts or hypertrophy. Intraspinal tumors and inflammatory radiculopathy are two additional causes of a positive SLR test.
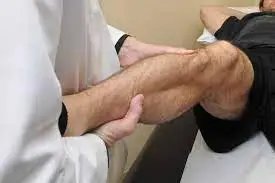
Prone Knee Bend Test
- Test of Prone Knee Bend: to ascertain whether the patient’s symptoms are influenced by neural tension.
- Position of Test: Prone.
- How to Pass the Test: The examiner flexes the patient’s knee passively until it reaches the end range and holds it there for 45 seconds. Rotating the hip is not recommended. A tight or strained quadriceps muscle or neural tension in the femoral nerve could be the cause of pain in the anterior thigh. Lumbar radiculopathy of the L2-L3 nerve roots may be the cause of pain in the unilateral lumbar area, buttock, or posterior thigh.
- Accuracy of the diagnosis: Unknown.
- Relevance of the Test
- Because the femoral nerve runs along the anterior side of the lower extremity, knee flexion strains the nerve and its rootlets. Pain or other neural symptoms may occur in the lower extremity if the femoral nerve becomes stuck to the tissues it passes through.
- This slump test places tension on the entire nerve as well as its rootlets, this may show radicular pain or pain that comes from the irritation of spinal structures. Even though the innervation of the femoral nerve may cause irritation of the nerve roots L2-L3, the test should not be used solely for diagnosis.
- Always treat the underlying cause of the patient’s impairments as you would normally. This location of the pain as well as symptoms should assist you to locate the pathology as well as determine how to treat a patient.
Slump Test
- A Slump Test is the neural tension test which is mainly utilized to look for altered neurodynamics or even sensitivity in neural tissue.
- Note on Technique:
Different sources give different descriptions of the slump test. The reproduction of pain when tension is applied to the dura during testing is a common factor among sources. Mark Dutton was the inspiration for the method shown below. - Description:
A patient may be seated with the hands behind the back to create a neutral spine before the test starts. Slumping the patient forward at the thoracic and lumbar spines is the first step. Have the patient flex the neck by placing the chin on the chest and then extending one knee as far as possible if this position does not cause pain. - Have a patient extend a neck into the normal if extending a knee causes pain. The test is deemed positive if the patient continues to experience pain while extending their knee.
- Ask the patient to actively dorsiflex the ankle if it does not hurt to extend the knee. Have a patient slightly flex a knee during still dorsiflexing if this causes pain. The test is deemed positive if the pain returns.
- Test again on the opposite side.
- During any of the test positions, overpressure can be applied.

Cervical rotation lateral flexion test
- Purpose
The purpose of the cervical rotation lateral flexion test is to determine whether a patient with brachialgia has hypomobility of the first rib. - Methodology
The patient is seated during the test. The cervical spine is rotated maximally and passively away from the test side. The spine is gently flexed as far as possible while remaining in this position, bringing the ear closer to the chest.

Adson’s test
- Purpose
Adson’s test is the provocative test for Thoracic Outlet Syndrome accompanied by compression of a subclavian artery by the rib or tightened anterior as well as middle scalene muscles. This test is considered positive when a lateral flexion motion is blocked. - Starting Point of the Technique
- The patient can be placed in either a sitting or standing position and have their elbow fully extended.
Standing or seated, the patient’s arm is maximally extended and abducted 30 degrees at the shoulder. - The patient’s wrist is grasped by the examiner as the radial pulse is felt.
The patient is then asked to take a deep breath and hold it while extending their neck and turning their head toward the symptomatic shoulder. - The quality of the radial pulse is compared to the quality of the arm resting at the patient’s side during the procedure.
- In a modified test, some doctors ask patients to turn their heads away from the side being tested.
- Test Results:
If the radial pulse significantly decreases or disappears, the test is positive. In order to identify the patient’s normal pulse, it is essential to check the patient’s radial pulse on the opposite arm. - The non-symptomatic side should be compared to the positive side.
Kehr’s Sign
- Purpose
The purpose of Kehr’s Sign is that pain in the left shoulder is caused by bleeding from a splenic rupture, which causes irritation of the inferior surface of the diaphragm. The German surgeon Hans Kehr was the first to describe it. As an illustration of referred pain, Along the phrenic nerve, pain signals are carried from the diaphragm irritation to the supraclavicular region. This is because the C3 and C4 cervical origins of the supraclavicular and phrenic nerves are the same. Right shoulder pain typically indicates liver or gallbladder irritation, whereas Kehr’s sign (left shoulder pain) is typically a sign of splenic rupture. - Technique
Place the patient in the Trendelenburg position, which is a supine position with an elevated lower extremity. The left shoulder will hurt if you gently palpate the upper left quadrant of the abdomen. - Tests of the cervicothoracic: to elicit the patient’s neck pain symptoms.
Murphy’s sign
- Murphy’s sign is typically checked for during a supine abdominal examination in order to establish a differential diagnosis. These clinical tests are part of the examination that follows. It is performed by gently placing the hand below the costal margin on the right side at the mid-clavicular line—the approximate location of the gallbladder—and asking the patient to exhale. After that, the patient is instructed to inhale. Normally, when the lungs expand (and the diaphragm moves down), the abdominal contents are pushed down.
- The test is deemed positive if the patient winces with a “catch” in-breath and stops breathing because the gallbladder is tender and comes into contact with the examiner’s fingers as it moves downward. The same maneuver must not cause pain when performed on the left side for the test to be deemed positive.
- Predictive value
Murphy’s sign has a low specificity but a high sensitivity and negative predictive value. However, the elderly have a significantly lower sensitivity; If other tests and the patient’s medical history point to cholecystitis, a negative Murphy’s sign does not rule out the possibility. - Abdomen Palpation:
Upper Right Quadrant: Duodenum, liver, gallbladder, right kidney, and head of the pancreas are all included.
Upper Left Quadrant: Stomach, spleen, liver, pancreas, left kidney, adrenal gland, splenic flexure of the colon, and a portion of the transverse descending colon.
Lower right quadrant: Right ovary, fallopian tube, cecum, ascending colon, and right ureter
Lower left quadrant: descending colon, sigmoid colon, left ureter, and fallopian tube - Palpation of the Abdominal Aortic Pulse: Patients at risk for an abdominal aortic aneurysm should have this test performed. With the abdominal muscles slack, place the patient in a supine hook position. Palpate to the left of the patient’s navel to check for a pulse. Once you feel one, move laterally until the pulse is gone. Refer the patient for additional diagnostic tests if the pulse is detected at a distance greater than 2.5 cm.
- Recover Tenderness
Slowly and deeply palpate the abdomen in a location away from suspected inflammation with your hand. Take the handoff quickly. Rebound tenderness can be a sign of an inflamed peritoneum if the patient experiences pain upon release. - Thoracic Excursion
If you think a patient has ankylosing spondylitis or another condition that causes their chest to expand less, you can measure their thoracic excursion. Utilizing a cloth measuring tape and standardized measuring locations (the fifth thoracic spinous process, the third intercostal space, and the tenth thoracic spinous process, or xiphoid process), have the patient completely exhale to take the measurement, and then have them fully inhale to take the measurement and record it.

Costoclavicular or Military Brace or Eden’s Test
- Purpose
- Test for the presence of thoracic outlet syndrome.
- Technique
- The goal of the costoclavicular, military brace, or Eden’s test is to look for thoracic outlet syndrome.
- Procedure The patient is standing. After palpating the patient’s radial pulse, the examiner asks the patient to raise their chest in an exaggerated “at attention” position while drawing the patient’s shoulders back and down. A positive test suggests a possibility of costoclavicular syndrome when the pulse is absent or becomes weaker. It is also beneficial if the client experiences an increase in upper-extremity neurologic symptoms on that side. Patients who complain of symptoms while wearing a backpack or heavy coat respond best to this test.
Halstead Test
- Purpose
The Halstead Test’s goal is to look for signs of a possible thoracic outlet syndrome. - Method
The patient is either seated or standing. On the side being tested, the therapist continuously palpates the radial pulse. The therapist applies a downward distraction to the arm while abducting the arm to 45 degrees, extending the shoulder to 45 degrees, and externally rotating the upper extremity while still palpating the radial pulse. After that, the patient is instructed to fully rotate her head away from the side that is being tested and to extend her cervical spine.
Roos Stress Test
- Purpose
The purpose of the Roos Stress Test is to identify thoracic outlet syndrome (TOS) using this diagnostic tool. The “elevated arm stress test” or “EAST” is another name for it. - Technique Position of the beginning:
- The patient is positioned with both arms in the frontal plane of the chest and in the 90° abduction-external rotation position.
Over the course of three minutes, the patient is instructed to slowly open and close their hands. - Forearm muscle fatigue and minimal distress are the only possible symptoms of TOS:
- Pain in the neck and shoulder that gradually gets worse and moves down the arm Paraesthesia in the forearm and fingers in the event of arterial compression: pallor of the arm when the arm is raised, and reactive hyperemia when the limb is lowered in the event of venous compression: Swelling and cyanosis, inability to finish the test, and the patient dropping their arms on the floor in obvious distress are all signs of reproduction of typical symptoms.

The Wright Test
- The Wright Test, also known as the hyper abduction test, is a provocative test for Thoracic Outlet Syndrome. It is believed to involve the axillary interval, which is the space that is posterior to the pectoralis minor.
- Starting Position
The test is done in the sitting and supine positions, respectively. Procedure: The test is done in two steps.
First step: head forward while passively bringing the arm into the abduction and external rotation to 90 degrees without tilting the head.
Maximum elbow flexion is 45 degrees. After that, the tester holds the arm for one minute to measure the radial pulse and watch for the onset of the patient’s symptoms. - Step separated:
The radial pulse quality and the patient’s symptom onset are monitored by the tester.
With the extremity in hyperabduction (the end of the range of abduction), the test is repeated.
A positive test result for thoracic outlet syndrome is a decrease in the radial pulse and/or the reproduction of the patient’s symptoms. The pulse disappearance indicates a positive test result.
FAQ
Your upper and middle backs meet in the middle, and this is where your thoracic spine is. The cervical spine starts at the base of your neck and ends just above your lower back at the bottom of your rib cage.
The bodies of thoracic vertebrae are of varying sizes. They are distinguished by the presence of facets on the transverse processes that articulate with the tubercles of ribs and facets on the sides of their bodies that articulate with the heads of the ribs. Additionally, they are distinguished by their long, slender spines.
The twelve thoracic vertebrae are sturdy bones that are sandwiched between the cervical vertebrae above and the lumbar vertebrae below in the middle of the vertebral column. They are separated from each other by intervertebral discs, like regular vertebrae.
Things that are associated with your thorax are referred to as thoracic in medicine. your back. The term “thoracic” is probably used in biology class. Your chest is the thorax: the region between your abdomen and neck.
The thoracic spine is divided into four sets of three vertebrae, from the cranial to the caudal, according to the rule of threes, which states that the SPs are at the same level, a one-half level below, or one full level below the TPs of their corresponding vertebrae.
The upper and middle portion of the back is home to the thoracic spine. The thoracic spine is made up of twelve vertebrae, with the numbers T-1 through T-12. The spinal cord nerves in that section are represented by each number: The muscles in the upper chest, middle back, and abdominal region are affected by the T-1 through T-5 nerves.