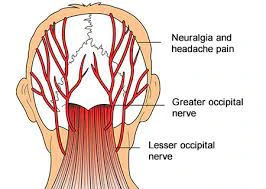
Coccygodynia (Coccydynia, Coccalgia, Tailbone Pain)
Definition
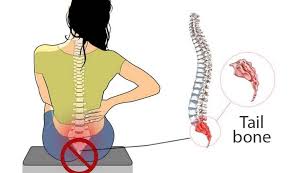
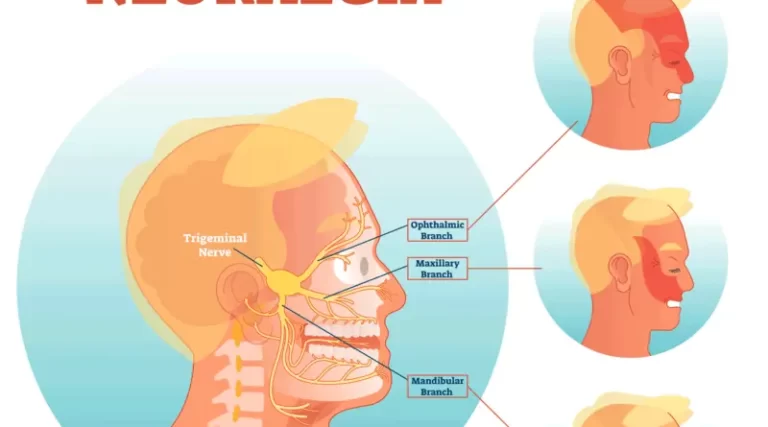
__Coccygodynia, sometimes referred to as coccydynia, coccalgia, coccygeal neuralgia or tailbone pain, is the term used to describe the symptoms of pain that occur in the region of the coccyx.
__The pain is most commonly triggered in a sitting position, but may also occur when the individual changes from a sitting to standing position.Most cases will resolve within a few weeks to months, however for some patients the pain can become chronic, having negative impacts on quality of life. For these individuals, management can be difficult due to the complex nature of coccygeal pain.
Clinically Relevant Anatomy
__The coccyx is a triangular bone that forms the most distal segment of the spine. It is composed of 3 to 5 coccygeal segments. These segments fuse together to form a single bone, with the exception of the first coccygeal segment.The first coccygeal segment might not fuse together with the second coccygeal segment.
__The ventral aspect of the coccyx is concave in shape, while the dorsal aspect of the coccyx is convex in shape.The first coccygeal segment is composed of articular processes that form the coccygeal cornua. The coccygeal cornua articulates with the sacral cornua of the inferior sacral apex of S5. This articulation creates a symphysis or synovial joint, which forms one of the borders of the foramen for the dorsal branch of the fifth sacral nerve route (S5).
__The coccyx serves as an attachment site for several muscles and ligaments. Anteriorly, the coccyx is bordered by the levator ani muscle and the sacro-coccygeal ligament.
__In an anterior (front) to posterior (back) direction, the lateral border of the coccyx serves as an insertion point for the coccygeal muscles, the sacrospinous ligament, the sacrotuberous ligament and the gluteus maximus. Inferiorly, the tendon of the iliococcygeus muscle inserts onto the tip of the coccyx.Together, these ligaments and muscles contribute to voluntary bowel control, as well, provide support to the pelvic floor.
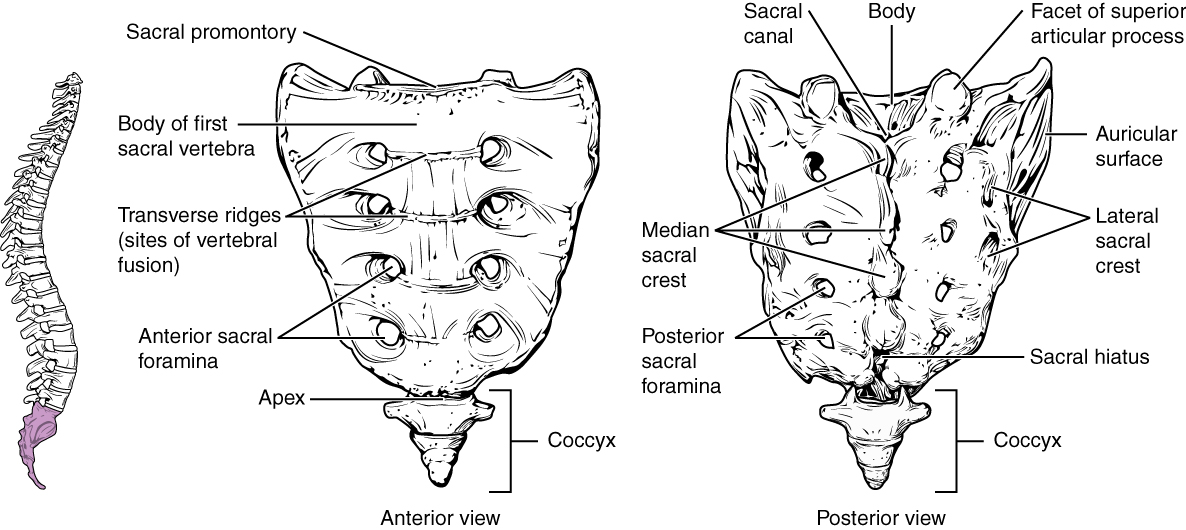
__In addition to being an insertion site, the coccyx, in conjunction with the ischial tuberosities, provides weight-bearing support to an individual in a seated position. For this reason, increased stress and pressure can be placed on the coccyx while a person leans back in a seated position. The coccyx also functions in providing support to the anus.
__Postascchini and Massobrio (1983) classified the variations in morphology of the coccyx into four different configurations:-
Type I: The coccyx is slightly curved forward, with its apex positioned downward.
Type II: The forward curvature of the coccyx is more exaggerated, with the apex positioned in a straightforward direction.
Type III: Sharp angulation of the coccyx forward.
Type IV: Subluxation of the coccyx at the sacrococcygeal or intercoccygeal joint
Function of the Coccyx
__Although the tailbone is considered vestigial (or no longer necessary) in the human body, it does have some function in the pelvis. For instance, the coccyx is one part of a three-part support for a person in the seated position. Weight is distributed between the bottom portions of the two hip bones (or ischium) and the tailbone, providing balance and stability when a person is seated.
__The tailbone is the connecting point for many pelvic floor muscles. These muscles help support the anus and aid in defecation, support the vagina in females, and assist in walking, running, and moving the legs.
Pathophysiology
__There are common pathophysiological ways that a person may develop coccydynia. The two main causes for this condition are sudden impact due to fall, and coccydynia caused by childbirth pressure in women.
__ Other ways that coccydynia develops are partial dislocation of the sacrococcygeal synchondrosis that can possibly result in abnormal movement of the coccyx from excessive sitting, and repetitive trauma of the surrounding ligaments and muscles, resulting in inflammation of tissues and pain.
Epidemiology and Etiolog
__Currently, the incidence of coccygodynia is unknown.
__Certain factors can increase an individual’s risk for developing coccygodynia, such as body mass, age, gender.
__With obesity, the coccyx is more vulnerable to increases in intrapelvic pressure while sitting, increasing the risk of posterior subluxation (displacement backward) of the coccyx. With rapid weight loss, the cushioning around the coccyx may be lost, and the coccyx is at an increased risk for anterior subluxation (displacement forward).
*Repetitive Strain Injury (RSI)
__Sports like bicycling and rowing require you to lean back and forth and stretch your spine. Too much of that repeated motion can strain the tissues around your coccyx.

*Pregnancy/Childbirth
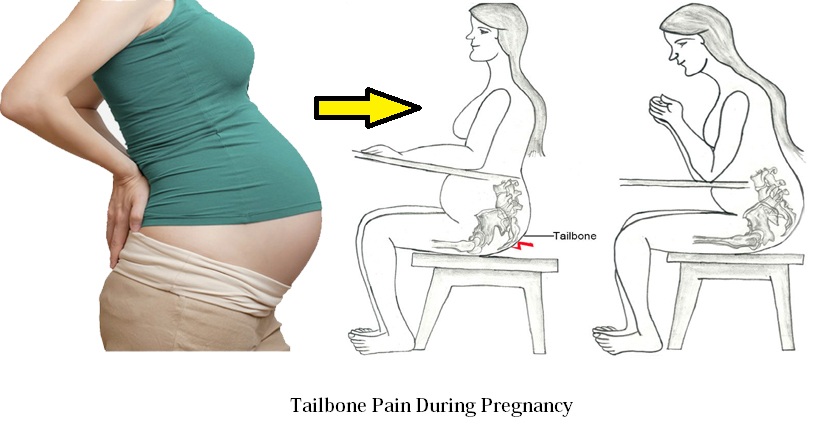
__During the third trimester of pregnancy, a woman’s body secretes hormones that soften the area between the sacrum and the coccyx. This enables the coccyx to move as necessary during childbirth. This is a natural process but, unfortunately, such movement may stretch the muscles and ligaments around the coccyx too far, causing additional pain. Such a strain on those soft tissues keeps them from supporting your coccyx at the correct angle.
*Obesity
__Extra weight applies additional pressure to the coccyx. This can cause the coccyx to lean backward. Your tailbone will hurt if it is out of position.
*Underweight
__If you don’t have enough fat in your buttocks to prevent your coccyx from rubbing against the muscles, ligaments and tendons, that can cause. The rubbing inflames the soft tissues.
*Sitting
__Just this simple act can increase coccyx pain, especially if you’re sitting on a hard or narrow surface. Do your best to get up often, stretch and take a short walk. Better yet, find yourself a softer, more comfortable place to sit or use a cushioned seat.

*Cancer
__Only in rare cases is tailbone pain a sign of cancer. It is extremely unlikely.
__Referred coccyx pain. In rare cases pain will be referred to the coccyx from elsewhere in the spine or pelvis, such as a lumbar herniated disc or degenerative lumbar disc.
__ The risk of coccygodynia is 5 times higher in females than it is in males, which may be a result of the increased pressure that occurs during pregnancy and delivery.
__Furthermore, adults and adolescents are more likely to present with coccygodynia than children.
*Coccygodynia may be classified as,
1> post-traumatic
2> non-traumatic or idiopathic
_ Post-traumatic coccygodynia is usually a result of internal or external trauma. For example, external trauma could result from a backwards fall that might dislocate or break the coccyx, and internal trauma could result from a difficult childbirth or a childbirth with an assistive delivery. Minor trauma, such as repetitive sitting on hard surfaces can also lead to coccygodynia. _ Non-traumatic coccygodynia can result from degenerative disc disease, hyper and/or hypo-mobility of the sacrococcygeal joint, infectious diseases and different variations in the configuration of the coccyx. Type II, III, and IV configurations typically cause more pain than type I configurations.
__ Idiopathic coccygodynia occurs in the absence of any pathology in the coccyx.This is typically a diagnosis of exclusion, and may result from spasticity or other abnormalities that affect the musculature of the pelvic floor. For example, over-extension of the levator ani muscle can shift the coccyx into an abnormal position.
Clinical Presentation
__The most common complaint of coccygodynia is pain in and around the coccyx without any reports of severe low back pain or radiating pain.
__The pain is typically localized to the sacrococcygeal joint and is described as a “pulling” or “cutting” sensation.
__Individuals will commonly report tenderness on palpation of the coccyx.
__Patients will usually exhibit a guarding seated posture, whereby one buttock will be elevated to take weight off of the coccyx.
__Pain is usually exacerbated with repeated sitting or with transition from sitting to standing position.
__ Individuals will report that pain is alleviated with sitting on the legs or buttock. Patients may also report pain with defecation or the frequent need to defecate.
__ Other complaints may include pain with coughing or increased pain during menstruation in females.
__Although not a hallmark sign of coccygodynia, low back pain may still arise in individuals with coccygodynia due to the morphological variations in the shape of the coccyx and it’s forward curvature.
__ The medical condition is often characterized by pain that worsens with constipation and may be relieved with bowel movement. Rarely, even sexual intercourse can aggravate symptoms.
*Other related symptoms that may occur with coccydynia include:
__Depression.
__Anxiety.
__Poor sleep.
__Painful buttocks.
__Back pain
Differential Diagnosis
The following differential diagnoses should be ruled out:-
- Coccyx fracture
- Lumbar spondylosis or disc herniation
- Levator ani syndrome
- Piriformis syndrome
- Descending perineal syndrome
- Perianal abscess
- Rectal tumour or teratoma
- Aclock canal syndrome
- Proctalgia Fugax
Evaluation
*Radiographs:-
__Although primarily a clinical diagnosis, dynamic radiographs can be used in diagnosis.
__Dynamic radiographs taken in both sitting and standing positions can provide measurements of coccygeal displacement. Single-position radiographs are usually not used for diagnosis as they are unable to identify any morphological differences between individuals with and without coccygodynia. Radiographs are usually taken if the pain persists for a duration that is greater than 8 weeks.


*Coccygeal discogram:-
__ Similar to the same procedure done on the lumbar spine, a coccygeal discogram consists of an injection of local anesthesia in the sacrococcygeal region. The injection targets a specific area in the spine, such as an intervertebral joint or disc, to identify the precise location where pain is being caused.
__If the anesthetic test proves positive, then a dynamic (sit/stand) x-ray or MRI scan may show whether the coccyx dislocates when the patient sits.
*Use of dynamic x-rays gave positive results with the anesthetic test showed:-
1.31% Not possible to identify the cause of pain
27% Hypermobility (excessive flexing of the coccyx forwards and upwards when sitting)
22% Posterior luxation (partial dislocation of the coccyx backwards when sitting)
14% Spicule (bony spur) on the coccyx
5% Anterior luxation (partial dislocation of the coccyx forwards when sitting)
*CT or MRI scans:-
__A static image of the coccyx taken by MRI or CT scan (one that does not illustrate pelvic rotation or movement) may be used if the suspected cause of pain is a fracture, tumor, or abnormal mobility of the sacrococcygeal joint. Static images, however, are usually not helpful for diagnosing coccydynia and are used sparingly when a source of coccydynia cannot be clearly identified using other means.
__In rare cases, routine blood tests are obtained to rule out the possibility of an infection or tumor. A doctor may also order a guaiac stool test to determine if the issue has its origin in the gastrointestinal tract.
Physical examination
__A complete medical history collected will likely include information on current symptoms, as well as when and how symptoms developed. A doctor may also look for environmental or lifestyle factors for the patient’s pain, such as recent injury, exercise habits, or obesity.
__After a medical history is collected, a doctor will begin a physical exam. A thorough physical examination for coccyx pain may include:-
*Palpation:-
__Palpation to check for local tenderness. A doctor will feel by hand (called palpation) to identify swelling and tenderness around the coccyx. Palpation may also be used to identify potential coccygeal spicules (bone spurs), cysts, or tumors.
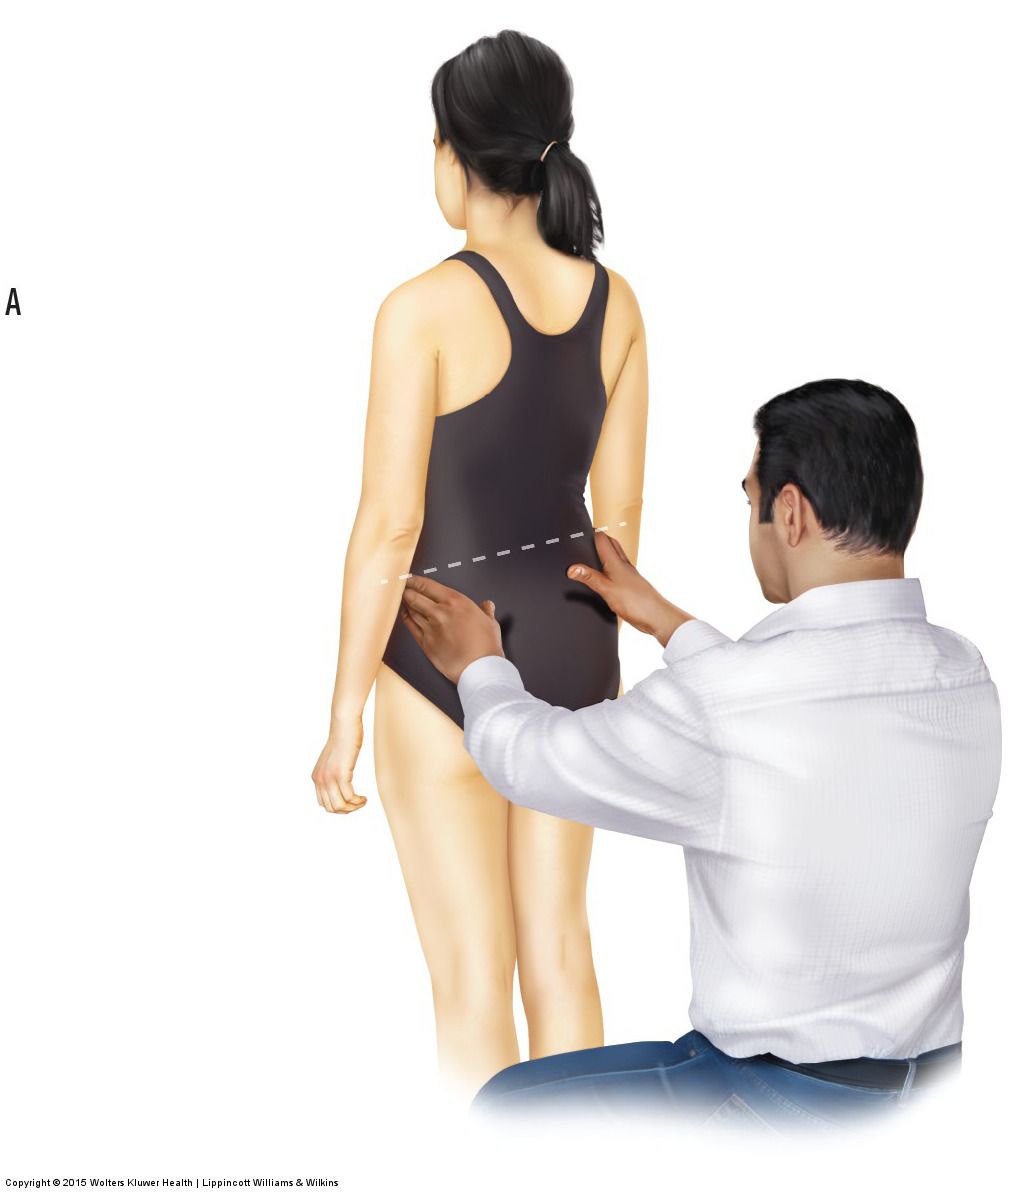
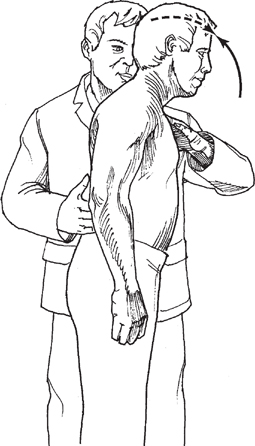
__ palpate the posterior lumbar, sacral, and coccygeal spine, sit on a stool behind the standing patient. Place your thumbs on the midline of the patient’s back at the level of the iliac crest.
__ This should be the junction between L4 and L5, called the interspace . From the interspace, palpate superiorly and inferiorly the spinous processes of the lumbar and sacral vertebrae. Absence of spinous processes may indicate spina bifida.
__The most consistent finding on examination is usually tenderness upon palpation of the coccyx. If the coccyx is not tender to palpation, then the pain is likely referred from another part of the spine.
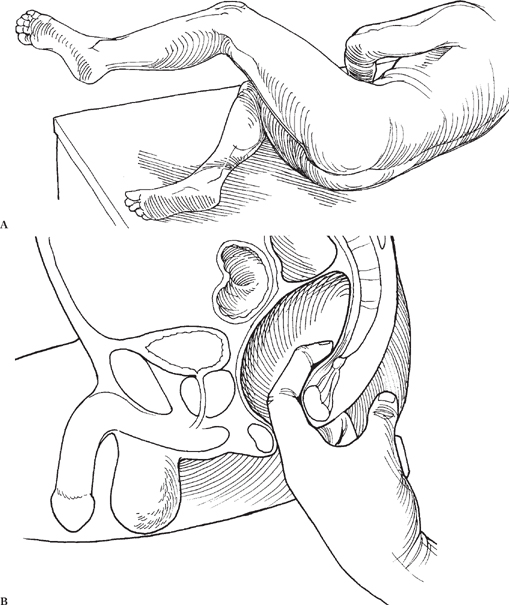
__Palpating the coccyx can be used to differentiate between true coccygodynia, which is localized pain over the area of the coccyx, and pseudo coccygodynia, which is characterized by pain that is referred to the coccygeal area from visceral organs, a peripheral nerve, nerve root or plexus.
__If referred pain is present, pain will radiate around the buttocks, thigh and back, and reports of pain will be present with lumbar movements.Referred pain may also be indicative of psychogenic coccygodynia, in which pain will be more diffuse and pain will be experienced with lumbar and hip movements.
__Increased pain may also be reported during a straight leg raise test.
*PARASPINAL MUSCLES:-
__Instruct the patient to stand and extend the neck. Palpate the paraspinal muscles on each side of the midline simultaneously . Deep massage and kneading are used to detect tenderness, spasm, muscular defect, and asymmetries.
Anterior Lumbar, Sacral, and Coccygeal Spine:-
__To perform palpation of the anterior lower spine, instruct the patient to lie supine on the exam table with knees bent and muscles completely relaxed.
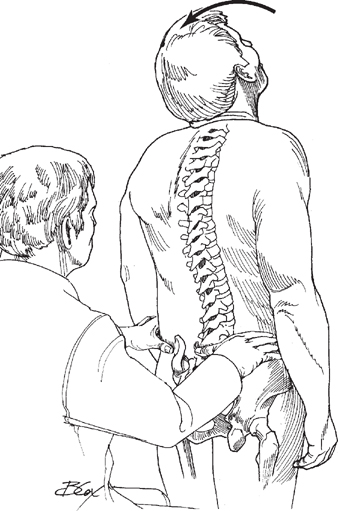
Palpation of the paraspinal muscles and the posterosuperior iliac spine
P__The vertebral bodies and disks of L4, L5, and S1 can be palpated just below the umbilicus. To do this, ask the patient to relax. Push firmly into the abdomen, and feel for the vertebral bodies. The L5-S1 articulation is the most prominent bony feature found. Hyperextension of the lumbar spine makes palpation easier. This examination can be extremely difficult if not impossible on the obese patient.
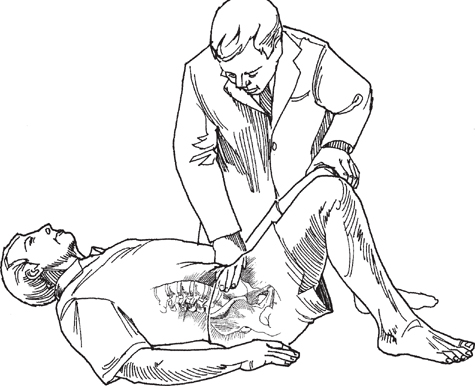
Palpation of the anterior lumbar spine can be performed with the patient supine, knees bent, and abdominal muscles completely relaxed.
MOVEMENTS:
Active Movements:-
Forward Bending:-
__To test forward bending, ask the patient to bend over and touch the toes without bending the knees . Take note of fluidity and any areas of restricted movement.
Backward Bending:-
__To examine lumbar extension, place a hand on the patient’s lower back over the posterior superior iliac spine. Instruct the patient to fully extend the spine by bending backward . Take note of the fluidity and range of lumbar extension.
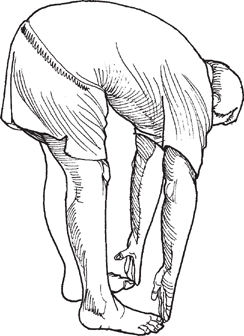
Forward bending.
F
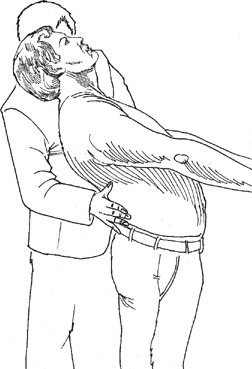
Lumbar extension
Side Bending:-
__To test active side bending, instruct the patient to cross the arms and rest the hands on the opposite shoulders. Ask the patient to side bend to the left and then to the right . The crossing point of the arms makes an imaginary axis of rotation. Place a hand on the iliac crest of the patient for stabilization. Note any pain and limitations in movement.
Trunk Rotation:-
__Lumbar trunk rotation occurs with the patient standing, arms crossed and hands resting on opposite shoulders. Make sure that the patient keeps the chin directed perpendicular to the shoulders so that the cervical spine is not rotated.
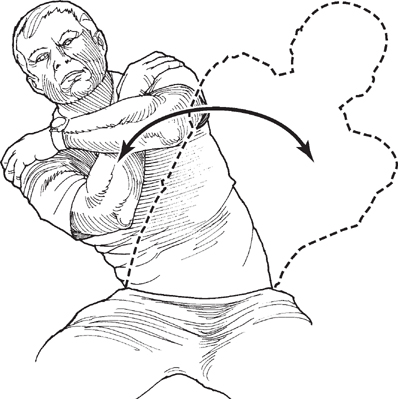
Lumbar side bending.
__Place a hand on the iliac crest of the side the patient is going to rotate away from. Place the other hand on the patient’s opposite shoulder. The patient should rotate in each direction separately .
Passive Movements:-
__Passive tests are employed when full range of motion is not achieved during active testing. Passive tests of flexion are not performed because of possible aggravation if a disk protrusion exists. When testing passive movements, take note of the end feel, range of motion, and any pain elicited.
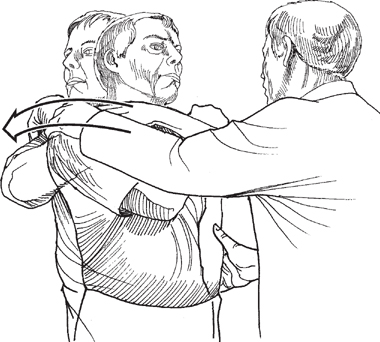
Trunk rotation
TRotation:-
__To perform passive rotation, instruct the patient to stand. The patient’s arms are crossed, and the hands are rested on the opposite shoulders. Once the patient is in position, stand behind the patient and place one hand on the iliac crest and the other hand on the patient’s shoulder. Finally, rotate the patient in the tested direction.
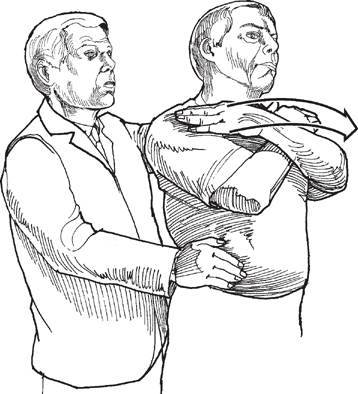
Passive rotation.
*Resisted Movements:-
Rotation
__To perform resisted rotation, instruct the patient to sit with arms crossed and hands resting on opposite shoulders . Stand in front of the patient. To test rotation to the left, place your left hand on the patient’s left arm and your right hand on the back of the patient’s left shoulder. Then ask the patient to rotate to the left against the resisting force.
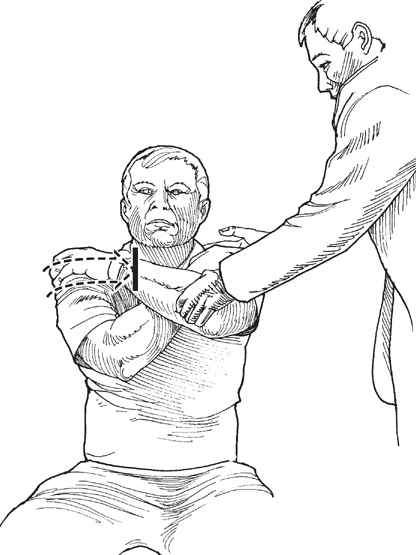
Resisted rotation.
Flexion:-
__To perform resisted flexion, stand to the side of the patient. Place one hand on the patient’s back over the posterosuperior iliac spine and the other hand on the chest over the manubrium . Instruct the patient to flex as you resist. Note any weakness or pain.
Side Bending:-
__To test resisted side bending, sit next to the seated patient. Wrap one arm around the patient’s back and place your other hand on the patient’s shoulder. Sit close to the patient, and place the lateral side of your pelvis against the patient’s pelvis to lock it into place. Instruct the patient to side bend away from you, and resist the motion. Note any weakness or pain.
Intrarectal exam and manipulation:-
__ In some cases, a doctor may choose to manipulate the coccyx manually through the rectum, in order to assess limited or excessive mobility of the sacrococcygeal joint. Intrarectal manipulation may also be used to assess any muscle tension in the pelvis connecting to the coccyx.
__They will be able to carry out a comprehensive assessment and provide you with an accurate diagnosis of your injury.
__Upon rectal examination, pain will be present when the tip of the coccyx is manipulated.An internal mass, referred to as a chordoma, might also be present on the anterior surface of the sacrum.
Treatment of Coccygodynia
__Most people recover without undergoing any sort of treatment. Of those who do require treatment, 90% just need to use at-home remedies.
*At-home remedies for tailbone pain (coccydynia) include:-
1) Taking a NSAID like ibuprofen to reduce pain and swelling.
2) Decreasing sitting time. Lean forward if you have to sit.
3) Taking a hot bath to relax muscles and ease pain.
4) Using a wedge-shaped gel cushion or coccygeal cushion (a “donut” pillow) when sitting.
5) Taking stool softeners to reduce pain during bowel movements.
6) Stretching and strengthening the muscles of your lower back and pelvis.
7) Applying hot or cold packs to your lower back. Apply for no longer than 20 to 30 minutes, several times a day.
8) Wearing loose-fitting clothing.
*NON-OPERATIVE TREATMENT:-
__Blocking the nerve supply of the area — a Coccygeal nerve block — using numbing medications and steroids to decrease the inflammation.
__Non-steroidal anti-inflammatory drugs (NSAIDs). Common NSAIDs, such as ibuprofen (Advil), naproxen (Aleve), or COX-2 inhibitors (Celebrex), help reduce the inflammation around the coccyx that is usually a cause of the pain.
*Outpatient treatments for tailbone pain (coccydynia) include:-
__Coccygectomy surgery is rarely recommended and performed. While the surgery itself is a relatively straight-forward operation, recovery from the surgery can be a long and uncomfortable process for the pat
__Surgeons may take slightly different approaches to the operation. Perhaps the biggest difference between surgeons is that some remove only part of the coccyx, while others recommend removing the entire coccyx
1) Partial coccygectomy (removal of part of the coccyx — extremely rare).
2) Total coccygectomy (removal of the entire coccyx — extremely rare).
*In general, the surgery involves the following steps:-
__A one to two-inch incision is made over the top of the coccyx, which is located directly under the skin and subcutaneous fat tissue. There are no muscles to dissect away.
__The protective cartilage over the bone (the periosteum) is dissected from the bone starting on the back and carried around the front.
__The coccyx is then removed. It may receive a biopsy if a tumor is suspected.
__ The most difficult part of the operation is the long healing process. Generally, it takes three months to a year after the surgery before patients see any relief from their symptoms, and sitting is difficult throughout the healing process.
PHYSIOTHERAPY TREATMENT
1) cryotherapy
2) Heat therapy
3) TENS (transcutaneous electrical nerve stimulation)
4) Ultra sound
5) LASER treatment
6) Massage therapy (usually only provides temporary relief)
7) Postural Realignment
8) Stretching exercises
9) Acupuncture
10) Exercise Programmes
1.CRYOTHERAPY
__Ice or cold pack. Applying ice or a cold pack to the area several times a day for the first few days after pain starts can help reduce inflammation, which typically occurs after injury and adds to pain.

2.HEAT THERAPY
__Heat or heating pad. Applying heat to the bottom of the spine after the first few days of pain may help relieve muscle tension, which may accompany or exacerbate coccyx pain. Common heat sources include a hot water bottle, chemical heat pack, long-lasting adhesive heat strip, or hot bath (as long as weight is kept off the tailbone in the bathtub).
3.TENS
__if you use TENS to help with coccyx pain, you need to be careful not to use it to mask the pain, sit longer, and aggravate the cause of the pain. It is not a substitute for treatments to remove the source of the pain. However, if you know that there is no remaining physical cause for the pain (for instance after removal of the coccyx), then TENS can be very helpful.
__For coccyx pain, the electrode pads should be lower down, either side of the coccyx. You may only need one pair of pads.
__Electrically conducting pads are attached to the skin and a low current alternating voltage is applied between them. Pain may be reduced, possibly on the same principle suggested to underlie acupuncture and scratching to relieve an itch, that stimulation of one part of the nervous system can block signals in another pathway.TENS can block neuropathic pain (pain caused by the nervous system itself).
__If sitting sets off your neuropathic pain, you can place the electrodes either side of your coccyx, and switch on the TENS when sitting, and switch it off when you stand up.
4.ULTRSOUND
__Ultrasound therapy may be used, which soothes pain with warmth.The application of ultrasound during the inflammatory, proliferative and repair phases is not of value because it changes the normal sequence of events.
__Ultrasound used over tenderpoint at site of coccygeal pain for reduced swelling.especially musculoskeletal problems like inflammation from injuries (sprains, tendinitis, bursitis). It has been a popular therapy for decades.

5.LASER
__Low-level laser therapy (LLLT), or laser acupuncture, is used for many clinical conditions, and has been well accepted as a useful treatment option because it is non-invasive and is a pain-free process. In addition, laser acupuncture has been shown to have anti-inflammatory effects and to promote tissue healing, thus alleviating acute or chronic pain.
__Light energy enters the damaged cells and stimulates inter-cellular activity. This reduces pain in the area and speeds recovery of the damaged cells. Once the cells recover, the healing process is complete
6. MASSAGE THERAPY
__ Coccydynia may be reduced or alleviated by massaging tense pelvic floor muscles that attach to the coccyx. Tense muscles in this region can place added strain on the ligaments and sacrococcygeal joint, limiting its mobility or pulling on the coccyx.


7.POSTURE REALIGNMENT
__Alterations to everyday activities can help take cumulative pressure off of the tailbone and alleviate pain. These activity modifications may include using a standing desk to avoid prolonged sitting, using a pillow to take the weight off the coccyx, or adjusting posture so weight is taken off the tailbone when sitting.
__The initial goal of treatment should be focused on providing postural education. Individuals should be taught to correct their sitting posture by sitting more erectly on a firm chair. A proper sitting posture ensures weight is taken off the coccyx and is instead loaded onto the ischial tuberosities and the thighs. Patients should be advised to avoid any positions or movements that might exacerbate their symptoms.
__ Decreasing sitting time. Lean forward if you have to sit.
__Physiotherapists may also recommend the use of cushions. Modified wedge-shaped cushions (coccygeal cushions), which can be purchased over the counter, help to relieve the pressure placed on the coccyx during sitting. Donut shaped or circular cushions may also be used. Donut shaped cushions may actually increase pressure over the coccyx, but are more beneficial for rectal pain.The use of cushions can be recommended over a 6-8 week period.

- tailbone pain (coccydynia) treated when a woman is pregnant
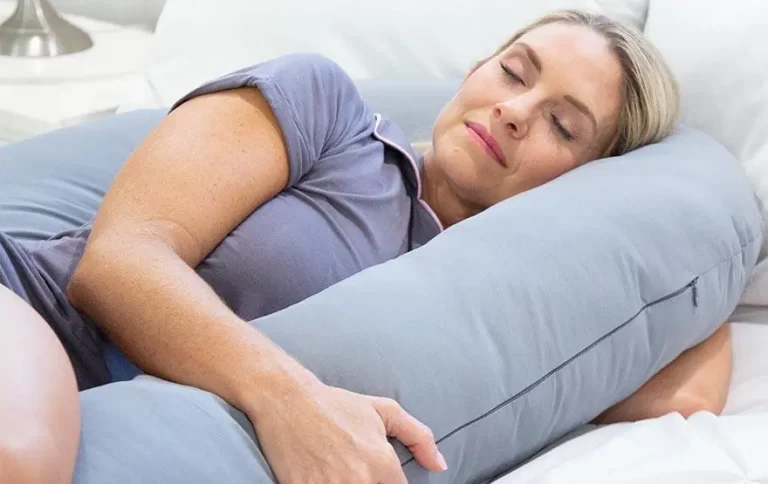
__When you are pregnant, it’s normal to have tailbone pain. Pain comes from sitting for long periods of time, but can also occur when standing and walking. This is because the growing fetus is putting pressure on the bone. Physical therapists recommend you lie on your side when you sleep and sit on a coccyx cushion. Both will help relieve some of the pain by taking pressure off of your coccyx.
- walking help tailbone pain (coccydynia)
__Yes. Standing up and walking around decreases pressure on your coccyx, reducing pain. - sleep with tailbone pain (coccydynia)
__Sitting, driving, bending and sleep are all affected by tailbone pain. In severe cases it can vastly decrease your quality of life. Lie on your side to reduce tailbone pain. - chiropractor help with tailbone pain (coccydynia)
__Yes. A chiropractor can help correct the misalignment of a coccyx that leans too far forward or back.
8.STRETCHING EXERCISE
__stretching of the levator ani might be chosen if the underlying cause is due to spasm of the pelvic floor musculature .
1.Single leg knee hug
__ This stretches the piriformis and the iliopsoas muscles, both of which can become tight and limit mobility in the pelvis. The piriformis originates from the tailbone and can irritate the sciatic nerve if it becomes inflamed.
__Gently increasing the stretch over time will allow the range of movement to expand.
__Lie down on the back and extend the feet straight out.
__Bend one knee toward the chest.
__Hold onto the bent knee and pull it gently down into the chest.
__Hold for 30 seconds, then repeat on the other side.
2.Piriformis and glute cross leg stretch
__ This stretches the piriformis as well as the glutes. The glutes are attached to the tailbone and walking or running can cause them to pull on it
__Lie down on the back.
__Raise the knees toward the ceiling, keeping the feet flat on the floor.-__Bend the left leg closer into the body and rest the left ankle across the right knee.
__ Loop the hands around the right thigh and gently pull it toward the chest for 30 seconds.
__ Repeat on the other side.
3.Kneeling psoas stretch
__The iliopsoas refers to the joined iliacus and psoas muscles. These hip muscles help the hip to flex.
__Stretching them can help to relieve tailbone pain as they often become stiff with prolonged sitting.
__Kneeling upright on the floor, move one leg in front and place the foot flat on the floor. The thigh should be at a 90-degree angle to the shin.
Rest the shin and knee of the back leg on the ground with the toes pointing backward. Placing a towel under the back knee may be necessary for comfort.
__With the chest upright, rest the hands on the hips for stability.
__Tuck the pelvis under and lean forward slightly.
__ Hold the stretch for 20–30 seconds.
__Repeat on the other side.
4.Iliopsoas and glute stretch (Pigeon Pose)
__The Pigeon Pose helps to open the hips.
This stretch is a yoga pose that helps to open the hips. It stretches the iliopsoas, as well as the glute muscles on the bent leg.
9.ACUPUNCTURE
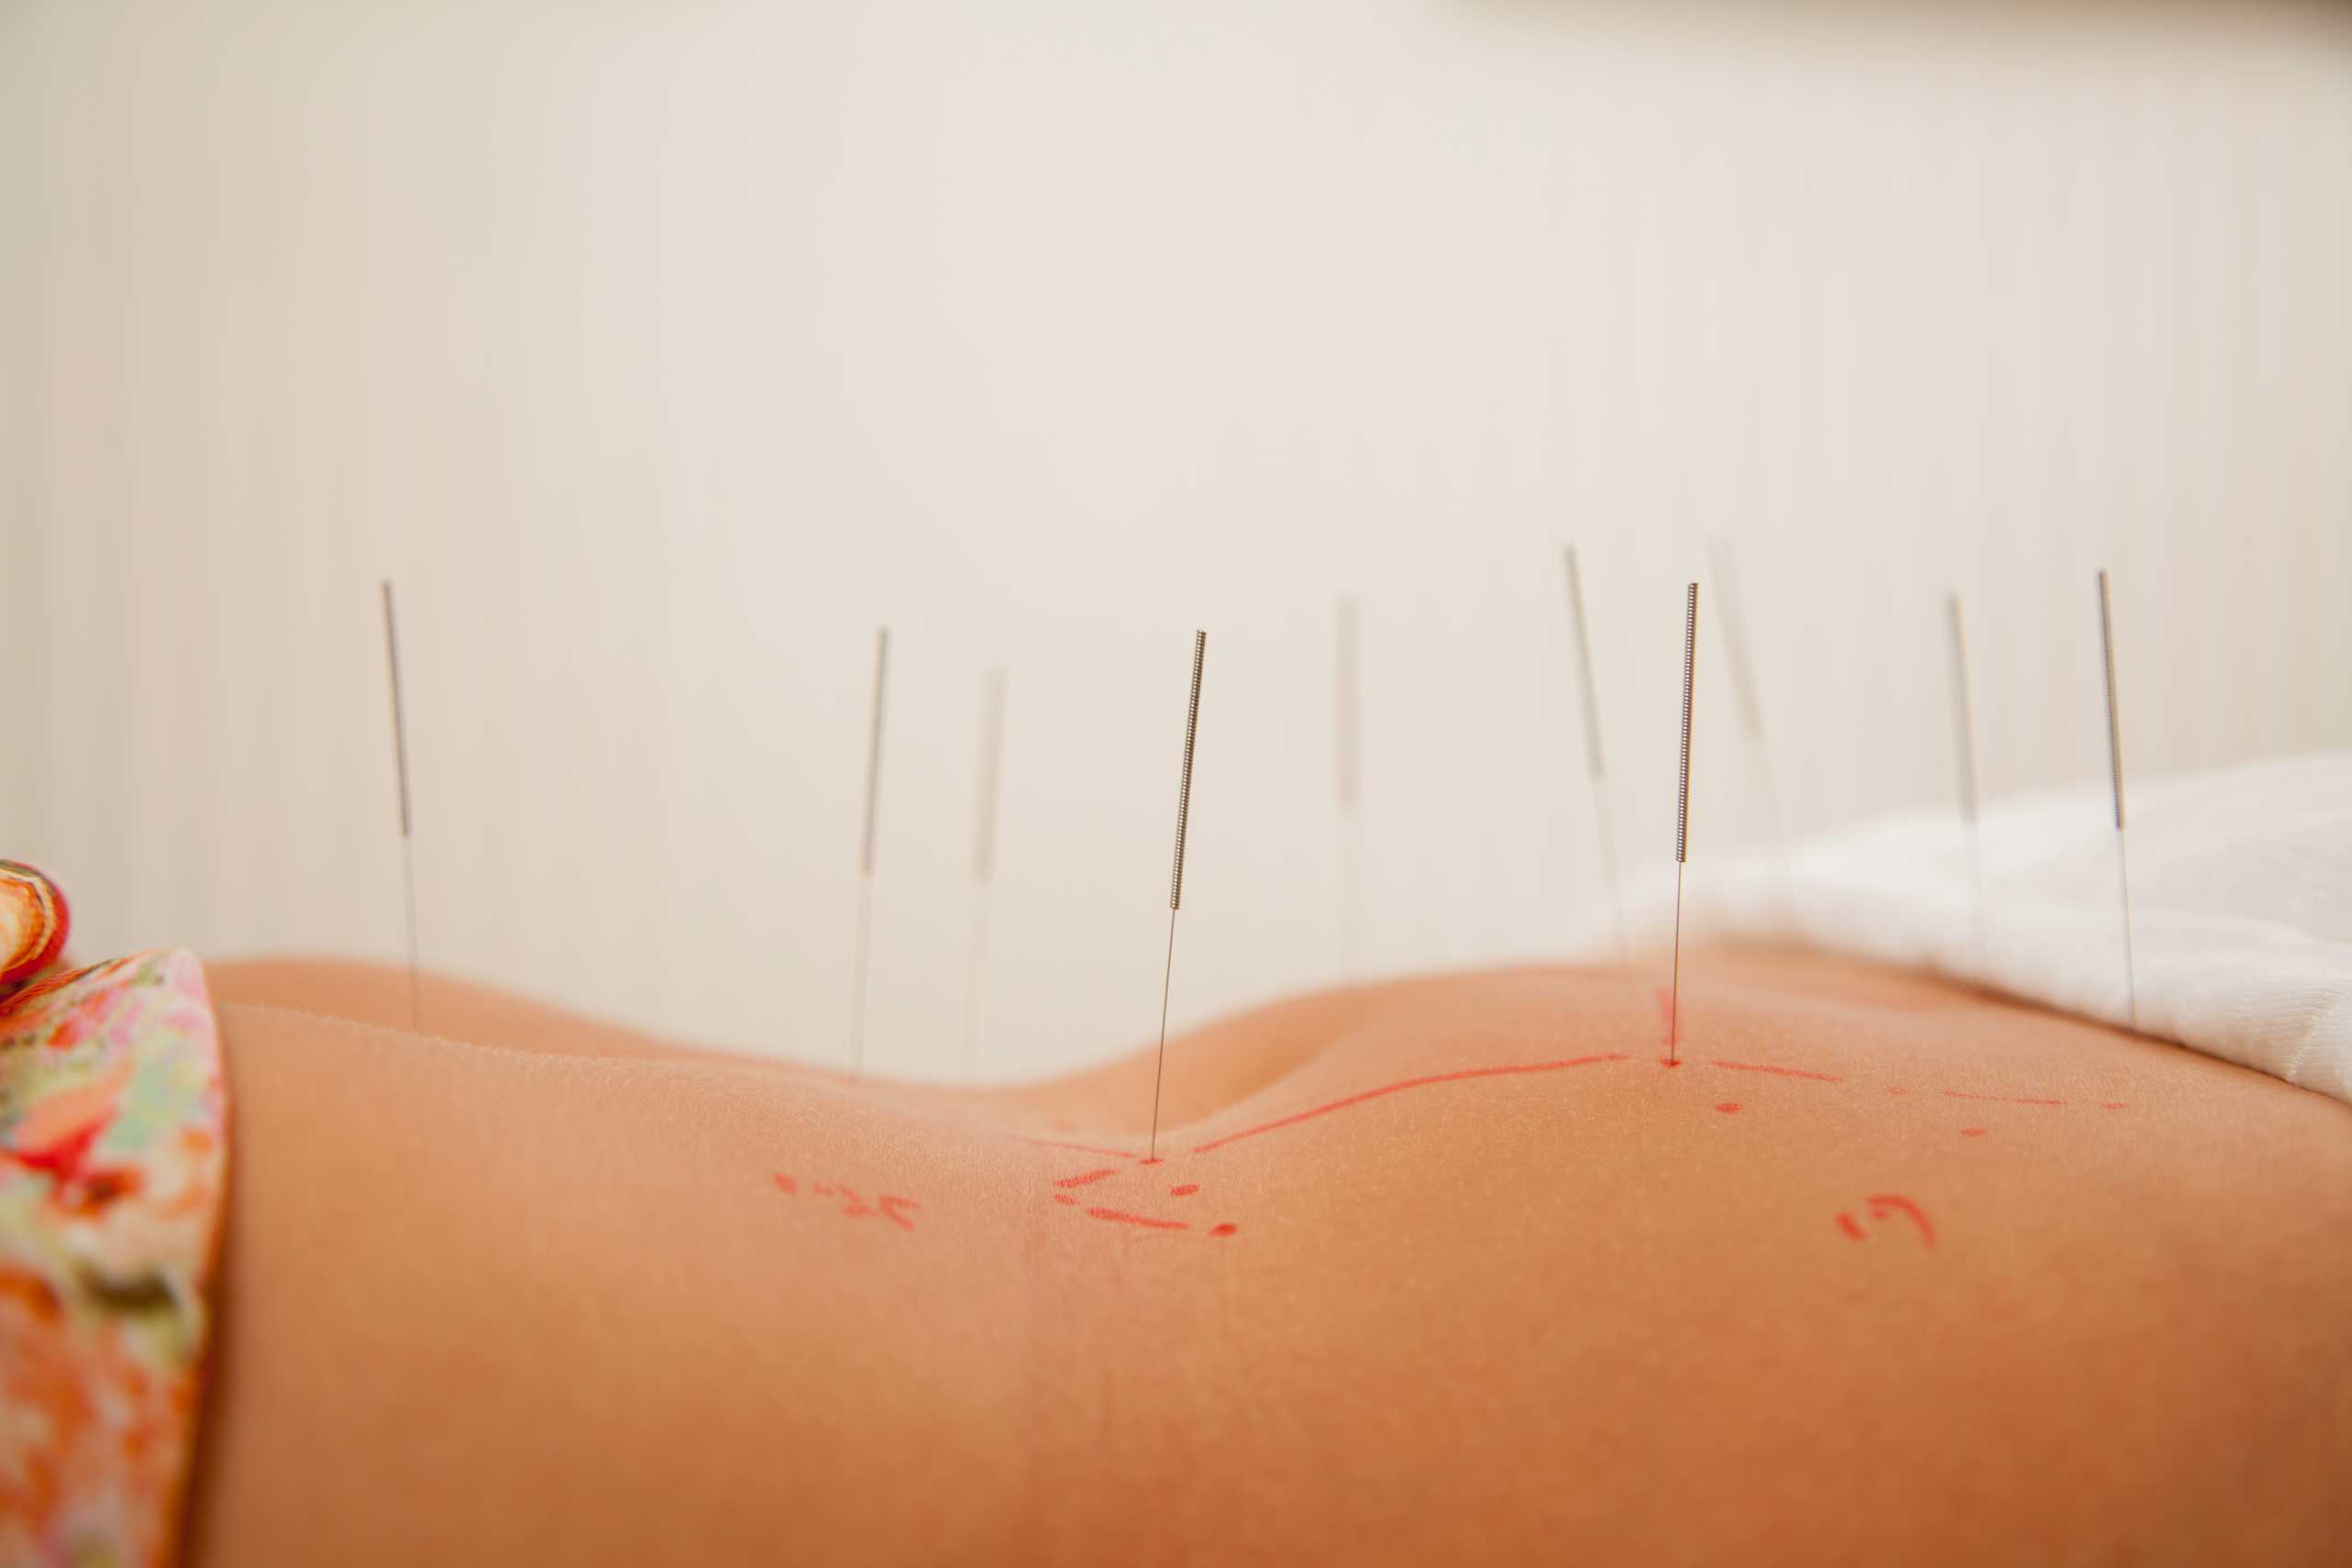
__ Acupuncture can reduce pain in about 70% of people. Some people have little or no response to acupuncture.
__Research shows that acupuncture works for three reasons: (1) because of the placebo effect, (2) because it causes the body to release endorphins (which are like opiate drugs), and (3) because it causes changes in the nervous system.
10.EXERCISE PROGRAMMES
*Manual Therapy
__Procedure: placed thumb between anus and tip of coccyx, approach the anterior surface of coccyx and slide finger cephalocaudal with slight pressure to mobilize the anterior soft tissue, initially, in first few seconds it was painful after 30 seconds patient became comfortable.
__continued this gentle movement with lateral medial sliding of thumb with slight pressure further 30 seconds (myofascial release); patient reported no pain on palpation.

__ After soft tissue mobilization, performed sacrococcygeal joint mobilization to resume themobility of joint. Patient was in above mentioned position grasped coccyx between thumb and index finger ( by placing thumb in space between anus and upper coccyx). applied slight traction on coccyx and glide the coccyx anterior and posterior 5 times, performed three sets of same movement, first set was quite painful, 2nd set was quite comfortable and third set was pain free.
__ gave three treatment sessions on alternate days. Patient was also guided to perform sit bath and Kegel exercises twice a day.

__Mobilization and manipulation, and may either involve internal or external contact with the coccyx.
__Internal techniques may include massage of the levator ani muscle or the coccygeus muscle,joint mobilization while the coccyx is hyperextended to stretch the levator ani, or repeated mobilizations while the coccyx is rotated.
__External techniques may include manipulations of either the coccyx or sacroiliac joint,mobilizations of the sacrococcygeal or intercoccygeal joints, posterior mobilizations to the thoracic spine,and stretching of the piriformis or iliopsoas.
__The technique chosen will vary depending on what the originating cause of the coccygodynia is.For example, massage or stretching of the levator ani might be chosen if the underlying cause is due to spasm of the pelvic floor musculature . Mobilization techniques may be the preferred technique when the goal of treatment is to increase coccygeal mobility.Manipulation techniques are helpful when the goal of treatment is to improve extension of the coccyx.
*Pelvic Floor Muscle Exercises
__The pelvic floor forms a broad sling of muscle, lying across the bottom ofthe pelvis, through which pass the openings from the bowel, vagina (birthpassage) and the urethra (passage from the bladder).
__It is important to start practising exercises with these muscles as they are particularly important during pregnancy, labour and after the birth.They are the main support for your pelvic organs and provide control of the three passages.
__ The weight of your baby on your pelvic floor during pregnancy and delivery will cause these muscles to weaken.This could result in symptoms such as leakage of urine when coughing,urgent or frequent need to pass urine or decreased satisfaction during intercourse. These muscles also provide a great deal of stability and support for your back.You can exercise your pelvic floor muscles in the same was as you would exercise any other muscle.
__Practise the following:-
• Imagine that you are trying to stop yourself from passing windand at the same time imagine trying to stop your flow of urine mid-stream. The feeling is one of ‘squeeze and lift’, closing and drawing up the front and back passages.
• Hold for as long as you can (up to 10 seconds). Release and restfor a few seconds. Repeat as many times as you can (up to a maximum of 10 repetitions at a time).
• It is important to do pelvic floor exercises without squeezing your legs together, tightening your buttocks or holding your breath. You may feel your lower tummy gently pull in with this exercise.
1: Child’s Pose
__Child’s Pose helps to tone the muscles of the pelvis, stimulate blood flow to the pelvic organs and stretch the back. This allows the nervous system to be reset and the body to rejuvenate properly.
- Come to your hands and knees on the mat.
- Spread your knees as wide as your mat, keeping the tops of your feet on the floor with the big toes touching.
- Bring your belly to rest between your thighs and root your forehead to the floor. Relax the shoulders, jaw, and eyes. If it is not comfortable to place the forehead on the floor, rest it on a block or two stacked fists. There is an energy point at the center of the forehead in between the eyebrows that stimulates the vagus nerve and supports a “rest and digest” response. Finding a comfortable place for the forehead is key to gaining this soothing benefit.
- There are several possible arm variations. You can stretch your arms in front of you with the palms toward the floor or bring your arms back alongside your thighs with the palms facing upwards. These are the most common variations. But you can also stretch the arms forward with palms facing up for a shoulder release or try bending the elbows so that the palms touch and rest the thumbs at the back of the neck. In this position inch the elbows forward.
- Do whichever feel more comfortable for you. If you’ve been doing a lot of shoulder work, the second option feels nice.
- Stay as long as you like, eventually reconnecting with the steady inhales and exhales of your breath.
2: Bow Pose
__A Bow Pose is a gentle stretch exercise that helps to strengthen your back, tailbone muscles, and the tendons simultaneously. Bow Pose position is suitable for beginners as it poses a lesser risk of collapsing into your lumbar spine.
- Lie flat on your stomach. Keep your chin on the mat and your hands at your sides. Your hands should be palm up.
- Exhale while you bend your knees. Bring your heels as close as you can to your buttocks. Your knees should be hip-width apart.
- Lift your hands and take hold of your ankles. Be sure to grab the ankle and not the top part of the feet. Your fingers should wrap around the ankles, but your thumb does not. Keep your toes pointed.
- Inhale and lift the heels away from the buttocks, keeping a hold of your ankles. Simultaneously, lift your head, chest, and thighs away from the mat. As you lift, rotate your shoulders safely and comfortably. At this point, only your core should touch the mat, while the rest of your body is lifted towards the ceiling.
- Draw your tailbone into the mat to deepen the stretch. You should feel the stretch in your back as the weight and balance shifts to your core. Your chest and shoulders should feel open.
- Look straight ahead and hold the pose for about 15 seconds while you focus on stretching, breathing, and balancing.
- Exhale and release the pose. Lower your head, chest, thighs, and feet back towards the mat. Let go of your ankles and return to your hands to your side. Relax for a few seconds and repeat the pose as needed or continue to your next pose.
3: Side Angle Pose
__Also known as Parsvakonasana, the Side Angle Pose strengthens your legs while at the same time lengthen the side of your body. This exercise helps to activate the entire spine, stretching the tailbone and spine simultaneously.
- Exhale and step your left foot behind towards the back of the mat with front foot staying at the top.
- Lift and extend your arms out horizontally from your sides, with palms down.
- Angle your right heel toward the center of your mat. Opinions vary on the ideal angle for the foot in relation to the ankle. Somewhere between 90 (which would be parallel to the back edge of your yoga mat) and 45 (toes pointing at the top left corner of your mat) degrees is acceptable.
- Bend your right knee so that your calf and thigh form a right angle with your thigh parallel to the floor.
- Rest your right forearm on the right thigh with the palm turned up towards the ceiling. If you’d like to deepen the stretch, bring your right hand inside or outside the right foot, depending on which is more comfortable.You can place the right fingertips on the floor for added length and to also avoid dumping the weight in the shoulder. A block underneath the hand is also welcomed. Remember to lift the weight out of the shoulder while engaging the core for support.
- Lift your left arm up and extend it over the ear. Reach through finger tips while pressing firmly into the pinky toe side of the back foot.
- Open your chest and make sure your left shoulder is aligned over your right shoulder.
- Bring your gaze up toward your left hand.
- Lift the torso up on an inhale extending arms wide. Pivot the feet and torso to face the top of the mat and step forward, returning to tadasana.
- To keep the body in balance, repeat the pose with your left foot forward.
4: Sunbird Pose
While Sunbird Pose is rather a simple exercise to do, its effects are great. It helps to strengthen your back while stabilizing your spine and tailbone at the same time.
Other benefits include improving static balance, posture, as well as increasing your focus and concentration.
1.Start on all fours. The hips are directly above the knees. The thighs, knees, calves, ankles and feet are hip distance apart from one another.
2.The hands and arms are shoulder distance apart. Stack the shoulders over the elbows and wrists. Spread the finger wide and root down through the index, thumb and pinky fingers.
3.Bring the gaze a few inches in front of the hands so that the neck is long and in line with the spine. Lengthen the spine. The sit bones reach back as the crown of the head reaches forward.
4.Bring a slight engagement to the belly by drawing the naval in and up towards the spine.
5.Shoulders draw away from the ears and the shoulder blades down the back.
6.Find your balance and on an inhale extend the right leg up and straight back. Activate the leg and keep lifting it from the inner thigh. Flex the toes towards the face and draw the outer left hip down towards the earth so that the hips are squared.
7.Then extend the right arm forward in a handshake fashion with the palm of the hand facing the midline of the body and the thumb facing up towards the sky. The arm is engaged as you reach forward through the fingertips Make sure that the shoulder is not scrunching up towards the ear.
8.To release, gently place the extended arm and leg back down to the earth. Flush it out with a few cat/cows and then repeat on the opposite side.
5: Triangle Pose
__Triangle Pose is also known as Trikonasana. This pose improves the strength of your legs and as a result, stabilizing the spine and tailbone while opening your hips. It also strengthens your hamstrings.
__As much as the Triangle Pose is beneficial to our health, you should refrain from doing this exercise completely if you are having diarrhea and low blood pressure.
- Engage your right thigh muscles and draw your right femur into its socket. Extend your right hand toward the front of the room, keeping your right hip tucked.
- Lower your right hand down onto your shin or ankle. If you are more open, bring your right hand to the floor on the inside or on the right foot. Do whichever one feels most comfortable.
- The left shoulder stacks on top of the right one as you open your chest, reaching your left fingertips toward the ceiling while keeping your left shoulder rooted in its socket.
- Turn your head to take your gaze up toward your left fingertips. If this is uncomfortable for your neck, it’s also fine to keep the head in a more neutral position.
- Continue to draw your right thigh muscles upward, deepening the crease in your right hip.
- Soften your right knee slightly to prevent hyperextension (this is called a microbend).
- Stay for at least 5 breaths.
- Repeat the pose with your left leg forward.
6: Pigeon Pose
__This iliopsoas and gluteal stretch help to open your hips as well as stretching the iliopsoas and gluteus muscles on the bent leg.
__By doing this exercise, it stimulates your abdominal organs and facilitates your digestion. On a mental and emotional level, the Pigeon Pose tests our ability to sit uncomfortably as well as bringing up pent-up anger and fears.
__The Pigeon Pose has a number of health benefits. However for those suffering from knee, ankle, and sacroiliac injury, you will definitely want to exercise caution when doing such strenuous move, or if possible, avoid it altogether.
- From Downward Facing Dog, bring the right leg up into a Down Dog Split.
- Bend your right knee and bring that leg forward as if you were going to step into a lunge. Instead of placing your foot down as you would for a lunge, bring your right knee to the floor on the outside of your right hand. The right shin may angle back towards the left hip or be more parallel to the front of your mat, depending on your range of motion.
- Release your left knee to your mat. Your left leg should be flat on the floor. Take a look backward and make sure that your left foot is pointing straight back.
- Square your hips towards the front of your mat.
- Take padding (a folded blanket works well) under the right side of your hip as necessary to make the pose more comfortable.
- If you feel stable, bring your torso down into a forward bend over your right leg.
- Keep hips square and weight balanced equally on both sides as best you can. If this feels too intense, place a blanket or block or under the hip or back knee. Reach your forehead toward the floor.
- Continue squaring your hips and breathing into any tightness.
- Come back up, bringing your hands in line with your hips.
- To release, curl your left toes under and step back into a Downward Facing Dog.
- Repeat the pose on the other side.

7: Cat-Cow Pose
__Known as the Marjaryasana, the Cat-Cow Pose is a dynamic movement that helps to warm up your spine at any point on or off your mat.
__If you are suffering from a neck injury, you should ask a professional for some tips or avoid this exercise.
- Start on your hands and knees with your wrists directly under your shoulders, and your knees directly under your hips. Point your fingertips to the top of your mat. Place your shins and knees hip-width apart. Center your head in a neutral position and soften your gaze downward.
- Begin by moving into Cow Pose: Inhale as you drop your belly towards the mat. Lift your chin and chest, and gaze up toward the ceiling.
- Broaden across your shoulder blades and draw your shoulders away from your ears.
- Next, move into Cat Pose: As you exhale, draw your belly to your spine and round your back toward the ceiling. The pose should look like a cat stretching its back.
- Release the crown of your head toward the floor, but don’t force your chin to your chest.
- Inhale, coming back into Cow Pose, and then exhale as you return to Cat Pose.
- Repeat 5-20 times, and then rest by sitting back on your heels with your torso upright.
8: Cobra Pose
__The Cobra Pose, also called Bhujangasana, targets specifically on your lower back. Doing this movement strengthens the spine and surrounding spine. While the Cobra pose is great for all types of back pain, you should be cautious and slow when doing this pose particularly if your lower back is less flexible or if you are new to this.
- Place your palms flat on the ground directly under your shoulders. Bend your elbows straight back and hug them into your sides.
- Pause for a moment looking straight down at your mat with your neck in a neutral position. Anchor your pubic bone to the floor.
- Inhale to lift your chest off the floor. Roll your shoulders back and keep your low ribs on the floor. Make sure your elbows continue hugging your sides. Don’t let them wing out to either side.
- Keep your neck neutral. Don’t crank it up. Your gaze should stay on the floor.
9: Bridge Pose
__When doing the Bridge Pose, it stimulates the abdominal muscles. It also helps to strengthen your back, hamstrings and stretches your thighs. You will become more alert both in your body and mind as you do this pose.
__ The patient lies down with the back, knees in full flexion and feet flat on the floor and close to the buttock. Then the patient lifts hip off the floor towards the ceiling/sky as high as possible.

