

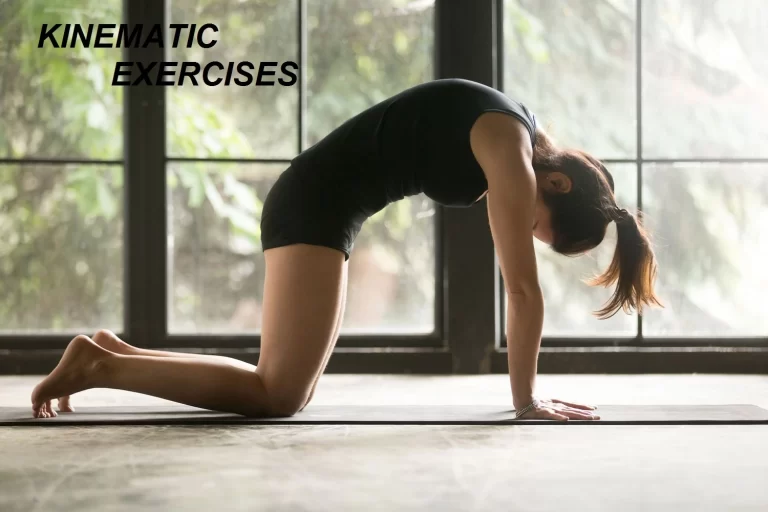
Kapotasana (Pigeon Pose)
Table of Contents
What is Kapotasana (Pigeon Pose)?
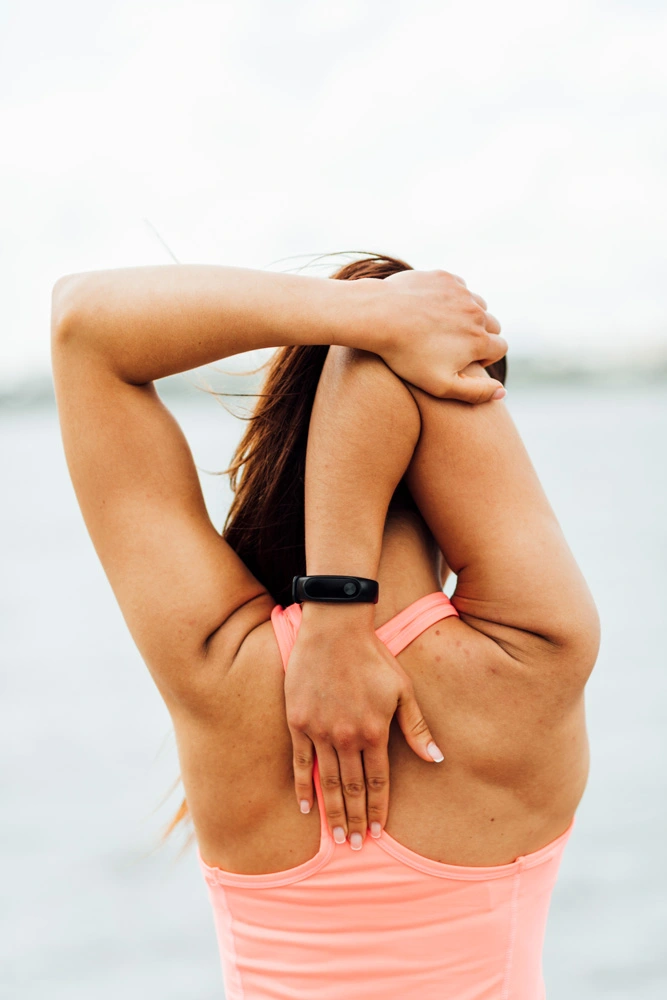
Which muscles are used in Kapotasana?
The benefits of the Pigeon Pose
Which poses are necessary for Kapotasana preparation?
How to do the Pigeon Pose
Kapotasana (Pigeon Pose) video
What are some Kapotasana beginner tips?
- This may cause significant stretching of the outer hip. The hip opener is more challenging when your shin is parallel to the front of the mat.
- Before placing it on your hands, stand them or use a block if your forehead does not reach the mat.
- You can also stay higher, resting on your hands or elbows, but be careful not to let your shoulders droop and keep your neck relaxed.
Pigeon Pose variations and modifications
Modifications:
To make the Pigeon posture more enjoyable (and effective) for someone new to it, take a few extra steps and make an effort.
The leg bent in the direction of you should have its hip checked. On the side where the hip does not touch the floor, make sure there is adequate cushioning beneath your butt. If necessary, use a block or more blankets. Maintaining both hips square with the floor and distributing your weight evenly between them is essential. If not, you risk straining your knee and bending your spine.
Try to construct an external support system that will allow you to relax throughout the forward bend.
If you are uncomfortable with the Pigeon stance, consider Eye of the Needle, also called Suchirandrasana.
Variations:
- As opposed to dropping the head to rest on the mat, practitioners can turn this into a back bend. Keep your arms straight and raise your chest.
- Examine the variation presented in Figure Four. To extend the stretch, bring your left foot closer to your hip.
- You can also perform Figure Four while on your back. Pull the back of your left leg in your direction after crossing your right ankle over your left knee. Change sides.
What are the types of Kapotasana?
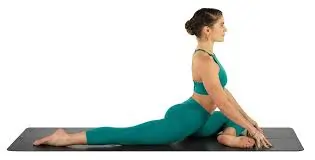
- Classic Pigeon Pose
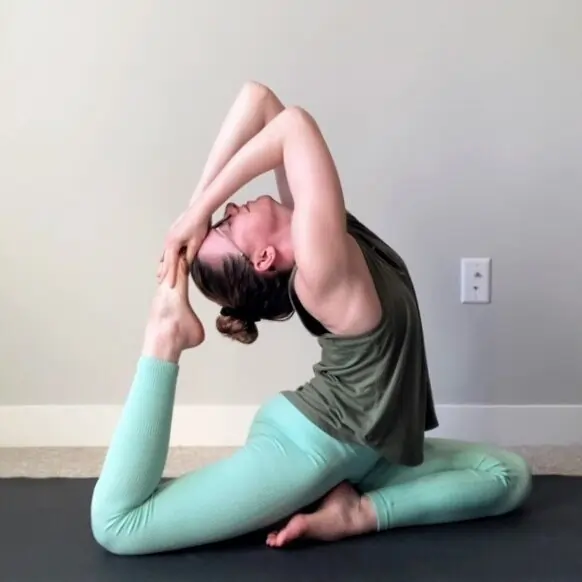
- King Pigeon Pose
- Sleeping Pigeon Pose
Classic and Resting Pigeon Pose
- On a yoga mat, start in the downward-facing dog position. Raise your hips to the sky, straighten your legs, and apply pressure to your hands and feet. Your body will be in an inverted V form.
- Move your right knee to the back of your wrist after lifting your right leg off the floor.
- As you push your right leg to the mat, make sure your left leg strikes the floor straight.
- Stretch your right knee so it is farther to the right than your hips, and make sure your right foot is dorsiflexed, or flexed towards the shin. Maintain an even weight distribution across both hips as you slowly descend your right buttocks to the floor. Put a folded towel underneath your right buttocks if this is too difficult.
- Put both hands under your shoulders and lightly press on the palms of your hands to stretch and straighten your spine. Look straight ahead and feel the stretch. The Classic Pigeon Pose is now yours.
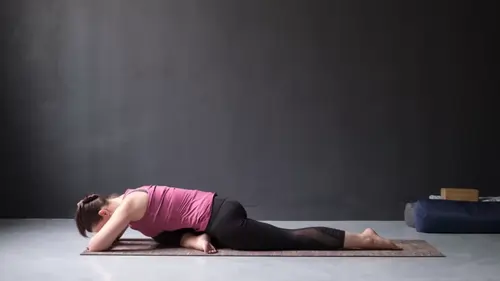
- Then, lower your chest over your right leg, exhale deeply, bend your elbows slightly, and extend your arms straight in front of you. If you are uncomfortable with this, simply reach forward as far as you feel comfortable.
- Pull your shoulders back from your ears softly while you are in a comfortable position.
- In this position, take five to ten deep, peaceful breaths.
King Pigeon Pose:
- Follow steps 1 through 5 above to enter the Classic Pigeon Pose.
- Maintain a plantar flex or toe-pointing position.
- Next, hold your left foot and slowly fold your elbow back while raising your left hand in the air.
- Don’t bend your neck back, but you can look up and lift your chin slightly.
- In this position, take five to ten deep, peaceful breaths.
- Continue to the other side.
Sleeping Pigeon Pose
- Place your knees firmly under your hips and your hands squarely under your shoulders to create a tabletop position.
- Slide your right leg forward until it is about an inch or two behind your right wrist.
- Place your hands on the floor in front of your right leg while maintaining a square hip position.
- Bring your belly button closer to your spine to activate your core muscles.
- Gently return your torso to a straight position to release.
When performing Kapotasana, what common mistake should you avoid making?
Avoid these blunders to get the most out of the Pigeon posture.
Rear Leg Rotation
Your back leg should remain neutral during the Pigeon stance instead of being turned outward. To fix this, raise your thigh and tuck your toes under to make your hips square.
Not Square Hips
Never allow the front incorrect knee to drop into your hip. Maintain a square hip position and provide padding if necessary.
Contraindications
- damage to the shoulders, neck, or spine.
- Insomnia
- Stiff back or a sore back.
- Migraine
- Hypertension
- Women who are pregnant or menstruating.
- Weak functions of any organ.
- Spondylitis
- Any kind of allergies related to breathing.
- Depression
Conclusion:
Kapotasana, sometimes referred to as “pigeon pose,” is a potentially fulfilling and changing yoga pose, but it does take patience, practice, and good alignment. By following the thorough directions and practical tips in this article, you may improve your strength, flexibility, and balance while also collecting the benefits of this posture in a safe and virtual environment.
Always pay attention to the demands and limitations of your body, and get advice from a able to yoga instructor or another medical professional if you have any concerns or health problems. With effort and focus, Kapotasana can become a lovely and allowing additional to your yoga practice.
FAQs
What advantages does Kapotasana offer?
The Pigeon Pose improves your strength because it enables you to reach your limbs’ greatest length. stretches a variety of muscles, including the thigh, groin, ankle, throat, chest, psoas, and belly.
What is the Kapotasana procedure?
Try to maintain your thighs as close to the floor as possible as you descend back. With your palms on the floor and your fingers pointing towards your feet, lower your crown to the floor as well. Press your palms together, lift your hips, and lift your head slightly off the floor to open your front groin as much as possible.
Is the pigeon posture acceptable in bed?
This popular hip opener becomes even more pleasant and accessible when you have the support of your bed and pillows. Get on your hands and knees and go towards the edge of the bed to create space for yourself.
Is Kapotasana challenging?
I am aware that kapotasana is the most challenging pose for most yogis, and I am one among them. It requires a lot of leg strength and considerable flexibility in the shoulders and upper back.
Did Pigeon’s position injure?
Pain in the front knee is often a sign that the hip is not fully externally rotated, and the knee is trying to take up the rotation. This should be avoided as it increases the risk of injury to the knee.
References
- EkhartYoga. (2024, January 24). How to do Pigeon pose / Eka Pada Rajakapotasana – Ekhart Yoga. Ekhart Yoga. https://www.ekhartyoga.com/resources/yoga-poses/pigeon-pose
- Pigeon Pose Yoga (Kapotasana) | Yoga Sequences, Benefits, Variations, and Sanskrit Pronunciation | Tummee.com. (2017, October 15). Tummee.com. https://www.tummee.com/yoga-poses/kapotasana
- JanviMangukiya, J. (2023, December 13). Kapotasana (Pigeon Pose) – Steps, Benefits, Variations – Mobile. Mobile Physiotherapy Clinic. https://mobilephysiotherapyclinic.in/kapotasana-pigeon-pose/#Benefits_of_pigeon_pose
- Ryt, A. P. (2024, May 10). How to Do Pigeon Pose in Yoga. Verywell Fit. https://www.verywellfit.com/pigeon-pose-eka-pada-rajakapotasana-3567103
- Cpt, K. D. M. R. (2021, March 4). Pigeon Pose: A How-To Guide. Healthline. https://www.healthline.com/health/fitness/pigeon-pose#how-to

One Comment