10 Best Spine Alignment Exercises
Table of Contents
Introduction
You can strengthen your back muscles, increase your stability, and correct your posture with spinal alignment exercises.
These advantages can enhance general function in day-to-day tasks while reducing pain and damage. Discuss the best workouts for your needs with a medical professional or a trained personal trainer to maximize the benefits of your alignment regimen. They may make adjustments and offer guidance on proper form and technique.
How to maximize your daily routine
Determine how frequently and for how long you want to perform the exercises as you plan your routine. Another option is to perform several mini-workouts during the day. Increase the frequency, duration, and intensity gradually after starting gently.
Warm up for five to ten minutes before each workout to increase heart rate and circulation. Perform modest aerobic exercises, such as running or walking, with dynamic stretches.
Throughout your session, permit yourself to relax completely. Be mindful of your body and concentrate on taking deep, regular breaths. To complete the exercises and move between them, use carefully slow motions. Rest for roughly 30 seconds between exercises.
For activities that call for lengthier holds, you can use equipment like pillows, heated pads, and cold packs.
To ease tension and pain, end with a cooldown. Gentle stretches, foam rolling, and relaxation methods, including progressive muscle relaxation, breathing exercises, and guided imagery, are among the options. Another option is to go for a brief walk.
Stand tall with spine alignment exercises
Exercises for spine alignment enhance your strength training sessions, help you stand taller and straighter, and prepare you to move more effectively.
Everyday postures can cause proper spine alignment, but a few easy exercises can help strengthen the spine’s natural curves and improve your body mechanics, form, and regular posture during weight training.
What effects does spine alignment have on your overall health and well-being?
The spine’s natural curves work to balance the body’s constant gravitational pull.
- Make sure the joints are functioning properly.
- improve your body mechanics in all of these positions: prone (face down), supine (lying face up), on all fours, sitting, and standing.
The curves produce a functional balance when they are in neutral alignment:
- The lower back and neck have two small inward bends.
- The sacrum and mid-back have two little outward bends.
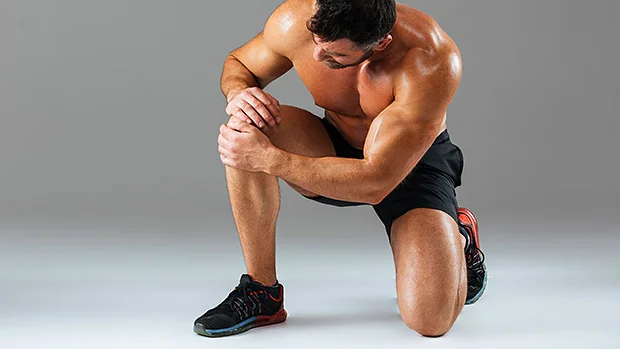
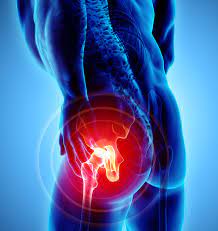
Exaggeration of any of these curves can strain the joints, leading to migraines, shoulder and neck pain, sciatica, and hip and knee pain.
Spine Alignment Exercises video
Use these easy spine alignment exercises to:
- Develop healthy posture.
- Improve your body’s mechanics in any activity.
- Encourage good form when working out.
- Improve your weight-training results.
- Lower the possibility of getting injured.
Best Exercise To Align Your Spine
Start with this regimen if you’re new to working out, have an injury, or want a mild workout. With the aid of these workouts, you may improve your alignment and form. Increase your back muscles’ strength, flexibility, and stability gradually before moving on to more difficult exercises.
Bird Dog Exercise
You will need an exercise mat for this exercise. For added padding, place a folded towel or flat cushion below your knees. To check your alignment, use a mirror.
 Bird Dog Stretch
How to do it:
- Start in the tabletop posture on all fours.
- Your shoulder blades should be moved together.
- After a few seconds of holding this position, return to the starting position.
- Go back to where you were before. There is only one round.
- Perform 8–12 repetitions in two or three sets.
Cat Cow Stretch
The Cat-Cow Stretch, or Chakravakasana, is an essential yoga practice, and for good reason. It involves moving the spine from a rounded (flexion) to an arched (extension) position. This is a straightforward vinyasa that connects breath to movement since each movement is performed in parallel with either an inhalation or an exhale of the breath.
 Cat-Cow Stretch
How to do it:
- Start in table pose, with your spine neutral, on your hands and knees. As you take a breath and assume cow stance, raise your sit bones, thrust your chest forward, and let
- Your lower abdomen should sink.
- Raise your head and look directly ahead while letting your shoulders drop away from your ears.
- Pull your pubic bone forward, tuck your tailbone in, and round your spine outward as you exhale to enter cat posture.
- Don’t push your chin to your chest; instead, let your head drop to the ground. Above all, relax.
Bridge Pose
The bridge exercise improves core stability while strengthening your hamstrings (back of the leg) and glutes (butt). It’s easy to include in a strength-training or warm-up program, and it’s also an effective rehabilitation exercise for strengthening the spine and core.
 Bridge Pose
How to do it:
- Press your lower back onto the floor to tighten your buttocks and abdominal muscles.
- To make a straight line from your knees to your shoulders, raise your hips.
- For 20 to 30 seconds, hold.
- To return to the starting position, lower your hips.
Wall Angels Exercise
Wall angels are sometimes referred to as a “V” to “W” stretch due to the arm postures at the beginning and end. They are typically done with your back to the wall. The feedback from the wall keeps your spine neutral and your arms in position.
 Wall Angels Exercise
How to do it:
- As you stand, position your feet 6 to 8 inches (15 to 20 cm) away from the wall. Press your butt, back, shoulders, and head on the wall.
- Move your belly button toward your spine to try to start with a neutral spine. Feel the back of your rib cage attach to the wall as you draw your ribs in and down, keeping your lower back just a little bit off the wall.
- Try to get the back of your head to touch the wall by tucking your chin in a little. Try positioning a tiny pillow behind your head if you have trouble getting it to rest against the wall.
- After that, raise your arms straight up and place them on the wall over your head, making sure the backs of your hands make a “V” shape with the wall. Try moving your feet further from the wall to see if that fixes any alignment problems you may be having.
- It’s acceptable to feel a strain; lower as much as you can without losing proper posture. Return to the “V” starting position while keeping alignment after holding for five counts at the lowest point.
- If your muscles are no longer able to maintain the postural alignment without suffering pain, cease after 5–10 repetitions.
Child’s Pose
It’s an opportunity to pause your current activity, reevaluate your posture, re-establish a connection with your breathing, and become ready to go.
 Child’s Pose
How to do it:
- On the yoga mat, take a hands-and-knees position.
- Keeping the tops of your feet on the ground and your big toes in contact, extend your knees as wide as your mat.
- Place your abdomen between your thighs and root your forehead to the ground. If putting your forehead on the floor causes pain, place it on a block or two fists.
- You can either pull your arms back to your thighs with your palms facing up or extend them in front of you with your hands facing the floor. You can also bend your elbows until your palms touch and position your thumbs at the back of your neck, or you can extend your arms forward with palms facing up to relieve your shoulders. In this position, the elbows should be pushed forward.
- Take as long as you like, maintain the regular inhalations and exhalations of your breath.
Plank Hold
Holding the remainder of your body off the ground while balancing on your toes and forearms is known as a plank. Your spine stays in a neutral position while your head, torso, and legs are all in motion. Since you maintain your core muscles contracted in a single position, planking is an isometric workout.
 Plank Hold
How to do it:
- Start in the plank position with your toes and forearms on the ground, face down. Your elbows are specifically below your shoulders, and your forearms are pointing forward. Your head should be at ease when you look at the ground.
- Use your abdominal muscles to pull your abdomen in the direction of your spine. Maintain an upright and strong torso and a straight body from your ears to your toes without bending or drooping. This is the neutral spine position. Don’t incline your shoulders up toward your ears; instead, keep them down. Your heels should be underneath the balls of your feet.
- For ten seconds, maintain this posture. Let’s go to the ground.
- Work up to 30 or 45, or 60 seconds over time.
Thoracic Extension On Foam Roller
A thoracic spine flexibility exercise designed to improve your passive extension is the foam roller thoracic extension. Place a foam roller beneath your upper back and lie down. As you lift your arms raised and extend your upper back over the foam roller, keep your pelvis on the floor. You can repeat this stretch at two or three separate thoracic spine segments after holding it for two minutes.
 Thoracic Extension On Foam Roller
Cobra Stretch
You can extend your entire upper body with the heart-opening backbend known as Bhujangasana (Cobra Pose). Depending on your requirements, you can bend or straighten your elbows to change the backbend’s intensity.
 The Cobra Stretch
How to do it:
- Start by placing your forehead and the tops of your feet on the floor or yoga mat as you lie on your abdomen on the floor.
- Aim to keep your feet no more than hip-width apart, but close enough for your heels to touch.
- Put your palms straight on the floor under or next to your shoulders, based on how relaxing it is for you. You should have your fingers pointing forward.
- Your elbows should remain close to your sides.
- Take a deep breath and raise your upper body off the floor with a gentle push-up, straightening your elbows.
- Maintaining a relaxed posture, drop your shoulders away from your ears and indicate your shoulder blades back.
- Depending on your inclination and degree of flexibility, you can either keep your neck straight or tilt your head forward.
- As you lift your chest off the ground, keep your elbows in position. Keep your pelvic bone and thighs strong on the ground.
- Concentrate on raising your chest to the heavens.
- As you return your body to the floor, exhale to release the action.
Side Lying Leg Lift
- On a mat or the floor, lie on your right side. Your body ought to extend in an upright position with your legs extended and your feet placed on top of each other.
- For support, hold your head with your elbow bent or place your arm straight on the floor underneath it. For further support, hold your left hand out in front of you or place it on your hip or leg.
- Take a breath while pulling the leg back down to the right leg. Once more, balance your feet.
- After ten to twelve repetitions, switch to the opposite side.
 Side-Lying-Leg-Lift
Superman Hold
The Superman exercise works the hamstrings, glutes, and lower back, and is suitable for all fitness levels. It also enhances other core exercises that focus on the abs.
 Superman Hold
How to do it:
- Lying on the floor in a prone (facedown) posture, extend your arms in front of you and keep your legs straight.
- Slowly raise your arms and legs about 6 inches (15.3 cm) off the floor, or until you feel your lower back muscles contracting, while maintaining a neutral head position (don’t look up). Contract the muscles in your glutes, core, and upper body simultaneously.
- Try lifting your abdomen slightly off the floor to contract your abs. Imagine yourself as Superman soaring through the air to help you visualize this.
- Maintain this posture for two to three seconds. Throughout, make sure you’re breathing.
- Return your abdomen, arms, and legs to the floor. Do this exercise two or three times for 8 to 12 repetitions.
Conclusion
Through the stretching and strengthening of your spine, spinal decompression exercises can enhance your general health. These exercises increase alignment, stability, and posture, which makes your everyday activities more comfortable.
It takes self-control and consistency to make and follow a workout regimen. Perform spinal decompression exercises a few times a week for optimal effects. Strength training and low-impact aerobic exercises like biking and swimming should be a balanced part of your fitness regimen.
FAQs
How should your spine be aligned while you sleep?
When you sleep, your spine should be as neutral and aligned as possible, maintaining its natural curves without needless pressure or twisting. Sleeping on your side with a pillow between your knees or on your back with a pillow below your knees will assist in maintaining a straight, natural alignment of your spine.
What signs of misaligned spines are present?
The signs of a misaligned spine include persistent headaches.
soreness in the lower back.
knee and neck ache.
hip pain.
frequent sicknesses.
excessive exhaustion.
hand or foot aching or numbness.
Which sleeping position most effectively positions the spine?
For spinal alignment, sleeping on your back is frequently regarded as the healthiest position. It maintains your head, neck, and spine in a neutral position while distributing your body weight evenly.
How much time does it take to realign the spine?
However, anticipate that it will take 10–12 sessions spread over 6 weeks before you start seeing an apparent difference. You have to be evaluated at this stage and transferred to the following round of treatment. Your goals, or how aligned you wish to be, will determine the following step.
Does walking aid in the alignment of the spine?
When you walk, your muscles will get stronger. Your back muscles support and maintain the proper alignment of your spine. You’re more likely to feel discomfort, stiffness, and a reduction in range of motion if your muscles weaken.
References
- Nagesh. (2024, December 10). 10 Spine straightening exercises for lower back treatment. Center for Brain and Spine. https://centreforbrainandspine.com/10-spine-straightening-exercises-for-lower-back-treatment/
- Cronkleton, E. (2025, August 1). 12 Spinal decompression exercises for all skill levels. Healthline. https://www.healthline.com/health/spinal-decompression-exercises
- Joan. (2023, October 10). Spine Alignment Exercises — Joan Pagano Fitness. Joan Pagano Fitness. https://www.joanpaganofitness.com/aging-gracefully-blog/2022/11/25/spine-alignment-exercises
- Top spine exercises to improve posture & relieve back pain. (n.d.). Rehabilitation Center in Hyderabad |Transitional Care | Physiotherapy Center-Brinnova. https://www.brinnovacare.com/top-10-spine-strengthening-exercises-for-better-posture