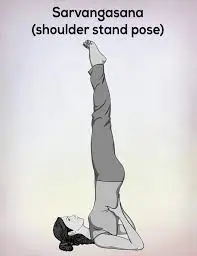
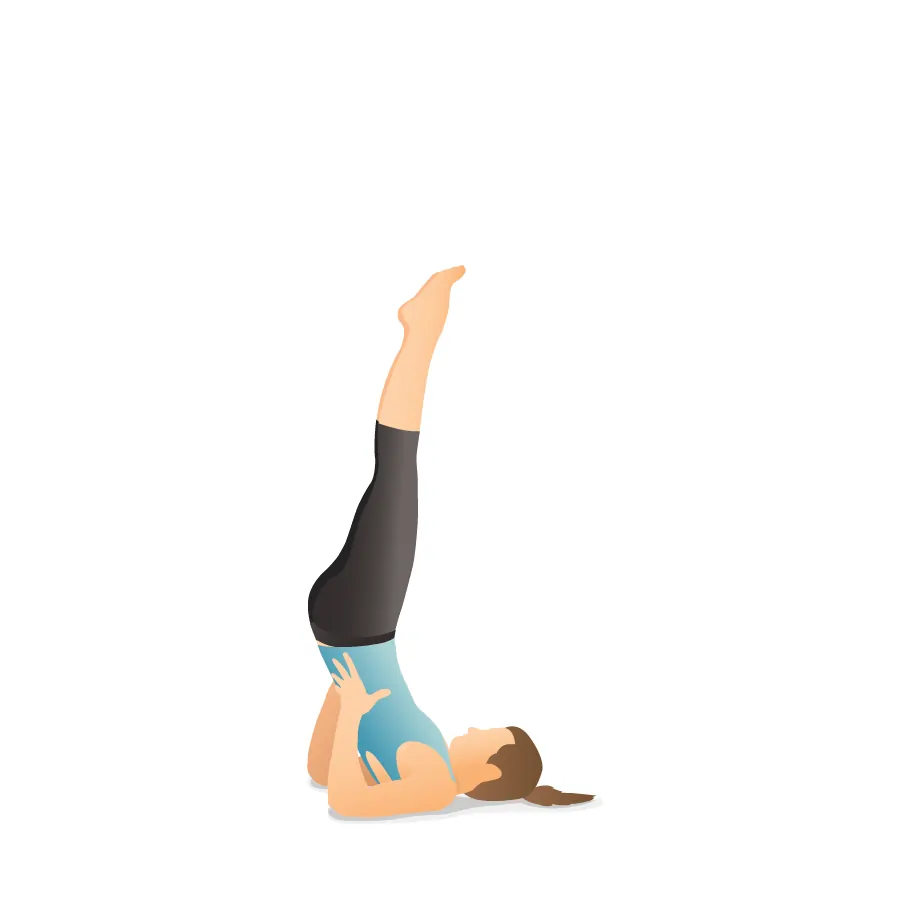
Sarvangasana (Shoulder Stand)
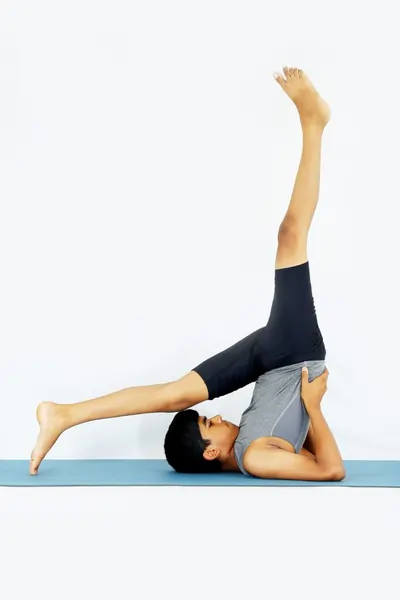
Sarvangasana (Shoulder Stand) is an inverted yoga pose that enhances circulation, strengthens the shoulders and core, and promotes relaxation. In this pose, the body is balanced on the shoulders with legs extended upward, supporting the back with the hands. It is known for its calming effects and benefits for thyroid health.
Your thyroid gland and respiratory system will benefit greatly from this yoga pose. Furthermore, as the name implies, shoulder stand has an impact on your muscles’ overall health and functionality.
Table of Contents
What is Sarvangasana?
In the yoga practice known as Sarvangasana, or shoulder stand, the shoulders support the entire body. As the name indicates, sarvangasana affects the way every part of your body works.
This pose, sometimes referred to as the “Queen of Asanas,” is highly advantageous for maintaining mental and physical health. As the name suggests, sarvangasana is a full-body exercise that works for several muscle groups and enhances posture, balance, and calmness in several ways.
Which muscles are used in sarvangasana?
- Neck flexors
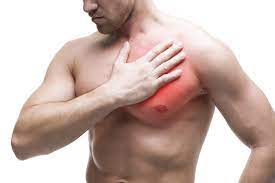
- Shoulder flexors
- Erector spinae
- Rhomboids and trapezius
- Abdominal muscles
- Quadriceps
- Hamstrings
- Calf muscles
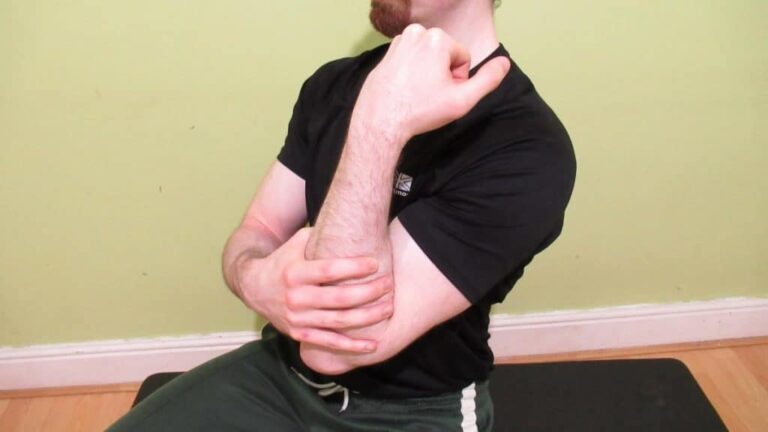
- Wrist and Forearm
What are the health benefits of sarvangasana?
- Increases blood flow throughout the body.
- Improves blood flow within the brain.
- Strengthens the neck, back, shoulders, and core.
- Enhances the reproductive organs’ ability to function.
- Enhances metabolism and aids in weight loss.
- Increases in blood flow to the eyes can improve vision.
- increases the spine’s endurance and adaptability.
- Promotes healthy function of the parathyroid and thyroid glands.
- Helps to calm the brain and reduce the symptoms of sleeplessness.
How to do Sarvangasana?
- Then lie flat on your back. Hold your legs together securely and tuck your chin in.
- Breathe deeply. Breathe. Raise your legs till they are perpendicular to your chest or pointing straight up.
- Place your hands under your buttocks to prepare to elevate your torso.
- When you slowly raise your body, it should rest on your shoulders.
- For support, place your hands behind your back. You should have your legs above your head.
- Slowly straighten your back.
- Now, keep your knees strong in place while relaxing your calf muscles. Maintain your position.
- To help you relax, lower your legs till they make a 45-degree angle with your head. Lower your arms to the floor. Relax slowly.
Sarvangsana Video:
What are the Follow-up Poses for Sarvangasana?
- Halasana
- Purva Halasana
- Eka Pada Sarvangasana
What is the Sarvangasana Beginner’s Tip?
- Maintaining a straight path for the body.
- Keeping a healthy balance.
- Breathing through the abdomen.
- Additionally, the throat and thyroid may be indicated.
What are the Variations of Sarvangasana?
There are certain variations of sarvangasana:
- Supported Shoulderstand
- Ardha-Sarvangasana(Salamba Sarvangasana)
- Niralamba Sarvangasana (Unsupported Shoulderstand)
- Urdhva Padmasana in Sarvangasana
- Eka Pada Sarvangasana
- Eka Pada Parsva Sarvangasana
- Parsvaika Pada Sarvangasana
- Parsva Pindasana in Sarvangasana
Supported Shoulderstand
What is a Supported Shoulder-stand?
Salamba signifies support (sa = with, samba = support), anga indicates limb, and sarva means all.
One form of the “unsupported” shoulder stand is called niralamba, which is pronounced near-ah-LOM-bah.
How to do a Supported Shoulder-stand?
- Put two or more firm blankets on top of each other after bending them into one-by-two-foot rectangles. Using a sticky pad to cover the blankets could help keep the upper arms in place while performing the position.
- Sleep on the blankets with your head on the floor, as your upper body is supported and prepared to be one of the larger corners.
- Before placing your feet flat on the floor with the heels at your sitting bones, place your arms next to your chest. Your knees should be flexed.
- Exhale, raise your feet off the floor, slam your arms into the floor, and pull your thighs into the front torso.
- Curl your pelvis and then your back torso away from the floor to bring your knees closer to your face as you continue to raise.
- Stretch your arms till your thumbs are facing behind, your fingers are touching the ground and the edge of the blanket is in line with them.
- Flex your elbows to move them closer together.
- Raise your pelvis over your shoulders so that your upper back is about perpendicular to the floor.
- As you walk your hands up your back (towards the ground), make sure your elbows are no wider than shoulder-width apart.
- As you inhale, raise your bent knees towards the roof, keeping your thighs in line with your upper body and hanging your heels by your buttocks.
- Rotate your upper thighs slowly inward, compressing your tailbone towards your pubis.
- After taking your last breath, bend your knees and push your heels towards the ceiling.
- Raise through the big toe balls until the legs’ backs are fully extended, resulting in the inner legs being somewhat longer than the outer.
- Soften the tongue and throat. Maintaining the scapulae firmly on the back, push the sternum towards the chin.
- The tip of your chin should be horizontal towards your skull, which should be about level with the ground.
- By firmly pressing the backs of your upper arms and the upper part of your shoulders into the blanket support, you can attempt to raise your upper spine off the ground. Gently examine your chest.
- A beginner holds the position for about 30 seconds. Increase your stay by five to ten seconds every day until you can maintain the stance for three minutes without pain.
- Then, for a week or two, or until you feel quite comfortable, continue to do the pose for three minutes every day. Again, extend your stay by 5 to 10 seconds each day or so until you can maintain the stance for 5 minutes without experiencing any kind of pain. Breathe deeply, flex your knees into your body once more, and roll your back torso slowly and carefully into the floor to fall while keeping your head on the ground.
Ardha-Sarvangasana(Salamba Sarvangasana)
How to doArdha-Sarvangasana ?
- Hold your palms close to your torso and make touch with your toes while lying down on the mat.
- Pull the feet near the hips and bend the legs against the thighs as you release the breath.
- Drag the abdominal muscles as you slowly lift the lower body vertically while holding it up with the hands (thumbs above, fingers below the hips).
- In the final posture, the entire weight of the body is balanced on the palms, elbows, neck, and back of the head.
- Exhale and repeat the previous steps in four seconds.
- As long as it seems comfortable, but no longer than two minutes, hold this position. Breathe rhythmically, naturally, and gently.
- Breathe, then slowly lower your hips towards the mat while holding your hands for four seconds to return to the beginning position.
- Return to the starting posture after extending the hands from behind.
- Take a few deep breaths, then pause for a moment and start breathing normally again.
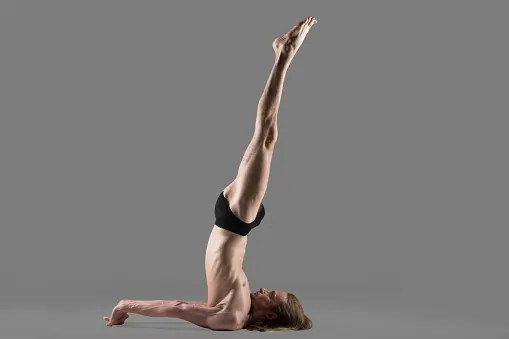
Niralamba Sarvangasana (Unsupported Shoulderstand)
What is Niralamba Sarvangasana?
Niralamba Sarvangasana is a contemporary balancing inversion that enhances balance, stimulating the thyroid gland and demands shoulder and neck flexibility. Tira signifies “without” in Sanskrit, whereas alamba means “support,” sarvanga means “all limb” or “entire body,” and asana means “pose.” Raising the arms next to the torso with the fingers spread and pointing upward is known as sarvangasana, or shoulder stand. The sky is also visible. In English, it’s called an unsupported shoulder stand. Niralamba Sarvangasana is a challenging version of Sarvangasana (Shoulderstand Pose) that is performed without the use of the backhands.
How to do Niralamba sarvangasana?
- Take a deep breath, then raise your legs to your stomach until your thighs are placed on it by flexing your knees.
- To support your hips, place your hands on the back of them and flex your elbows until they are flat on the floor.
- You should press your chin into your chest.
- When you release your breath, extend your legs straight up so they face the roof.
- Keep extending your body upward until only your head, shoulders, and the backs of your upper arms and elbows are supporting your weight.
- Then release the arms and spread them out on the floor so that they come out above the head but rest on the ground. Last but not least, stretch them towards the legs as if you were reaching for your toes while keeping them securely by the side of the body.
- Hold your breath here for 30 seconds. Then release the position gradually.
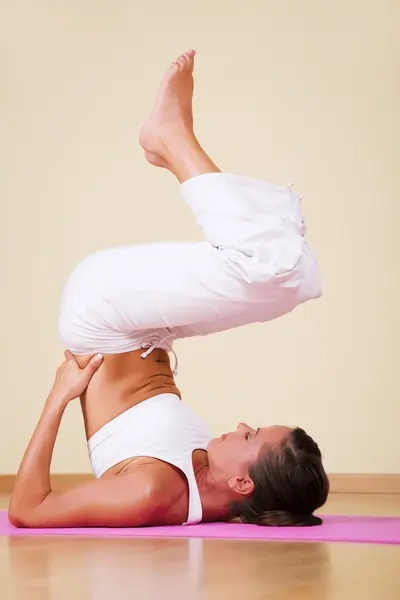
Urdhva Padmasana in Sarvangasana
What is Urdhva Padmasana?
Sarvangasana appears after Urdhva Padmasana, often known as an upward lotus, in the Ashtanga yoga final series. One may only reach this pose after becoming proficient in padmasana and sarvangasana.
Urdhva means “upward,” Padma indicates lotus, and Asana signifies position.
How to do Urdhva padmasana in Sarvangasana?
- On a yoga mat, stand upright with your face up and your back extended. The hands and thighs should remain slightly apart.
- Keep your legs stretched wide and your knees stable.
- Breathe deeply a few times. As you raise both legs transverse to the floor, take a deep breath. Breathe while keeping your legs straight to keep your posture.
- To make the legs even higher, gently press the palms into the floor as you exhale and elevate the hips and back off the ground.
- Place the shoulders firmly on the ground, fold the elbows, and press the palms into the ribs after the entire trunk is off the ground. This pose is known as Sarvangasana.
- The alternative position is this one.
- Flex the folded leg till it is parallel to your face. Put your palms on your knees to assist with forward motion.
Eka Pada Sarvangasana
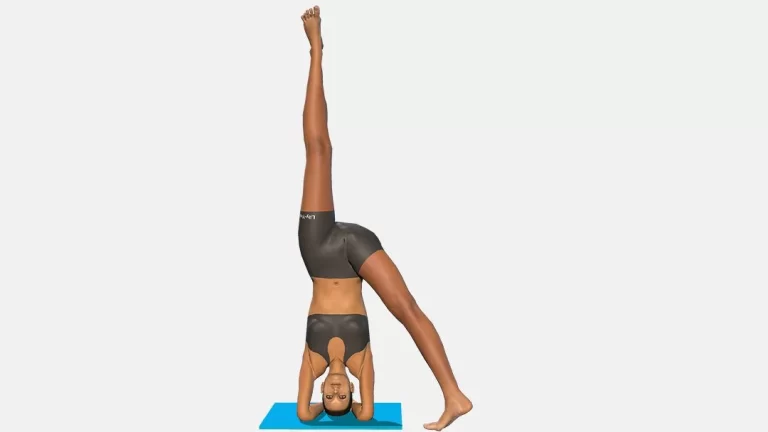
What is Eka Pada Sarvangasana?
It is also known as the One-Legged Shoulderstand Pose and One-Legged All Limbs Supported Pose.
- “eka” = “one or single”
- “pada” = “foot or leg”
- “Sarva” = “all”
- “anga” = “limb”
- “asana” = “pose or posture”
Sarvangasana, sometimes referred to as the Mother or Queen of Asanas, is among the most significant asanas. It takes a while to maintain the raise at first, but with practice, it becomes a calm and collected posture. A more asymmetrical form of Sarvangasana, Eka Pada Sarvangasana (One-legged Shoulderstand Pose) places an emphasis on flexibility, hamstring strength, and hip launching.
Similar to the complete version of the practice, Eka Pada Sarvangasana is often performed after a sequence, when the body and mind are at their most relaxed. When paired with Salamba Sarvangasana, it can also be utilized as a transitional position. It can be included equally in the first exercise because it is followed by other relaxing postures, such as supported forward bends.
How to perform Eka Pada Sarvangasana?
- Let’s everyone take the Salamba Sarvangasana or Shoulder Pose. For the first time, maintain this position.
- As we do in Halasana, slowly lower the left leg while breathing in and out, keeping the right leg in the shoulder stand position.
- The left leg should be straight and firm, and the knee joints should not flex.
- The same requirements apply to the right leg, which is straight and free of knee bends.
- Try the reverse pose with the left leg up and the right leg down after maintaining this position for some time.
Eka Pada Parsva Sarvangasana
What is Eka Pada Parsva Sarvangasana?
- Eka = one or single
- Pada =leg or foot
- Parsva=sideways
- Sarvanga= shoulder
- asana= pose
How to do Eka Pada Parva Sarvangasana?
- You start by lying on your back with your arms by your sides.
- Bend the knees and lift the hips.
- Move the legs to the left while keeping the hips up, such that the right heel is in alignment with the left hand.
- To support the body, place the left hand beneath the sacrum, or middle of the pelvis while keeping the right hand on the ground.
- Strike the Salamba Sarvangasana pose with your hands supporting your back.
- Raise the right knee closer to the torso by bending it while keeping the left leg straight and in line with the chest. Permit the pelvis slide forward. Holding the waist with the right hand, gradually support the right side of the body.
- Release the support of the right hand and put the arm down.
- Drop the left leg slowly while keeping it above the hips.
- To balance the left’s weight, stretch the right arm sideways in line with the shoulder once the left hand and shoulders are stable.
Parsvaika Pada Sarvangasana
What is Parsvaika Pada Sarvangasana?
The significance of Parsva is the side. The lower leg is positioned behind the head in Eka Pada Sarvangasana, but here it is sideways aligned with the trunk.
How to do Parsvaika Pada Sarvangasana?
- After performing Eka Pada Sarvangasana on both sides, return to Sarvangasana.
- After you release your breath, lower your left leg sideways to the ground until it is parallel to your trunk.
- Keep your left leg straight and tight rather than flexing it at the knee.
- If you are unable to make touch with the ground, lower the leg as far as you can.
- To prevent it from being inclined to the left, the right leg that is vertically lifted should stay straight.
- Use the hands to raise the ribs to fully extend the chest.
- After maintaining the pose for 20 seconds with regular breathing, relax and go back to Sarvangasana.
- Repeat with the second leg for the same duration, then return to Sarvangasana.
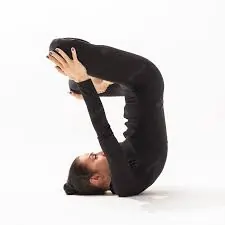
Parsva Pindasana in Sarvangasana
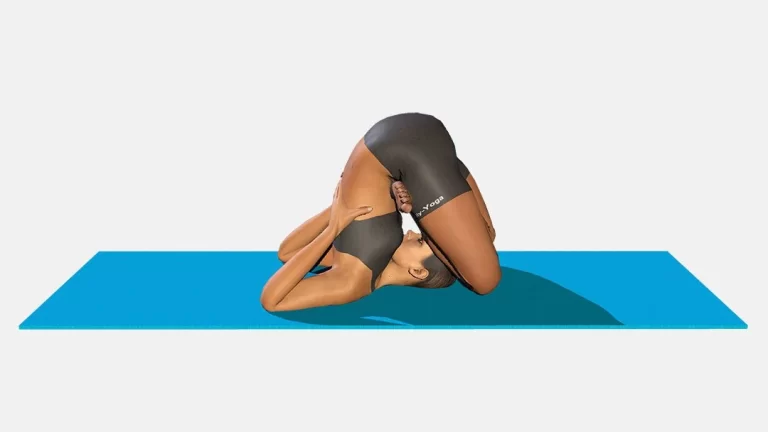
What is Parsva Pindasana in Sarvangasana?
Parsva means side or flank. In Pindasana, both knees are flexed sideways on the same side of the trunk, repeating the previous position. This is the lateral embryo stance used in Sarvangasana.
How to do Parsva Pindasana in Sarvangasana?
- Exhale, move the hips sideways to the left and lower both knees to the floor once you are in Pindasana.
- The right ear and right knee should be next to each other.
- The right shoulder will initially be raised off the floor.
- Push the shoulder to the floor and firmly press the right hand against the back.
- If you don’t, you’ll lose your balance and turn to one side.
- The lateral twist will result in fast and challenging breathing because the diaphragm becomes narrowed in this posture.
- The knee towards the ear can only start to rest on the ground after a lot of repetition.
- For 20 to 30 seconds, hold this position while continuing to breathe normally.
- To get your right foot towards your right ear, exhale, lift yourself from the left, and move your crossed legs to the right.
- Hold here for the same length of time.
- Go back to Ûrdhva Padmàsana. Uncross your legs to exit the lotus pose, then go back to Sâlamba Sarvangasana.
- Now you need to align the crossed legs.
- Cross the legs again by putting the right foot over the left thigh first, then the left foot over the right thigh, as opposed to the previous method.
Sarvangasana precautions:
The adverse effects and contraindications of yoga positions should be known to you. A list of some of Sarvangasana’s precautions can be seen below.
- Those who have high blood pressure should not perform this pose.
- Avoid this position if you are menstruation.
- If you have spinal issues, stay away from this position.
- Avoid practicing if you have glaucoma, acute thyroid problems, chronic neck conditions, shoulder injuries, or retinal problems.
- Avoid it if you have heart problems, middle ear problems, capillaries, spondylosis, slipped discs, or are elderly.
What are the Contraindications for Sarvangasana?
- Back Pain
- Spondylitis
- Heart Issues
- High Blood Pressure
- Pregnant or Menstruating
- Throat or Ear Infection
- Diarrhea
- Headache
- Neck injury
- glaucoma
Conclusion
Regular practice of Sarvangasana, a potent inverted yoga pose that improves thyroid function, strengthens the shoulders and core, and calms the nervous system, can help to improve physical vitality and inner balance. It also helps to improve mental clarity, reduce stress, and regenerate the body. However, practitioners need to perform Sarvangasana with proper alignment and precautions to prevent strain on the neck and spine.
FAQs
What is good for Sarvangasana?
Sarvangasana is a challenging yoga pose that strengthens the arms, neck, and core. It also increases hip flexibility and the body’s overall strength and flexibility.
Who should not do Sarvangasana?
People with high blood pressure should avoid this pose while menstruating, people with spinal problems should avoid it, and people with glaucoma, acute thyroid problems, chronic neck conditions, shoulder injuries, or retinal problems should avoid it.
What is the ideal duration for Sarvangasana?
Beginners can hold the Sarvangasana stance for 30 seconds, and then gradually increase it to 3 to 5 minutes. You can perform Sarvangasana for one minute at night and one minute during the day.
References:
- Sarvangasana – The Shoulder Stand | Steps | Benefits | Learn Yogasanas Online | Yoga and Kerala. (n.d.). Yoga. https://www.keralatourism.org/yoga/reclining-postures/sarvangasana
- Sarvangasana Yoga (Shoulderstand Pose) | Yoga Sequences, Benefits, Variations, and Sanskrit Pronunciation | Tummee.com. (2017, November 20). Tummee.com. https://www.tummee.com/yoga-poses/sarvangasana
- Sarvangasana (Shoulderstand Pose). (n.d.). MyYogaTeacher. https://myyogateacher.com/yoga-asana/sarvangasana
- Dr.Nidhiphysio. (2024b, September 29). Sarvangasana: Health Benefits, How to do? – Variation – Mobile Physio. Mobile Physiotherapy Clinic. https://mobilephysiotherapyclinic.in/sarvangasana-yoga-pose/#What_are_the_Follow-up_Poses_for_Sarvangasana
- Vastralphysiotherapyclinic. (2024b, February 7). Sarvangasana. Mobility Physiotherapy Clinic. https://mobilephysiotherapyclinic.net/sarvangasana/