Plank exercise
Table of Contents
Introduction:
- A plank is a simple, excellent bodyweight exercise that requires no equipment and can be performed just about anywhere (well, use your judgment).
- The plank exercise is an isometric core exercise that includes maintaining a position similar to a push-up for the maximum possible time.
- Holding your body (light as a feather) stiff as a board forms strength primarily in your core — the muscles that connect your upper body and lower body — as well as your shoulders, arms, and glutes.
- The plank exercise is considered a primary exercise to build your muscles and strength in the core area.
- The plank exercise is easily doable and does not require much space.
- Doing plank exercise regularly for 20-30 minutes will help you train your core muscles extensively.
- Plank is a single exercise that can help you focus on multiple classes of muscles like your neck muscles, biceps, and triceps. And also help in strengthening shoulder and hip muscles.
- Once you ease into doing standard(basic) planks, you can always move toward the advanced versions of plank exercises.
Which muscles are involved in basic plank:
- Erector spinae, rectus abdominis, transverse abdominis, trapezius, rhomboids, rotator cuff, the anterior, medial, and posterior deltoid muscles, pectoralis major, serratus anterior, gluteus maximus, quadriceps, and gastrocnemius.
Health benefits of doing plank exercise:
The followings are the health benefits of doing plank exercises:
- Improves Body Alignment and posture
- Decreases the risk of back and spine injuries
- Improves your balance and coordination
- Build Core Strength
- Improves flexibility
- Helps to reduce belly fat
- Improve metabolism
- Help to reduce joint pain
- Help to improve back pain
- Improves all over mental health
Different variations of plank exercise:
- Standard plank
- Forearm plank
- Knee plank
- Side plank
- Side Plank crunch
- Plank With Hip Dip
- Plank With Alternating Arm Raise
- Walking plank
- Plank with shoulder tap
- Reverse plank
- Spider-Man plank (knee to elbow)
- Plank with a row
- Mountain climber
- Single leg plank
- Medicine-ball plank
Standard Plank:
- Set your hands directly under your shoulders (slightly wider than shoulder width) like you’re about to do a push-up position.
- Place your toes into the ground and contract your gluteal muscles to stabilize your body. Your legs should be working, too — be cautious not to lock or hyperextend your knees.
- Neutralize your neck and back by looking at a spot on the ground about a foot beyond your hands. Your head position should be neutral with your spine.
- Hold the position for 15-20 seconds. As you get more comfortable with the position, hold your plank for as long as possible.
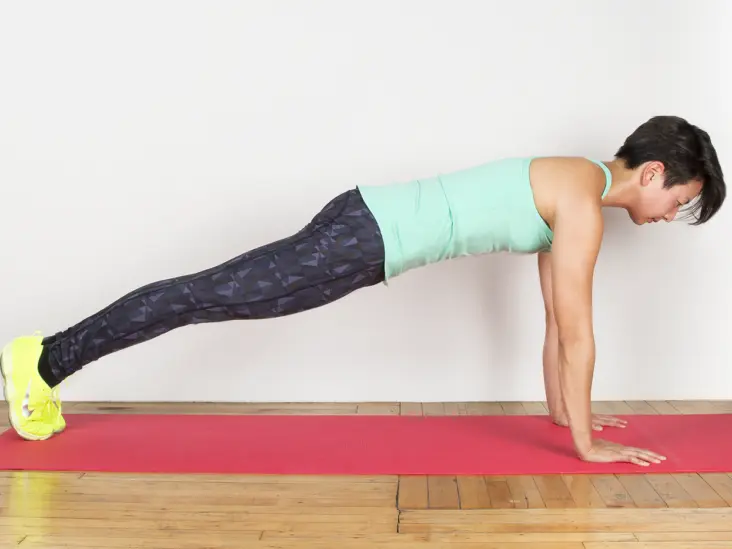
How to perform standard plank video:
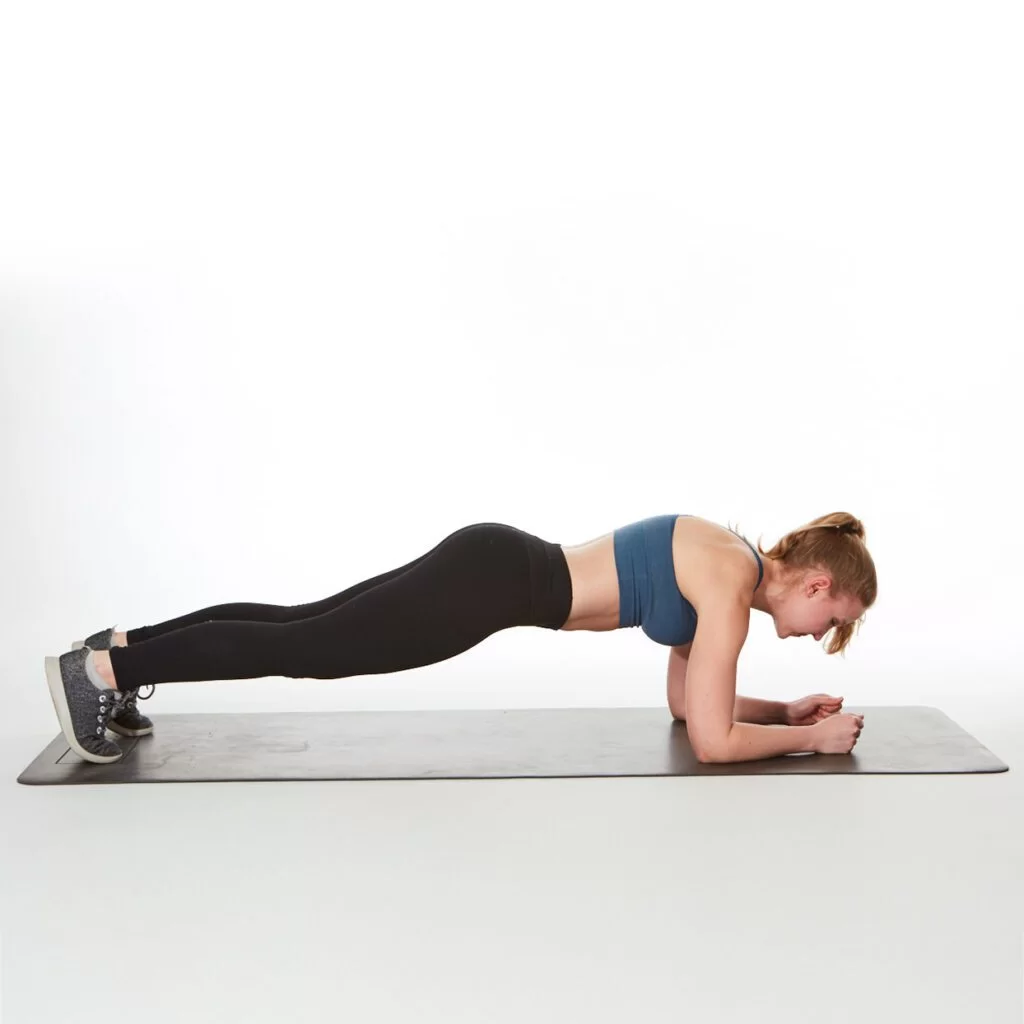
Forearm plank:
- This variation, one of the most common variations to perform a plank, is slightly easier than holding your body up with just your hands.
- Place forearms on the ground with elbows just below shoulders and arms parallel to your body at about shoulder width. If flat palms trouble your wrists, clasp your hands together.
Knee plank:
- This plank is comparatively easier to hold than the standard plank, which makes it great for beginners because it allows them to concentrate on form.
- Resting your knees on the floor puts less stress on your lower back.
- Place your knees on a rolled-up mat or towel if they feel discomfort on the ground.
Side plank:
- This variation of plank engages your oblique muscles (the side muscles of your core) better than a standard plank position.
- Lie on your side with one leg stacked on top of the another, then position your body up on your hand or elbow while keeping your feet stacked.
- You can make the side plank more challenging by lifting the opposing arm or leg — or both — in the air.
- You can make side plank easier by crossing the upper leg in front of your body for more support.
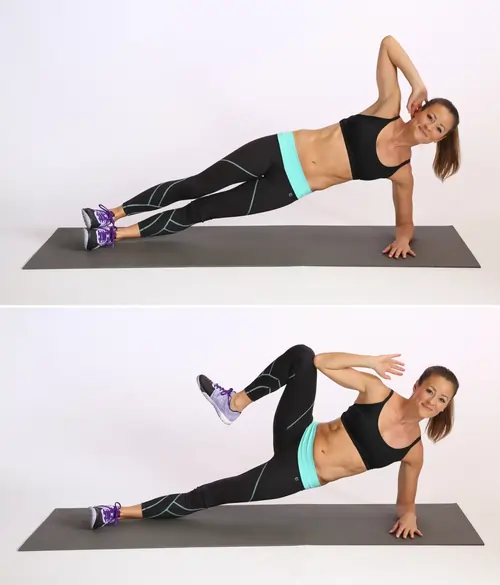
Side Plank Crunch:
- Begin in a side plank position, with your right hand on the mat and your right shoulder stacked over your wrist.
- Lurch your feet so your left foot is in front of your right on the mat.
- Flex your left arm and place your left hand behind your head.
- Twisting at your torso, draw your left elbow and right knee together in front of your body. Back to the start position.
Plank With Hip Dip:
- Begin in a forearm-plank position.
- Make sure your abdominal muscles are tight and you’re squeezing your butt.
- Slowly dip the right hip to the right side until it’s about one inch off the floor.
- Back to center with control, then repeat on the other side. That’s one rep. Do 15 reps.
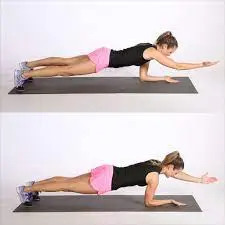
Plank With Alternating Arm Raise:
- Begin with a forearm-plank position, elbows directly under your shoulders, and hands on the ground.
- Raise your right arm out and away from your body keeping your butt and hips stable.
- Lower the hand back to the start position, then repeat on the other side. That’s one rep. Complete as many reps as possible in 40-50 seconds, then rest for 10 seconds.
Walking plank:
- Start in a standard plank position with your hands directly underneath your shoulders. Activate your glutes and abdominal muscles to prevent injury and gain maximum benefit.
- Begin to shift laterally (to the side) by alternatively moving your right hand and foot to the right.
- Lift your left hand and foot to meet in the center and back to the plank position.
- Complete all steps to the right and then 5 to the left for 1 set. Try to complete 3–5 sets or as many as you can safely perform in 60 seconds.
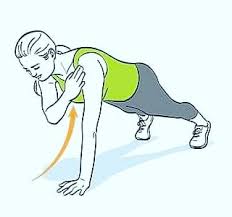
Plank with shoulder tap:
- Start in a traditional straight-arm plank position. Widen your legs for more stability, if necessary.
- Keeping your core tight, raise your right hand off the ground and touch your left shoulder. Then, back your right hand to the floor.
- Raise your left hand and touch your right shoulder through that.
- Continue to alternate hands for 20–30 seconds.
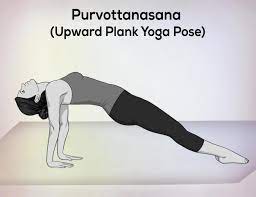
Reverse plank:
- Sit tall on the ground with your legs extended in front of you.
- Put your hands behind you on the floor, with your fingertips pointed toward your feet.
- Engage your gluteal muscles, core, and arms to lift your hips, forming a straight line from heels to shoulders.
- Make sure that your shoulders are drawn down, away from your ears.
- Avoid dipping your hips by slightly tucking your pelvis in.
- Hold this for 15–30 seconds, or as long as you can while maintaining proper form.
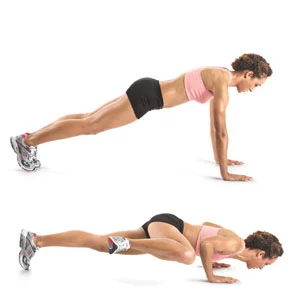
Spider-Man plank (knee to elbow):
- Start in full plank position.
- Pull your right knee toward the outside of your right elbow and then push it back to a plank position.
- Assure your knee is open out to the side, so your inner thigh hovers over the floor as you move your leg.
- Exhale as your knee comes forward and inhale as you push it back and straighten your knee.
- Start with 8–12 reps on each side. Aim for up to 15-20 reps on each side as you get stronger.
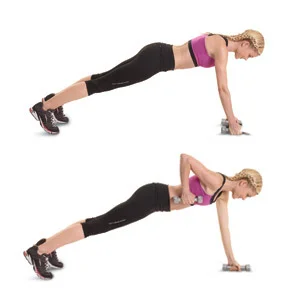
Plank with a row:
- Grab two dumbbells of your choice (if you’re new to working out, start with a lightweight to assure proper form).
- Get into the standard plank position with each hand gripping a dumbbell.
- With your right arm, lift the dumbbell to the side of your waist or toward your hip to do 1 row.
- Return the dumbbell to the starting position.
- Perform 1 row with your opposite arm.
- Complete 8–12 reps on each side. Aim to do 2–3 sets.
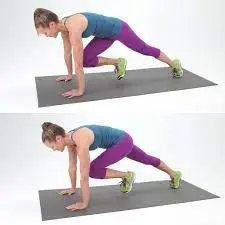
Mountain climber:
- Start in a standard plank position with your hands directly under your shoulders.
- Place your hands slightly wider than your shoulders and use your upper body and pelvis to stabilize your body.
- Keeping your core engaged, lift your right foot off the ground and bring your right knee toward your chest.
- Avoid rotating your hips or shoulders.
- Return to the beginning position and do the same with your left knee.
- Continue this movement for 15–30 seconds, or as long as you can maintain proper form.
Plank jack:
- Start in a forearm plank or high plank position.
- Jump both feet outward, wider than hip distance apart(horizontal jumping jack).
- Immediately jump your feet back together into the original plank position.
- Aim to complete 2–3 sets of 20-30 seconds, or as long as you can maintain proper form.
Single-leg plank:
- Just by removing one point of contact with the floor, this variation increases the demand on your core.
- Position your body in a standard plank, then raise one leg toward the ceiling as far as you comfortably can without compromising your back. Keep hips parallel to the ground, then alternate legs.
Medicine-ball plank:
- Increase the intensity by placing your hands on a medicine ball rather than on the (much firmer, steadier) floor.
- Stabilizing your body on an unstable medicine ball surface adds a balancing component to the move, increasing the demand on your core.
- Follow the same steps for a standard plank, but instead place your hands or forearms on the medicine ball, directly under the shoulders.
Tips to gain Maximum Health Benefits from Plank Exercise:
- If you are doing it for the first time, try the plank exercise under the supervision of the therapist.
- Try performing the plank for a minimum of 30-60 seconds at a time.
- Start by doing 1 plank a day to slowly 3 to 10 a day for the maximum benefits.
- Then, gently also try side planks which can help improve your flexibility.
- If you are doing plank exercises at home, ensure that you try them in front of the mirror or with someone who can guide you.
Common planking mistakes:
- Collapsing your lower back
- Instead of compromising your lower back by dipping your butt, engage your core by imagining your navel pulling in toward your spine. This will help keep your trunk flat and, in turn, your spine safe.
- Planks aren’t supposed to look like downward dog posture.
- To really get your core working the way it should in the plank position, keep your back flat enough so your abdominal muscles feel engaged from the top (right below your sternum) to the bottom (directly below your belt). Just don’t dip your butt too far toward the ground.
- Letting your head drop
- While most of the time your focus may be on keeping your hips, butt, and back in the proper position, form isn’t just about your core and lower body area in this position.
- It is also important to focus on head and neck position for that keeping your eyes on the floor and letting them rest about a foot ahead of your hands, which will help keep your neck neutral.
- Forgetting to breathe
- It’s normal human nature to hold your breath when you’re in a stressful posture. But denying yourself oxygen can bring on dizziness and nausea. so breathe continuously throughout the exercise.
- Focusing too much on the stopwatch
- Quality trumps the number of seconds ticking away. When your body begins to suffer, it’s time to call it quits. If your back starts to bow take a break.
When not to perform plank exercise:
- Have a shoulder injury
- Have pain in the shoulder after doing the exercise
- Have pelvic pain conditions
- Are pregnant or have recently become a mother
FAQ:
The plank strengthens your spine, your rhomboids and trapezius, and your abdominal muscles, which naturally results in a strong posture as they grow in strength.
Injury and Surgery.: Plank Pose should not be practiced if one suffers from an injury in the Arms, wrists, ankles, shoulders, and feet. People who have undergone abdomen, Shoulder, knee, hip, and spine surgeries must avoid this pose.
Start by doing 1 plank a day to slowly 4 to 10 a day to reap the maximum benefits.
A plank aids to burn fat rapidly, largely because it can engage multiple muscles at once. No wonder, it benefits the core strength of your body and boosts your metabolic rate to lose weight.




8 Comments