
KINESIO TAPPING FOR PATELLOFEMORAL PAIN SYNDROME
Table of Contents
Introduction :
kinesio tapping for patellofemoral pain syndrome is a rehabilitative cum protective mechanism, which is the most effective technique now a days. Elastic therapeutic tape, also called kinesiology tape or kinesiology therapeutic tape, is an elastic cotton strip with an acrylic adhesive that is purported to ease pain and disability from athletic injuries and a variety of other physical disorders.
Kinesiological tapping is a rehabilitative cum protective use of stretchable kinesiological tapes to provide :
- reduction of pain
- enhancing performance
- preventing injuries
- support to the joint
- repositioning of structure
- facial and ligamentous correction.
- It facilitate the healing process while providing full ROM with support to the joints supportive structure as well as mobilization effects.
- Patellofemoral pain syndrome (PFPS not to be confused with jumper’s knee) is knee pain as a result of problems between the kneecap and the femur.
- The pain is generally in the front of the knee and comes on gradually. Pain may worsen with sitting, excessive use, or climbing and descending stairs.
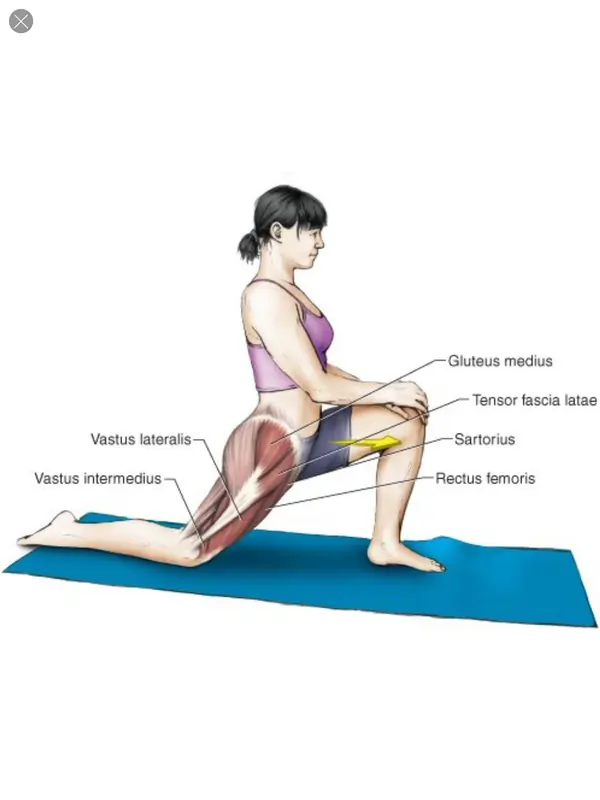
Anatomy of Patellofemoral joint :

- The patellofemoral joint is a unique and complex structure consisting of static elements (bones and ligaments) and dynamic elements (neuromuscular system).
- The patella has a configuration of a triangle with its apex directed inferiorly. Superiorly, it articulates with the trochlea, the distal articulating surface of the femur, which are the main articulating surfaces of the patellofemoral joint.
- The patella is a triangular shaped sesamoid bone, the posterior surface of the patella is covered with articular cartilage.The patellar retinaculum is an important stabilizer of the patellofemoral joint, mainly its medial and lateral components.
- The Medial Patellofemoral Ligament (MPFL) originates on the medial femur and has a “sail-shaped” attachment on the patella and quadriceps tendon.
- The Lateral Patellofemoral Ligament (LPFL) is an important lateral stabilizer of the patella against medial subluxation or dislocation.
- The quadriceps muscle is the largest and strongest extensor muscle, consisting of rectus femoris and vastus group (vastus lateralis, vastus intermedius and vastus medialis Muscle). The vastus group produces 80% of the knee extension torque and the rectus femoris produces 20% of the knee extension torque.
Causes of Patellofemoral pain syndrome :

Doctors aren’t certain what causes patellofemoral pain syndrome, but it’s been associated with:
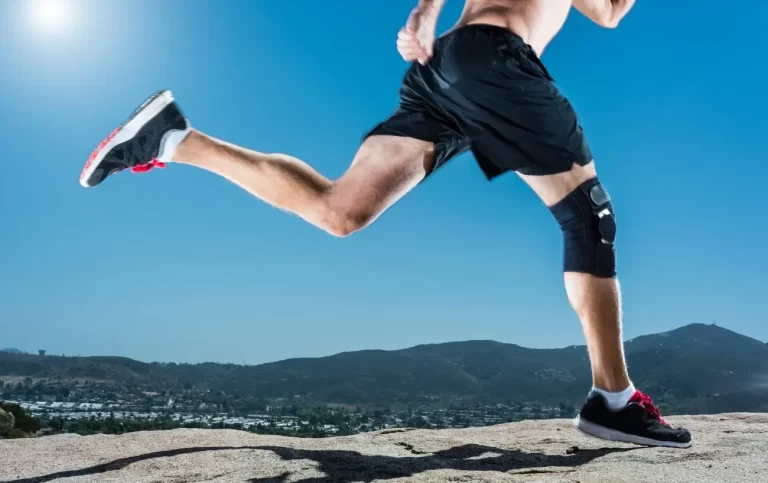
Overuse : Running or jumping sports puts repetitive stress on your knee joint, which can cause irritation under the kneecap.
Muscle imbalances or weaknesses: Patellofemoral pain can occur when the muscles around your hip and knee don’t keep your kneecap properly aligned.
Inward movement of the knee during a squat has been found to be associated with patellofemoral pain.
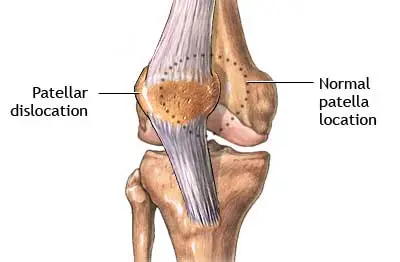
Injury: Trauma to the kneecap, such as a dislocation or fracture, has been linked to patellofemoral pain syndrome.
Surgery: Knee surgery, particularly repair to the anterior cruciate ligament using your own patellar tendon as a graft, increases the risk of patellofemoral pain.
Risk factors
- Factors that can increase your risk include:
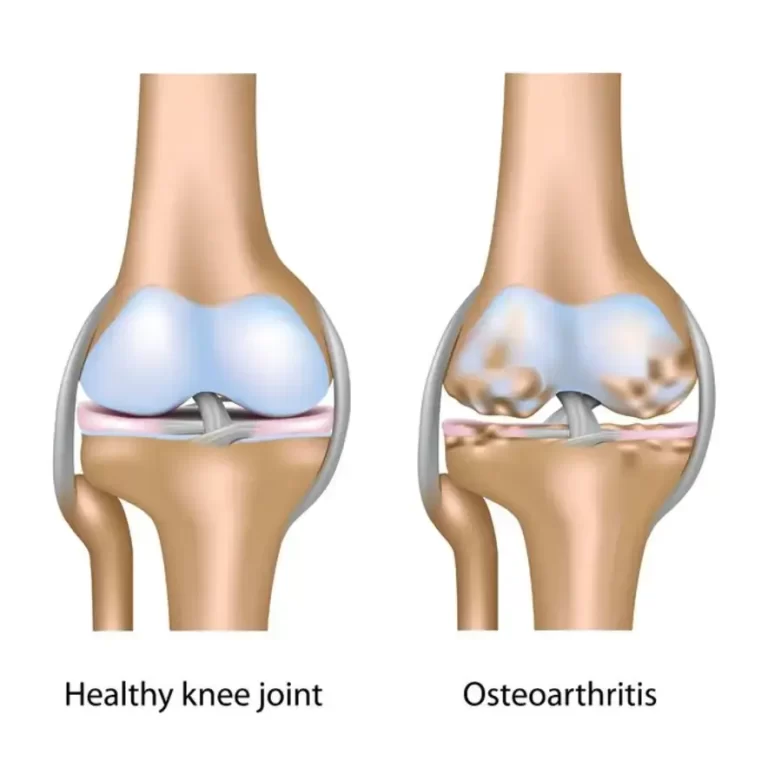
- Age: Patellofemoral pain syndrome typically affects adolescents and young adults. Knee problems in older populations are more commonly caused by arthritis.
- Sex: Women are twice as likely as men are to develop patellofemoral pain. This may be because a woman’s wider pelvis increases the angle at which the bones in the knee joint meet.
- Certain sports: Participation in running and jumping sports can put extra stress on your knees, especially when you increase your training level.
- Flat feet: People with flat feet may be at higher risk of patellofemoral syndrome as they place additional stress on their knee joints.
- High-impact activities: Engaging in high-impact or weight-bearing activities, including running, jumping, or squatting causes repetitive stress to the joints,
- and increases the risk of knee injury.
Symptoms :
- In most cases, symptoms of patellofemoral pain syndrome develop gradually. Symptoms usually get worse with activity.
- Many people experience a dull, aching pain in the front of the affected knee.
- Your symptoms may also include:
- Pain during activities that bend the knee, including squatting or climbing stairs Pain after sitting for extended periods of time with your knees bent
- Crackling or popping sounds in your knee when standing up or climbing stairs
- Pain that increases with changes to your usual playing surface, sports equipment or activity intensity
Special Tests for Patellofemoral pain syndrome :
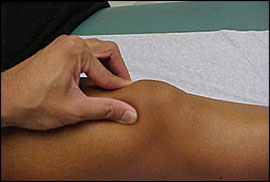
- Patella glide test : The patella glide test or apprehension test, tests the integrity of the medial and lateral patella restraints. The test is performed at full knee extension to assess soft tissue restraints only then at 20 degrees knee flexion to assess both bony and soft tissue stability.The therapist grasps the patella and glides it medially and laterally. The test is positive when there is a sense of dislocation at lateral translation.
- The moving patella apprehension test : The moving patella apprehension test, tests for lateral patella stability. The patient is supine and the therapist laterally translates the patella by his thumb then the therapist flexes the knee to 90 degrees then extends it, the test is positive if there are any symptoms indicating lateral patellar instability. The second portion of the test, the therapist translates the patella medially while performing the same steps if there are no symptoms then there is lateral knee instability.
- Patella tilt test : Tests patella hypomobilty due to contracture in the lateral deep retinaculum, which is contributed by tightness in the ITB, lateral patellofemoral and patelotibial ligaments.
- The knee is extended and the therapist pushes the patellar medial surface posteriorly and the lateral surface anteriorly. The patella should tilt 15 degrees on medial and lateral side and should be compared to the uninvolved side.
- Compression test : Tests for patellofemoral joint degeneration. The patella is compressed as the patient flexes his knee. A positive test is an increase of patient’s knee pain.
- Clarke’s test : Clarke’s test or Patellar grind test, tests for chondromalacia patella.
- The therapist compresses the patient’s patella into the trochlear while the patient contracts the quadriceps. A positive test is reproduction of the symptoms.
- However, It is not recommended to be used as it increases the patient’s condition and has high false-positive results.
- Muscles strength should be assessed for the lower limb muscles.The muscles flexibility is assessed for the hamstrings by the popliteal angle, Thomas test for the rectus femoris and iliopsoas and ober’s test for the iliotibial band. Finally, the examination is finished when an evaluation of the lumbar, hip and ankle is complete. The neurovascular assessment of the limb is also made.
kinesio tapping for patellofemoral pain :
- Kinesiology tape for your patellofemoral pain syndrome may be one option that your physical therapist uses to treat your condition .
- Kinesiology taping, also known as K-tape, is a treatment that can be used to decrease your pain, inhibit muscle spasm, or facilitate the correct muscle contraction of your elbow and wrist muscles.
Application of KT :

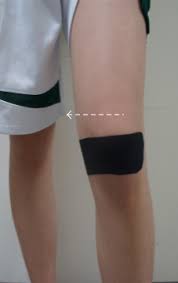
- The skin was cleaned with alcohol before KT application. KT was applied from origin to insertion of the muscle (proximal to distal) in a Y shape by a certified physiotherapist. The participants were lying in supine position on the examination table. Bilateral quadriceps femoris of the participants was taped from the origin of the rectus femoris on the anteroinferior iliac spine to the common patellar-tendon insertion of the quadriceps femoris on the tibial tuberosity.
- The base of the tape was attached to the anteroinferior iliac spine and stabilized. The participants were then instructed to maximally flex both hip and knee while the Y tails were applied to medial and lateral borders of patella with 25% of available tension.
- A second physiotherapist , who was aware of group allocation, applied adhesive tape to the affected knee of subjects in the taping group and placebo taping group. The taping techniques used were those detailed by McConnell to correct specific patella mal-alignments (tilt, glide, or rotation) identified by the therapist.
- Undertape was first applied, taking care not to place any tension on the skin. One strip of corrective tape was then applied as deemed appropriate by therapist . There is a lack of consensus in the literature regarding the reliability of therapists in assessing the specific components of tilt, glide, and rotation of the patella, which taping is purported to alter The present study, therefore, took the pragmatic approach of investigating current clinical practice.
How to remove KT :
- So now you’ve got your tape on and you’ve gotten that extra support during your chosen sporting activity, it’s time to take it off, so let us ease the process of removing kinesiology tape for you. The best tip we can offer when it comes to removing your kinesiology tape is to peel the skin from the tape, not the tape from the skin.
- But in terms of the actual process, firstly make sure you’re removing the tape in the same direction as the growth of the hair underneath it, and whatever you do don’t rip the tape off like a plaster! Start slowly, folding the corners of the edge back gradually, ensuring that you’re laying the removed tape on the back of the applied tape, as opposed to pulling the tape above and away from your arm.
- As you’re peeling off the tape, hold your skin down with your other hand and either tap it or pull it gently in the opposite direction of the tape.
- This helps the skin and the tape to separate more efficiently but with no discomfort.
- If the tape has been applied over a particularly hairy part of the body, it helps to press down on the tape as you are peeling it off, as the pressure helps avoid further pain.
- It’s wise to have shaved the area before applying the tape but, as this isn’t always practical, taking this precaution will be necessary to some.
- Need a little extra assistance? Apply oil directly onto the tape, rub it in and wait around 10 to 20 minutes before removing it slowly.This will help reduce the stickiness of the tape and make it easier to remove.
One Comment