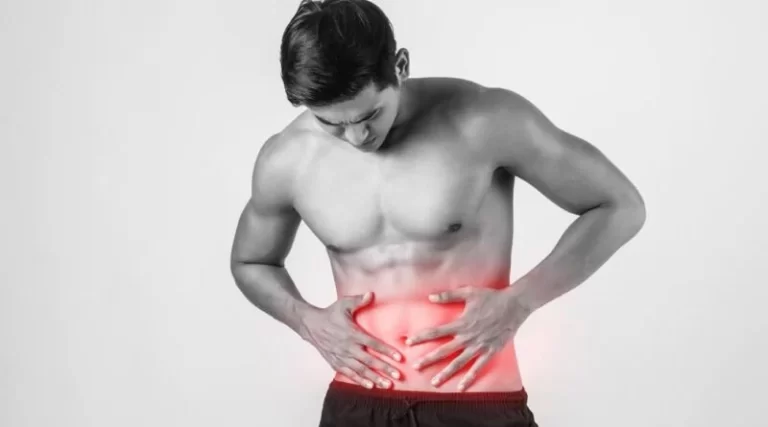
Taping Technique for Calf muscle strain:
Table of Contents
Introduction:
Kinesio taping for calf muscle strain is a great technique to relive pain and further support to the calf muscles .This is most effective and supportive treatment.It is give static as well as dynemic support to the calf muscles.
Kinesio taping give dynamic stability to the muscles while typical taping give static stability to calf muscle strain. it is also called kinesiology tape or kinesiology therapeutic tape.
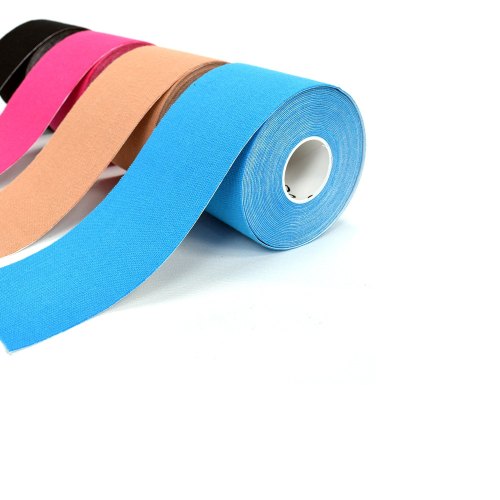
It is an elastic cotton strip with an acrylic adhesive that is purported to ease pain and disability from athletic injuries and a variety of other physical disorders.
Taping your calf muscle can help stabilize it when you are active and can give relief from pain.it is most popular technique.mostly use in sport injuries because calf muscle are more pron during sports. Kinesio taping is an excellent way to capitalize on your hands-on efforts when working to reduce tone in muscular tissues.
Kinesiological tapping could be a rehabilitative cum protecting use of elastic kinesiological tapes to supply:
- reduction in calf pain
- enhancing performance
- preventing any injuries
- support to the calf muscle
- repositioning of structure calf muscles
- facial and ligamentous correction calf muscles.
Anyone can get a pulled calf muscle. But these strains are more common in athletes who perform lots of stop-and-go movements with quick bursts of speed. Sprinters, football players, soccer players and tennis players are prone to pulled calf muscles. Sometimes the injury is called “tennis leg.”calf strains make up about 1.3% of all lower limb injuries in runners.
Relevant anatomy:
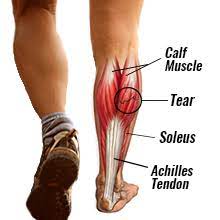
- The “calf muscle” refers to the muscles on the posterior aspect of the lower leg. gastrocnemius – in conjunction with soleus, provides primarily plantarflexion of the ankle joint and flexion at the knee joint.
- Plantar flexion provides the propelling force during gait. Although it spans over two joints, gastrocnemius is not able to exert its maximum power on both joints simultaneously.
- If the knee is flexed, gastrocnemius cannot produce maximum power at the ankle joint and vice versa.
- soleus – is located beneath the gastrocnemius muscle in the superficial posterior compartment of the lower leg. Its main function is plantar flexion of the ankle and stabilising the tibia on the calcaneus limiting forward sway.
- plantaris muscle – is located in the posterosuperficial compartment of the calf. Functionally, plantaris is not a major contributor and acts with gastrocnemius as both a flexor of the knee and a plantar flexor of the ankle.
- These muscles come together to form the Achilles tendon and all three muscles insert into the calcaneus.
Causes of Calf strain:
Calf muscle strains usually occur when someone suddenly moves or overstretches their calf after standing still. Quick pivots, jumps or abrupt stops can cause strains.
This injury is especially common when your toes get forced upward (toward your body) and your ankle pulls your calf muscles down too quickly.
Symptoms of Calf strain:
- swelling and redness
- difficulty moving the leg and decreased mobility
- weakness in the calf muscle
- pain, particularly when trying to move the muscle
Grades of calf strain:
- Grade 1: Sharp pain at the time of activity or after may have a feeling of tightness and may be able to continue the activity without pain or with mild discomfort post-activity tightness and /or aching.
- Grade 2: Sharp pain at the time of activity in calf unable to continue activity significant pain with walking afterward may have swelling in muscle mild to moderate bruising may be present.
- Grade 3: Severe and immediate pain in the calf, often at the musculotendinous junction unable to continue with activity may present with considerable bruising and swelling within hours of injury.
Taping technique:
- Developed By Dr. Kenzo Kase in 1979. The Kinesio Taping Method is the definitive rehabilitative taping system of knowledge, and is designed to facilitate the body’s natural healing process.
- while providing support and stability to muscles and joints without restricting the body’s range of motion, as well as providing extended soft tissue manipulation to prolong the benefits of manual therapy administered within the clinical setting.
- Latex-free and wearable for days at a time, Kinesio Tape is safe for populations ranging from pediatric to geriatric, and successfully treats a variety of orthopedic, neuromuscular, neurological and other medical conditions.
- The Kinesio Taping Method is a therapeutic taping technique not only offering you the support you are looking for, but also assisting in rehabilitation of injury and physiological dysfunction. Here we are used two type of taping technique.
1. Rigid taping for Calf strain:
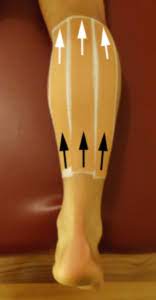
- Keeping the foot and ankle in a neutral position (i.e. the foot and toes should be approximately perpendicular to the lower leg), start the tape at the lower third of the calf.
- Begin this taping technique by following the black arrow and conclude this taping technique at the top of the calf, just below the knee joint by firmly following the white arrow .
- Do 2 to 5 straight lines adjacent to each other depending on the size of the calf and the amount of support required (each layer may overlap adjacent layers for increased support).
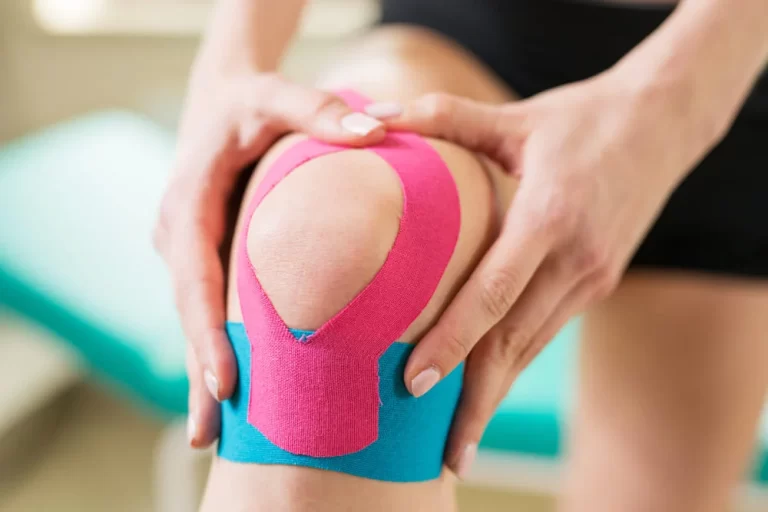
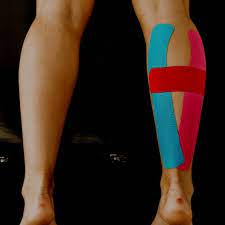
2. Kinesio taping for Calf strain:
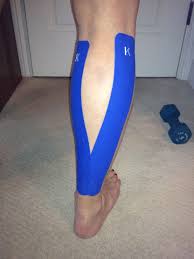
- Measure the tape from the bottom to top of the calf. cut 2 long I strips and 1 short I strip. round the edges to prevent them catching on clothing.
- Rip the ends of the long strip and lay the base of the strip down with 0% stretch at the top of the Achilles.
- Lunge forward to put the calf on stretch (its much easier if you have friend to help). Apply one I strip over the medial calf with 0% stretch, and then repeat for the lateral calf.
- Prepare the short strip by removing the middle section of backing paper. stretch the tape 50% and apply directly over the point of pain. stick the ends of tape down with 0% stretch.wait at least 30 minutes before beginning exercise.
How to remove Tape?
- So presently you’ve got your tape on and you’ve got that additional support throughout your chosen sporting activity, it’s time to need it off, so enable the United States to ease the tactic of removing physiology tape for you.
- the foremost effective tip we are going to provide once it involves removing your physiology tape is to peel the skin from the tape, not the tape from the skin.
- But in terms of the actual methodology, 1st ensure you’re removing the tape in an equivalent direction as a result of the expansion of the hair below it, and despite what you’re doing don’t rip the tape off kind of a plaster!
- Start slowly, folding the corners of the sting back bit by bit, guaranteeing that you’re birth the removed tape on the rear of the applied tape, as opposition propulsion the tape on top of and aloof from your arm.
- As you’re scraping the tape, hold your skin down beside your completely different hand and either regulator it or pull it gently among the opposite means of the tape.
- This helps the skin and so the tape to separate heaps expeditiously but with no discomfort.
- If the tape has been applied over a furred region of the body, it helps to maneuver on the tape as you are peeling it off, as a result of the pressure helps avoid a lot of pain.
- It’s knowing have shaved the realm before applying the tape but, as this isn’t frequently smart, taking this precaution square measure reaching to be necessary to some.
- want a bit additional assistance? Apply oil directly onto the tape, rub it in, and wait around 10 to twenty minutes before removing it slowly. This will facilitate reducing the viscousness of the tape and build it easier to induce obviate.