Autogenic Drainage
Table of Contents
Introduction of Autogenic Drainage (AD)
- Autogenic Drainage (AD), is an airway clearance technique that is characterized by breathing control, where the person aims to adjust the rate, depth, and location of lung volumes during respiration.
- Autogenic Drainage (AD) is based on a series of physiological principles believed to enable the patient to attain an independent airway clearance regimen that is adapted to their personal pathology and pulmonary function.
- Autogenic drainage (AD) was blinded in Belgium in the late 1960s by Chevaillier. During the 1980s, it was used throughout Europe to treat asthmatic patients who had suffered retention of secretions in the chest and strain in clearing the secretions.
- The overall aim of Autogenic Drainage (AD) is to reach the greatest possible expiratory airflow in different generations of the bronchi simultaneously with an active, but not forced expiration.
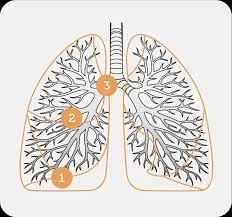
- Secretions are systematically transported from peripheral to more central airways by breathing at reduced lung volumes in the expiratory reserve volume (ERV), through progressively higher lung volumes in the inspiratory reserve volume (IRV). Chevaillier previously described these 3 phases as ‘unstick’, ‘collect’, and ‘evacuate’. Nowadays, these phases are not looked at as separate, yet rather that they blend into one another.
- It uses breathing at various lung volumes to loosen, mobilize, and move secretions in three stages toward the larger central airways.
Stage 1
- Unstick secretions – breathe as much air out of your chest as you can then take a tiny breath in, using your tummy, feeling your breath at the bottom of your chest. You may hear secretions begin to crackle. Resist any desire to cough.
- Loosening peripheral secretions by breathing at decreased lung volumes (slow, deep air movement).
- Repeat for at least three breaths.
Stage 2
- Collect secretions – as the crackle of secretions begins to get louder, change to medium-sized breaths in, and continue small breaths out. Feel the breaths extra in the middle of your chest.
- Repeat for at least three breaths.
- Collecting secretions from central airways by breathing at decrease to middle lung volumes (slow, mid-range air movement).
Stage 3
- Evacuate secretions – when the crackles are louder still, take long, slow, full breaths into your absolute maximum inspiration, continuing to catch tiny breaths out.
- Repeat for at least three breaths.
- Expelling secretions from the central airways by breathing at mild to high lung volumes (shallow air movements).
- The velocity or force of the expiratory airflow must be adjusted at each level of inspiration so that the greatest possible airflow is reached in that generation of bronchi, without being considered enough to cause the airways to collapse during coughing.
- Autogenic drainage (AD) is performed whilst sitting upright and does not use Postural Drainage (PD) positions.
The Rationale behind the Autogenic Drainage Technique
- The reason for the technique is the stage of life of shearing forces induced by airflow.
- The fast of the expiratory flow may mobilize secretions by shearing them from the bronchial walls and transporting them from the peripheral to the central airways.
Procedure
Choose a breath-stimulating position like sitting or reclining. Relax, with the neck slightly extended.
- Limpid your nose and throat by blowing your nose and huffing.
Breathing in - Slowly breathe in through the nose to retain the upper airways open. Use the diaphragm and the abdomen if possible.
- First, take a large breath in, and hold it for a moment. Breathe each the way out for as long as you can. Now you are at low lung volume. See the picture below. The size of your breath and the level at which you breathe depends on where the mucus is located.
- Take a tiny to normal breath in, and pause. Hold your breath for about 3 seconds. All the upper airways should be retained open. This increases the even filling of all lung parts. The pause allows time for the air to get after the mucus.
Breathing out - Breathe out through the mouth. Keep the upper airways open. This is your glottis, throat, and mouth. Breathing out is ready in a sighing manner. When you strengthen your breath out the airways can collapse. You will hear a wheeze.
- At a low lung level, breathe using your abdominal muscles. Compress all the air out until you can breathe out no more.
- You get the mucus rattling in the airways when breathing the right way. Put down a hand on your upper chest, and feel the mucus vibrating. Increased frequencies mean that the mucus is in the small airways. Decreased frequencies mean that the mucus is in the large airways. Using this feedback allows you easily adjust the technique.
- Repeat the cycle. Inhale steadily to avoid sending the mucus back down. Keep breathing at a decreased level until the mucus collects and moves upward. Signs of this are:
The crackling of the mucus can be heard as you breathe out.
You feel the mucus moving up.
You feel a strong urge to cough. - The level of breathing is raised when any of the above happens. Refer to the picture below. Moving the breathing from the lower to the higher lung area takes the mucus with it.
- Finally, the collected mucus reaches the large airways where it can be cleared by an increased lung volume huff. Do not cough until the mucus is in the larger airways. Cough only if a huff did not move the mucus to the mouth.
- You have now finished one cycle. Take a break of one to two minutes. Relax and perform breathing control before you begin the next cycle. The cycles are repeated during the session. A session lasts between twenty to forty-five (45) minutes or until you feel all the mucus has been cleared. Do sessions of Autogenic Drainage (AD) more often if you still have mucus present at the end of a session.
Length and Frequency of Autogenic Drainage (AD) treatment sessions
- The length of an Autogenic Drainage (AD) session is dependent on the disease severity, knowledge of the technique, quantity of secretions, etc.
- The aim is to clear the most secretions possible by the last of the treatment so that previously obstructed areas of the lung re-expand. The frequency of Autogenic Drainage (AD) also depends upon the same factors as previously mentioned.
- The increase secretions, the more times and/or sessions per day.
Benefits of Autogenic Drainage (AD)
- No equipment is needed,
- Patients can execute their airway clearance independently,
- Less effort is needed to expectorate which reduces stress on the pelvic floor.
Disadvantages of Autogenic Drainage (AD)
- Patients generally require to be over 8 years old,
- The technique can be hard to teach,
- Patients need the cognitive ability to understand the basic physiology beyond the technique,
- To benefit from the auditory feedback, patients require to have a moderate or large amount of sputum.
Combining Autogenic Drainage (AD) with other techniques
Autogenic Drainage (AD)can also be executed in conjunction with other airway clearance devices and also positive pressure.
- PEP: Traditionally Autogenic Drainage (AD) has been combined with PEP via pursed lip breathing to assist the patient in balancing expiratory forces during Autogenic Drainage (AD), or flow modulation. If increased levels of PEP are needed to modulate flow, an oscillatory PEP device might be used e.g. PEP mask, Acapella, Flutter, or Cornet.
Evidence
- Published studies of autogenic drainage are limited with a great of trials being in the cystic fibrosis (CF) cohort. The physiological rationale lends support for the use of Autogenic Drainage (AD) in non-cystic fibrosis (CF) bronchiectasis.
- Most of the studies of Autogenic Drainage (AD) compare its efficacy with other airway clearance. However, all these studies have methodological problems, for example, with little sample sizes or are of short treatment duration. The ACPCF standards of care outlined great recommendations to consider autogenic drainage when choosing an airway clearance technique. There is certainly evidence to suggest that autogenic drainage is as effective as other airway clearance techniques.
- Evidence suggests that a flutter device should be preferred in the Autogenic Drainage (AD) treatment of individuals with chronic bronchitis.
- In a long-term study of patients with cystic fibrosis (CF) comparing Autogenic Drainage (AD) with postural drainage and percussion, the patients expressed a marked preference for Autogenic Drainage (AD).
- In a comparison with ACBT, postural drainage, and manual techniques, Autogenic Drainage (AD) was found to be equally effective in improving lung function in patients with COPD with copious secretions.
- Greater expectoration was achieved with Autogenic Drainage (AD) compared to PEP therapy.
- The long-term effects of Autogenic Drainage (AD) on quality of life and lung function, compared to other airway clearance techniques, were similar.
FAQs
No differences were found in other lung function parameters. Conclusions: Autogenic drainage is as effective as ACBT in cleaning secretions and improving lung functions. These techniques can be used in stable COPD patients according to the patients’ and the physiotherapists’ preferences.
Autogenic drainage (AD) means “self-drainage” and uses different speeds of breathing to move mucus. To do it, your respiratory therapist can teach you how to control your breath. You will learn how fast and deeply to breathe to fill certain parts of your lungs with air.
Autogenic drainage helps to clear any secretions from the lungs, by clearing these secretions you are significantly minimizing the risk of developing a chest infection. The technique of autogenic drainage also has the advantage of Keeping the airways open, meaning secretions are more easily removed.
Autogenics is a relaxation technique that involves a series of attention-focusing exercises designed to induce relaxation and enhance the body’s self-healing powers.
Stage 1. Unstick secretions – breathe as much air out of your chest as you can then take a small breath in, using your tummy, feeling your breath at the bottom of your chest. You may hear secretions start to crackle. Resist any desire to cough.
Each lesson focuses on a different sensation in the body, and there are six established lessons (techniques) included in autogenic training:
Inducing heaviness. Verbal cues suggest heaviness in the body.
Inducing warmth.
The heart practice.
Breathing practice.
Abdominal practice.
Head practice.